
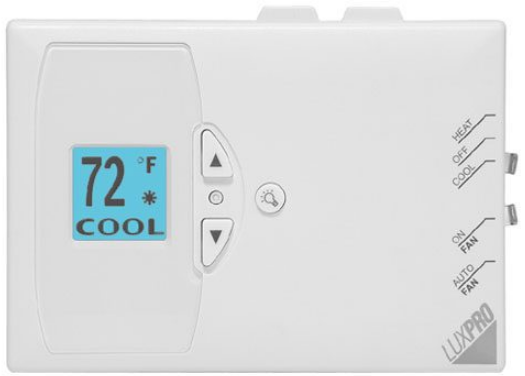
LUXPRO PSDH121+ Non-programmable Thermostat
INTRODUCTION
Thank you for your confidence in our product. To obtain the best results from your investment, please read this manual and acquaint yourself with your purchase before installing your new thermostat. Then follow the installation procedures, one step at a time. This will save you time and minimize the chance of damaging the thermostat and the systems it controls. These instructions may contain information beyond that required for your particular installation. Please save for future reference.
TOOLS REQUIRED
- #1 Phillips screwdriver (small)
- Wire Stripper
- Drill
COMPATIBILITY
LUX PSDH121+ is designed for use with single stage heat pump systems with auxiliary and/or emergency heat. These systems are typical known as 2-stage heat one stage cool heat pump systems.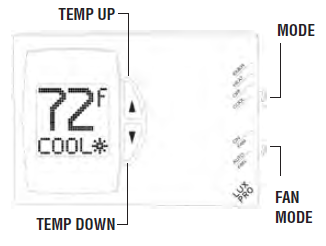
FEATURES
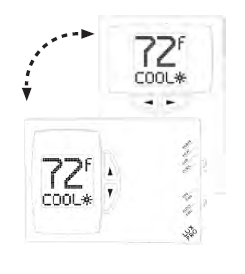
- Vertical or Horizontal Orientation
- Large easy to read backlit display
- Mode and Fan control for ease of use
- Simple Temperature UP and Down Control.
- Calibration control
- Temperature Swing adjustability (9 levels)
- 2 or 5 minute compressor delay
- Fahrenheit or Celsius selection
- Temperature Limits for High and Low selections
- Test mode to temporarily disable the compressor delay
OPERATING INSTRUCTIONS
- In the winter, set the system switch to HEAT to control your heating system.
- In the summer, set the switch to COOL to control your air conditioner.
- Press either the TEMPERATURE UP or DOWN key in order to show the current SET TEMPERATURE.
- Press TEMPERATURE UP or DOWN keys again until your desired temperature is displayed. The display will show the current room temperature again after two seconds.
- Press the light bulb button to illuminate the display. Adjusting the temperature will keep the display lit until no button has been pressed for over ten seconds.
- In spring and fall or when windows are open, you can set the system switch to OFF.
- Setting the FAN switch to AUTO automatically runs your system’s fan during heating and cooling.
- Setting the FAN switch to ON runs your system’s fan continuously even without heating or cooling.
- Setting the Mode switch to EMER (emergency heat) runs your Emergency heating system rather than the heat pump.
INSTALLATION
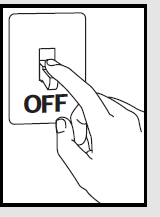
- Turn off electricity to the appliance before installing or servicing thermostat or any part of the system. Do not turn electricity back on until work is completed.
- Do not short (jumper) across electric terminals at control on furnace or air conditioner to test the system. This will damage the thermostat and void your warranty.
- All wiring must conform to local codes and ordinances.
- This thermostat is designed for use with 24 volt and millivolt systems.
- The thermostat should be limited to a maximum of 1.5 amps; higher current may cause damage to the thermostat. If you are in doubt, call your HVAC contractor.
- Your thermostat is a precision instrument. Please handle it with care.
THERMOSTAT LOCATION
- On replacement installations, mount the new thermostat in place of the old one unless the conditions listed below suggest otherwise. On new installations, follow the guidelines listed below.
- Remember that your PSDH121+ may be mounted vertically or horizontally when determining the optimal location.
- Locate the thermostat on an inside wall, about 5 ft. (1.5m) above the floor, and in a room that is used often.
- Do not install it where there are unusual heating conditions, such as: in direct sunlight; near a lamp, radio, television, radiator, register, or fireplace; near hot water pipes in a wall; near a stove on the other side of a wall.
- Do not locate in unusual cooling conditions, such as: on a wall separating an unheated room; or in a draft from a stairwell, door, or window.
- Do not locate in a damp area. This can lead to corrosion that will shorten thermostat life.
- Do not locate where air circulation is poor, such as: in a corner or an alcove; or behind an open door.
- Do not install the unit until all construction work and painting has been completed.
REMOVING THE OLD THERMOSTAT
- Switch electricity to the furnace and air conditioner OFF; then proceed with the following steps.
- Remove cover from old thermostat. Most are snap-on types and simply pull off. Some have locking screws on the side. These must be loosened.
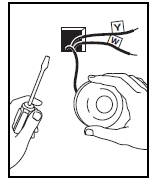
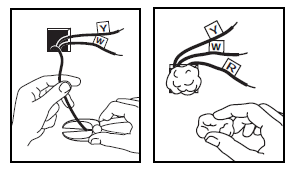
- Note the letters printed near the terminals. Attach labels (enclosed) to each wire for identification. Label and remove wires one at a time. Make sure the wires do not fall back inside the wall.
- Loosen all screws on the old thermostat and remove it from the wall.
MOUNTING THE PSDH121+ ON THE WALL
- Decide whether the thermostat will be mounted vertically or horizontally.
- Strip insulation 3/8 in. (9.5mm) from wire ends and clean off any corrosion.
- Fill wall opening with non-combustible insulation to prevent drafts from affecting the thermostat.
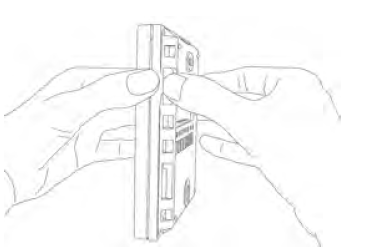
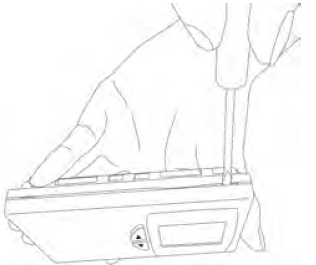
- Grip the device per the diagram below to remove the front plate from the back plate.
NOTE If you are mounting the base to a soft material like plasterboard or if you are using the old mounting holes, the screws may not hold. Drill a 3/16- in. (4.8mm) hole at each screw location, and insert the plastic anchors provided. Then mount the base as described below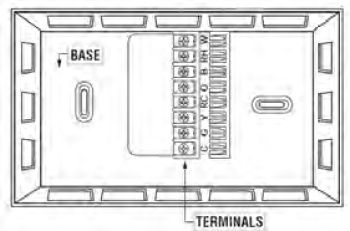
ATTACHING WIRES
Route the wires through the large hole in the base plate by the terminal block. Hold the base against the wall, with the wires coming through. Position the base for best appearance (to hide any marks from an old thermostat). The terminal block should be either to the right of or below the routing hole. Attach the base to the wall with the two screws provided.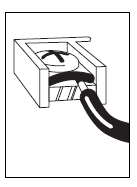
WIRING DIAGRAMS
These diagrams are provided for new installations or un-referenced wires.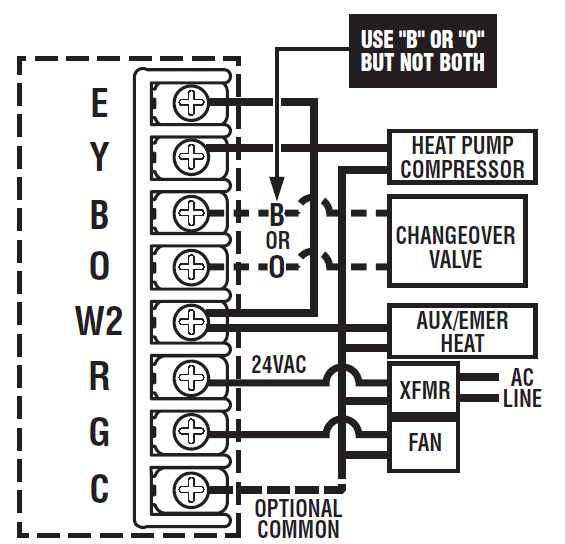
JUMPER Settings
There are 2 Basics steps involving jumper settings:
- Move the Jumper to the appropriate position as described below.
- After making all the jumper selections, press the Reset (RST) button.
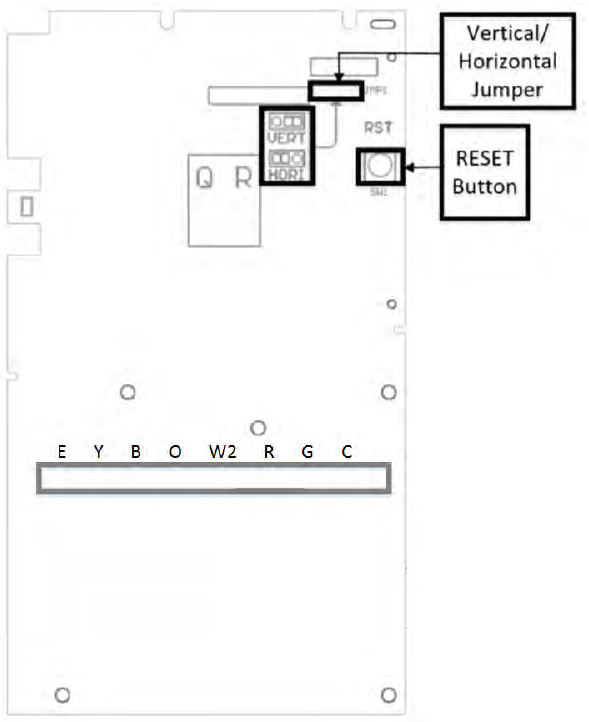
Multiple Features can be accessed and selected by navigating through the MENU screen. The instructions below detail all the options under the MENU screen:
- CAL: Calibration
- SWNG: Temperature Swing
- DELY: Delay
- F/C: Fahrenheit and Celsius Selection
- TLMT: Temperature Limit
- TEST: Test Mode
- EXIT: Exit
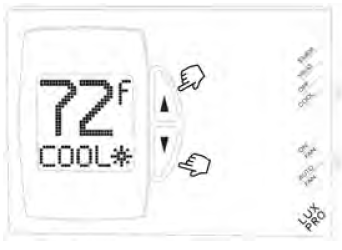
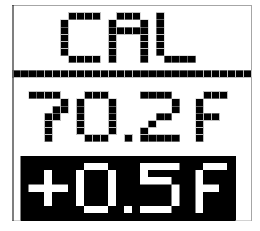
CALIBRATION
- Press and hold the Up and Down button simultaneously at the CAL selection.
- Press Up or Down to select the Calibration amount (-5F to +5F increments)
- Once the desired calibration point is reached, press and hold the Up and Down button simultaneously to select the value
TEMPERATURE SWING
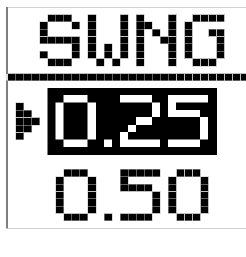
- Press and hold the Up and Down button simultaneously at the SWNG selection.
- Press Up or Down to select the Swing setting (0.25 to 2.25 increments)
- Once the desired swing point is reached, press and hold the Up and Down button simultaneously to select the value
COMPRESSOR DELAY
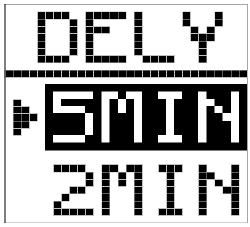
- Press and hold the Up and Down button simultaneously at the DELY selection.
- Press Up or Down to select the 5 Minute or 2 Minute Compressor delay
- Once the desired delay point is reached, press and hold the Up and Down button simultaneously to select the value
FARRENHEIT AND CELSIUS
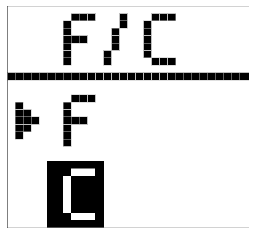
- Press and hold the Up and Down button simultaneously at the F/C selection.
- Press Up or Down to select the F or C
- Once the value is selected, press and hold the Up and Down button simultaneously to select the value
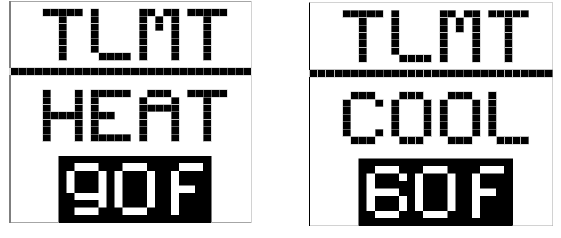
TEMPERATURE LIMITS
- Press and hold the Up and Down button simultaneously at the TLMT selection.
- Press Up or Down to select the Heat limit, then press UP and DOWN simultaneously to select the Heat limit
- Press Up or Down to select the Cool limit, then press UP and DOWN simultaneously to select the Cool limit
TEST MODE
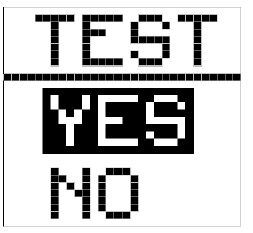
This mode is also known as Compressor Defeat. It allows the installer to operate the heating and cooling without any delays. Once entering this mode, the thermostat will automatically return out of the TEST mode in a 10 minute period. When the TEST mode is active, the temperature reading blinks as an indication of the TEST mode.
- Press and hold the Up and Down button simultaneously at the TEST selection.
- Press Up or Down to select the Yes or No
- Once the value is selected, press and hold the Up and Down button simultaneously to select the value
EXIT
- Press and hold the Up and Down button simultaneously at the EXIT selection.
- The device will automatically exit out of the MENU screen after being idle for 60 seconds
SERVICING THERMOSTAT
- Make sure all power is turned off to the equipment connected to the thermostat
- Remove the front plate of the thermostat per the diagram below with a Phillips screwdriver
BATTERIES/MAINTENANCE
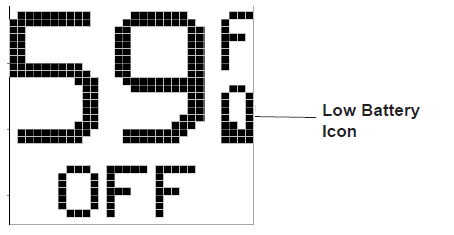
When a low battery indication is displayed, proceed to replace the batteries immediately per the instructions below
- Remove fresh batteries from their carton.
- Remove body of thermostat as described during installation.
- Remove the used batteries.
- Install two new Energizer® or DURACELL® “AA” size alkaline batteries in the battery compartment. Observe the polarity marking shown in the compartment.
- If the device is no longer powered, all programmed Menu settings will have to be reprogrammed if the batteries were not immediately replaced with new batteries.
- Place the body back on the wall
WARRANTY
Limited Warranty: If this unit fails because of defects in materials or workmanship within three years of date of original purchase, LUX will, at its option, repair or replace it. This warranty does not cover damage by accident, misuse, or failure to follow installation instructions. Implied warranties are limited in duration to three years from date of original purchase. Some states do not allow limitations on how long an implied warranty lasts, so the above limitation may not apply to you. Please return malfunctioning or defective units to the participating retailer from which the purchase was made, along with proof of purchase. Please refer to “TECHNICAL ASSISTANCE” before returning the thermostat. Purchaser assumes all risks and liability for incidental and consequential damage resulting from the installation and use of this unit. Some states do not allow the exclusion of incidental or consequential damages, so the above exclusion may not apply to you. This warranty gives you specific legal rights and you may also have other rights which vary from state to state. Applicable in the U.S.A. only
TECHNICAL SERVICE
If you are experiencing any issues with the installation or usage of the thermostat, please feel free to call our Technical Support department at (856) 234-8803 or visit our website at www.luxproproducts.com
REFERENCE
DOWNLOAD MANUAL
LUXPRO PSDH121+ Non-programmable Thermostat Installation Manual
Other manuals:
LUXPRO PSDH121+ Non-programmable Thermostat Product Specifications
LUXPRO PSDH121+ Non-programmable Thermostat Installation Manual