WATTS BT-D01 Wired Room Thermostat
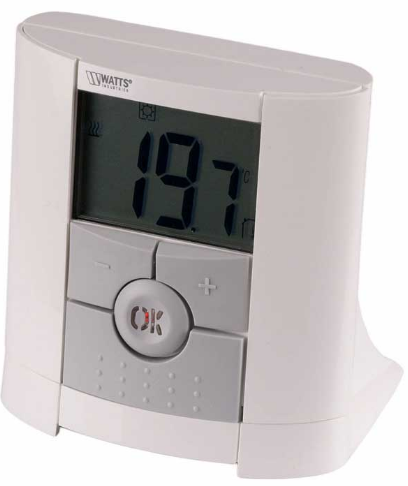
Description
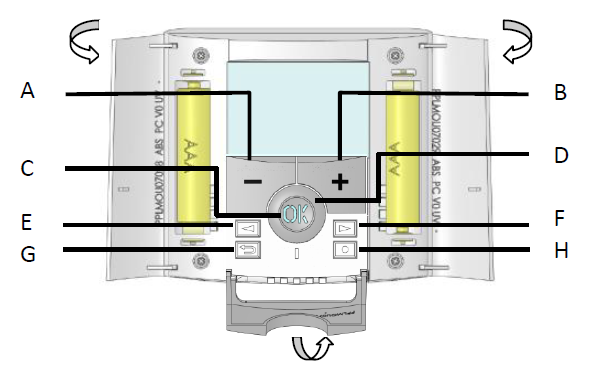
- A- Minus key (-)
- B- Plus key (+)
- C- Status LED
- D- Validation key (OK)
- E- Left navigation key (◄)
- F- Right navigation key (►)
- G- Escape key (
 )
) - H- Edition key (
 )
)

- Operating mode menu (active mode is framed).
- Parameter number if “3” is displayed.
- Installation Parameter menu.
- Type of sensor used and temperature displayed.
- Heating demand indication.
- Low batteries indicator.
- °C or °F unit indicator
- Setting or measured temperature if “2” is displayed. Parameter value if “3” is displayed.
- Key lock indicator
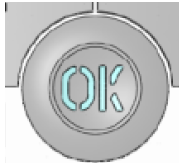
- Red Fix (when backlight is lit up): Heating demand
- Green flash: your validation is required
- Red flash: Error on sensor or batteries
For more information, use the QR Code or web link.
First installation
- Batteries installation:
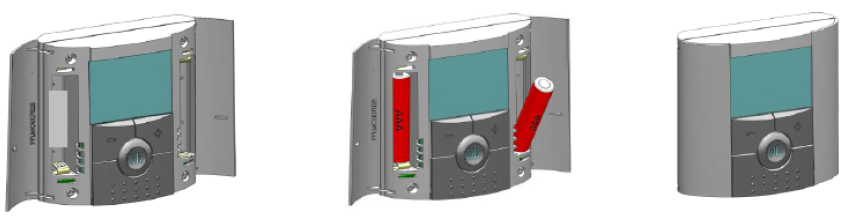
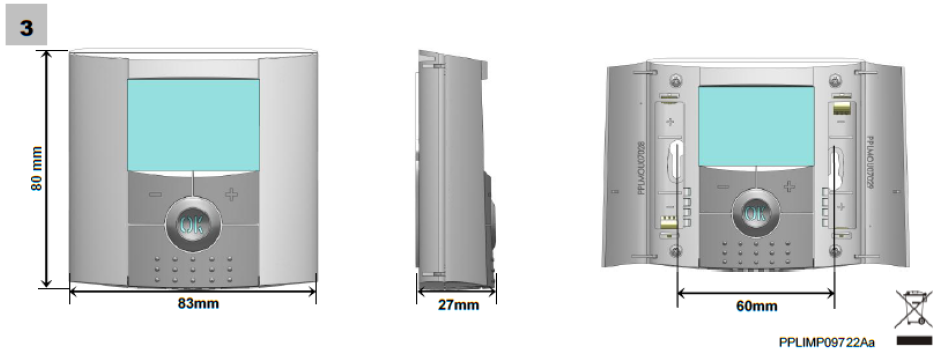
- Open the two sides covers and Insert the 2 AAA Alkaline supplied batteries (or remove the small protection sticker if the batteries are already installed in the compartment)
- Close the two side’s covers.
- Adjust the current time and date with the (+) and (-) keys and valid with the (OK) key.
Note: you can at any time adjust the time by pressing during 1 second on the edition key ( )
- Starting
The thermostat follows automatically the default working mode comfort
Available working modes
- Comfort mode

- Reduced mode

- OFF mode (the installation can freeze!)

- Antifreeze mode

- Timer mode

Choose the working mode you want to follow with the navigation keys (◄) or (►). Each time a value blinks, adjust it with the (+) and (-) keys and confirm by pressing the (OK) key.
INSTALLATION
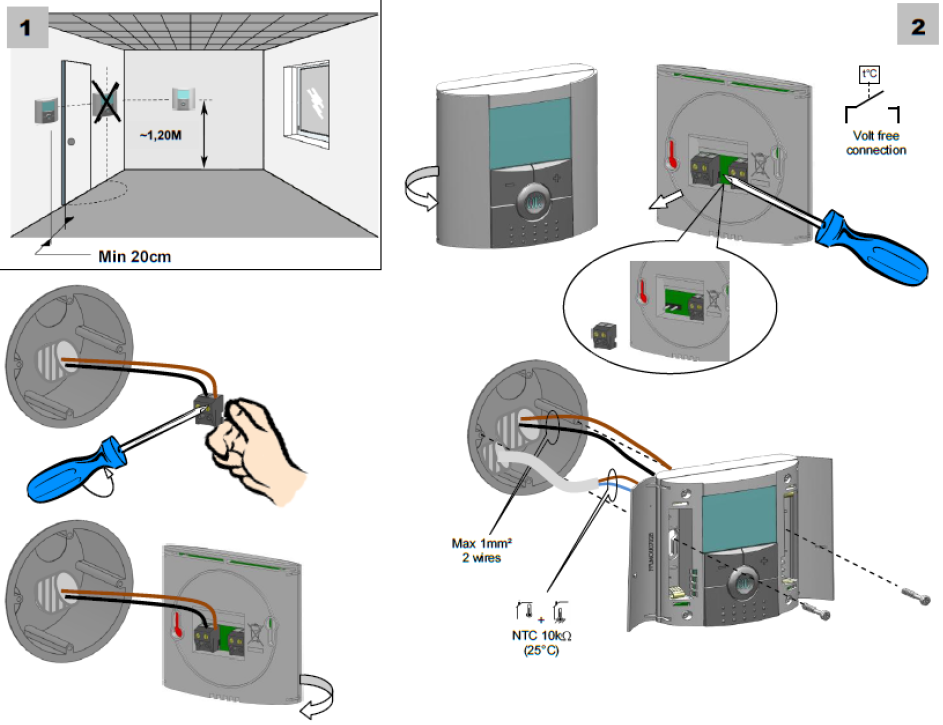
IMPORTANTS
Before starting work the installer should carefully read this Installation & Operation Manual, and make sure all instructions contained therein are understood and observed.
- The thermostat should be mounted, operated and maintained by specially trained personnel only. Personnel in the course of training are only allowed to handle the product under the supervision of an experienced fitter. Subject to observation of the above terms, the manufacture shall assume the liability for the equipment as provided by legal stipulations.
- All instructions in this Installation & Operation manual should be observed when working with the controller. Any other application shall not comply with the regulations. The manufacturer shall not be liable in case of incompetent use of the control. Any modifications and amendments are not allowed for safety reasons. The maintenance may be performed by service shops approved by the manufacturer only.
- The functionality of the controller depends on the model and equipment. This installation leaflet is part of the product and has to be obtained.
APPLICATION
- The thermostats of the “BT” series are developed to control and manage all type of heating installations.
- The controllers have been designed for use in residential rooms, office spaces and industrial facilities.
- Verify that the installation complies with existing regulations before operation to ensure proper use of the installation.
SAFETY INSTRUCTIONS
Before starting work disconnect power supply!
- All installation and wiring work related to the thermostat must be carried out only when de-energized. The appliance should be connected and commissioned by qualified personnel only. Make sure to adhere to valid safety regulations.
- The thermostats are neither splash- nor drip-proof. Therefore, they must be mounted at a dry place.
- Do not interchange the connections of the sensors and the 230V connections under any circumstances! Interchanging these connections may result in life endangering electrical hazards or the destruction of the appliance and the connected sensors and other appliances.
Presentation
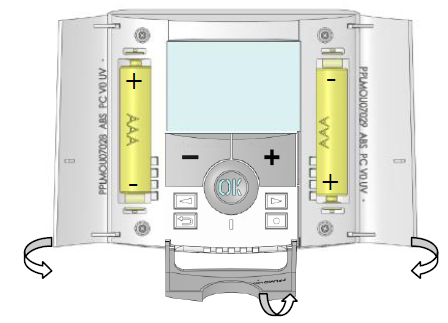
Electronic thermostat with LCD display specially designed to control different type of heating systems. It will be your best partner to optimize your energy consumption and increase your comfort.
- Modern design with soft touch material.
- Wiring & Installation simplified.
- Anti freeze function.
- EEPROM non volatile memory.
- 2 AAA batteries for 2 years operating life.
- 2 Wires output for a maximum possibility of use.
- 2 parameter menus, (User and Installer)
In option
- External sensor with several possibilities of regulation. (Floor, combined…)
Keyboard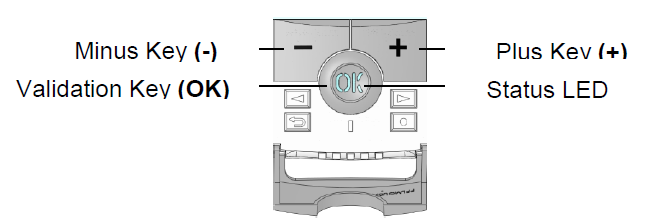
Display & LED
- Red Fix (when backlight is lit up): Heating demand
- Green flash: your validation is required
- Red flash: Error on sensor or batteries
- Operating mode menu (active mode is framed).
- parameter number if “3” is displayed.
- Installation Parameter menu.
- Type of sensor used and temperature displayed.
 Regulation => Internal or external ambient sensor.
 Regulation => Floor sensor.
 Regulation => Internal sensor with Floor limitation.
 View of the outside temperature
- Heating demand indication.
- Low batteries indicator.
- °C or °F unit indicator
- Setting or measured temperature if “2” is displayed. Parameter value if “3” is displayed.
- Key lock indicator
First Installation
This section will guide you to set up your thermostat for the first time.
Batteries installation
- Open the two sides covers and Insert the 2 AAA Alkaline supplied batteries (or remove the small protection sticker if the batteries are already installed in the compartment)
- Close the two side’s covers.
- Now your thermostat will propose you to adjust the current time and date.
Starting
The thermostat is now ready to works. The default working mode will be Comfort
Working mode definition
How to change the working mode?
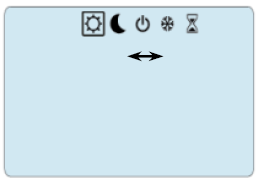
- Open the small center cover to have access to the navigation keys (◄) or (►).
- You can now press theses keys to display the working mode line.
- Move the frame cursor on the desired working mode and press (OK) to enter in the operating mode you have chosen.
- Manual mode Comfort
Manual working mode, the comfort setting temperature will be followed all the time. By pressing (-) or (+) keys, the comfort setting temperature starts to blink and can be adjusted. - Manual mode, Reduced
Manual working mode, the reduced setting temperature will be followed all the time. By pressing (-) or (+) keys, the reduced setting temperature starts to blink and can be adjusted. - OFF mode
Use this mode if you need to switch off your installation.
Be Careful:
In this mode your installation can freeze. At any time, when display is off, press on the (Ok) key to display a few seconds the current temperature and time.
- To restart your installation, use the navigation keys (◄) or (►).
- Anti freeze mode
Use this mode if you want to protect your system against freezing when going on holiday…- The anti-freeze setting temperature is fixed and can be adjusted in the parameter menu number 06 ‘HG’, see chapter 6. (Default value 10°C)
The anti freeze mode cannot be selected if your installation is in cooling mode!
- The anti-freeze setting temperature is fixed and can be adjusted in the parameter menu number 06 ‘HG’, see chapter 6. (Default value 10°C)
- Timer mode
The Timer mode allows you to adjust, the temperature and the duration for a special time. This function can be used when you stay at home for several days, or if you want to override the program for some time (reception…)- You can first adjust, the duration in hours “H” if below 24H, then in day “d” with (-) or (+), press (OK) to validate. (Adjustable 1 Hour to 44 days)
- In a second time, you can adjust the desired setting temperature with (-) or (+), press (OK) to start the function. (Default value 22°C)
The logo will be blinks and the number of hours /days left is displayed until the end of the period.
If you want to stop the Timer function before the end, set the duration period to “no” with (-) key.
Special function
Keyboards lock Function
Use this function to prevent all change of your settings (In a child room, public area…)
- To activate the Key lock function, first press maintain the escape key () and then press simultaneously on the edition key ().
- The “” logo will be displayed on the screen.
- Repeat the same procedure to unlock the key board.
Information
With this function You can quickly view all currents temperatures of the probe sensors connected to your thermostat (Floor, external or outside sensor) by several presses on the escape key ().This “Scroll function” is only available in the main screen.
You can view:
- The current setting temperature followed by the thermostat.
- The ambient temperature
- If external sensor is connected:the outside temperature
Other opportunities will be available by connecting an external sensor on your thermostat. Contact your supplier or installer for more information about these options.
Your thermostat has a parameter’s menu, in order to enter in this menu, press and maintain the edition key () during 5sec. Then parameter menu will appear and first parameter screen will be displayed:
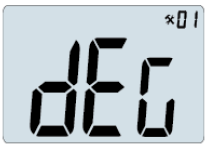
Now you can select a parameter which must be adjusted with the navigation keys (◄) or (►), once the parameter chosen, toggle the value with the (OK) key, modify it with (-) or (+) and confirm your adjustment with (OK). To leave the parameter menu, choose the parameter « End » and press (OK).
| N° | Default value & other possibilities |
| 01 | dEG: Unit of the temperatures displayed
°C Celsius °F Fahrenheit |
| 04 | AirC: Calibration of the internal probe
The calibration must be done after 1 day working with the same setting temperature in accordance with the following description: Put a thermometer in the room at 1.5M distance from the floor (like the thermostat) and check the real temperature in the room after 1 hour. When you enter on the calibration parameter “no” is displayed on the right to indicate no calibration has made. To enter the value shown on the thermometer, use the (-) or (+) keys to enter the real value. Then, press (Ok) to confirm. The message “Yes” should be displayed; the value will be stored in the internal memory. If you need to erase a calibration press on the escape key ( The old value will be erased and the message “no” will be displayed. * Pay attention: Only the heating element driven by the thermostat must be used during the complete step of the calibration. |
| 05 | OutC , AMbC , FlrC: Calibration of the external wired probe
Same calibration method as described in parameter “04 AirC” above. |
| 06 | HG: Anti-freeze temperature used in Holiday mode Default value 10°C.
Use the (-) or (+) keys to change the anti-freeze setting temperature. Then press (Ok) to confirm. |
| 08 | Clr ALL: Reset to Factory setting
Press and maintain (Ok) key during 10s to reset Set points temperatures and user parameters in this menu to factory default settings. User programs will also be resetted. * Pay attention: Ensure you that you have all necessary elements to re-setup your installation before to use this function. |
| 09 | Software version VErS |
| 10 | End: Exit the parameter’s menu
Press (OK) key to exit installation parameter menu and return to normal operation. |
Technical characteristics
| Measured temperature precision | 0.1°C |
| Environmental:
Operating temperature: Shipping and storage temperature: |
0°C – 40°C
-10°C to +50°C |
| Setting temperature range
Comfort and Eco Anti freeze Timer |
5°C to 35°C by 0,5°C step 0.5 – 10°C
5°C to 35°C |
| Regulation characteristics
minimum time to start and stop |
Proportional Band (PWM
2°C for 10min cycle) or Hysteresis of 0.5°C 2 minutes ON and OFF (configurable) |
| Electrical Protection | Class II – IP30 |
| Power Supply Operating life |
2 AAA LR03 1.5V Alkaline ~2 years |
| Type of contact
Maximum Load |
2 wires (free contact)
Screw connectors <1.5mm². Up to 3A – 250Vac 50Hz |
| Optional External sensor | 10k ohms at 25°C |
| Software version | Displayed in the user menu. |
| CE Directives
Your product has been designed in conformity with the European Directives. |
EMC 2004/108/EC RoHS 2011/65/EU |
Troubleshooting & Solution
| My BT D doesn’t start | |
| Batteries Problem | – Check if the protection sticker on the batteries is removed.
– Check the batteries orientation. – Check the capacity of the batteries |
| My BT D Led, blinks in Red | |
| Problem on sensors | The logo blinks (ambient sensor)
– Contact your installer or seller.
– Check the connection of the sensor. – Disconnect the sensor, and check it with an ohmmeter (the value must be around 10kohms) |
| Batteries level is too less |  The logo blinks (Batteries) The logo blinks (Batteries)
– Replace the batteries. |
| My BT D seems work correctly but the heating doesn’t work correctly | |
| Output | – Check the connections.
– Check the power supply of the heating element. – Contact your installer. |
| My BT D seems work correctly but the temperature in the room was never in accordance with the program. | |
| Temperature | – Try to calibrate your thermostat (see user menu parameter 04)
– Contact your installer, to check & adjust the regulation parameters with your heating system. |
http://www.wattselectronics.com/item.php?item=LGBCGJA

Reference
Download Manual:
WATTS BT-D01 Wired Room Thermostat User Manual