
SIEMENS RDF800 Flush Mount Touch Room Thermostat

Touch screen flush-mount standalone room thermostats
- For 2-pipe, 2-pipe with electrical heater, and 4-pipe fan coil units For universal applications
- For use with compressors in DX-type equipment
- Touch screen
- Large display with backlight
- 2P / PI / P control
- Outputs for ON/OFF or 3-position control
- Outputs for a 3-speed or 1-speed fan
- 2 multifunctional inputs for keycard contact, external sensor, etc.
- Independent function for window contact, presence detector (standard presence and hotel presence)
- Operating modes: Comfort, Economy and Protection
- Automatic or manual fan speed control
- Automatic or manual heating/cooling changeover
- The minimum and maximum limitation of room temperature setpoint
- Control depending on the room or the return air temperature
- Adjustable commissioning and control parameters
- AC 230 V operating voltage
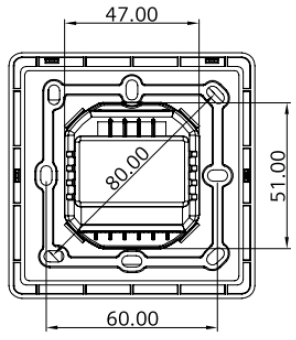
- RDF800, RDF800/VB: Mounting on the round box, with min 60 mm diameter or recessed square 86 mm box with 60.3 mm fixing centers and min 40 mm depth
- RDF800/NF: Mounting on a recessed square 86 mm box with 60.3 mm fixing centers and min 40 mm depth, requires an additional mounting frame
Use
Room temperature control (heating or cooling) in individual rooms and zones by means of:
- 2-pipe fan coil units
- 2-pipe fan coil units with electrical heater
- 4-pipe fan coil units
- Chilled /heated ceiling
- Chilled /heated ceiling and electrical heater
- Chilled ceiling and radiator / underfloor heating
- Compressors in DX-type equipment
- Compressors in DX-type equipment with electrical heater
The room thermostats are delivered with a fixed set of applications. The relevant application is selected:
- Local DIP switch and HMI
Functions
- Room temperature control via built-in temperature sensor or external room temperature/return air temperature sensor
- Changeover between heating and cooling mode (automatically via local sensor or manually)
- Selection of applications via DIP switches
- Selection of operating mode via touchscreen
- 1- or 3-speed fan control (automatically or manually)
- Display of current room temperature or setpoint in °C and/or °F
- Minimum and maximum limitation of room temperature setpoint
- Keylock function: unlock, total lock and setpoint
- 2 multifunctional inputs, freely selectable for:
- External room temperature or return air temperature sensor
- Sensor for automatic heating / cooling changeover (RDF…)
- Window contact
- Dew point sensor (RDF…)
- Electric heater enable (RDF…)
- Fault input
- Presence detector
- Advanced fan control function, such as: fan kick, fan start delay, and selectable fan operation (enable, disable or depending on heating or cooling mode)
- Purge function together with 2-port valve in a 2-pipe changeover system
- Reminder to clean fan filters (adjust with P62)
- Floor heating temperature limitation
- Reload factory settings for commissioning and control parameters
- Wizard function for easy commissioning via HMI
Note: The functional descriptions for the thermostat can be referred to the basic documentation P3174.
Applications
The thermostats support the following applications, which can be configured using the DIP switches on the inner side of the thermostat’s front panel.
Applications for fan coil systems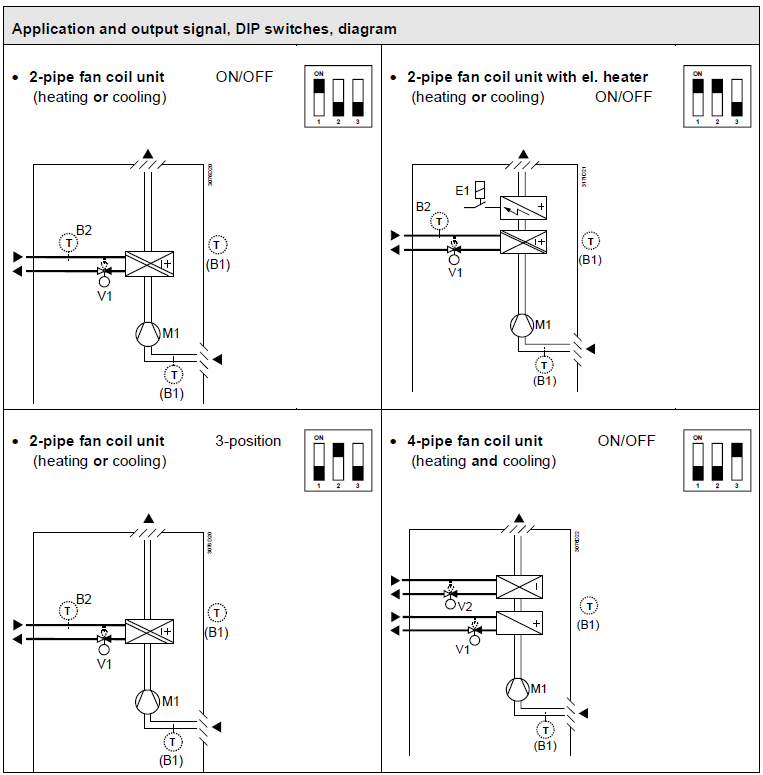
- V1 Heating or heating/cooling valve actuator
- V2 Cooling valve actuato
- E1 Electric heater
- B1 Return air temperature sensor or external room temperature sensor (optional)
- B2 Changeover sensor (optional)
- M1 3- or 1-speed fan
Applications for Universal systems
- V1 Heating or heating/cooling valve actuator
- V2 Cooling valve actuator
- E1 Electric heater
- B1 Return air temperature sensor or external room temperature sensor (optional)
- B2 Changeover sensor (optional)
- D3 Dewpoint sensor
Applications for heat pump systems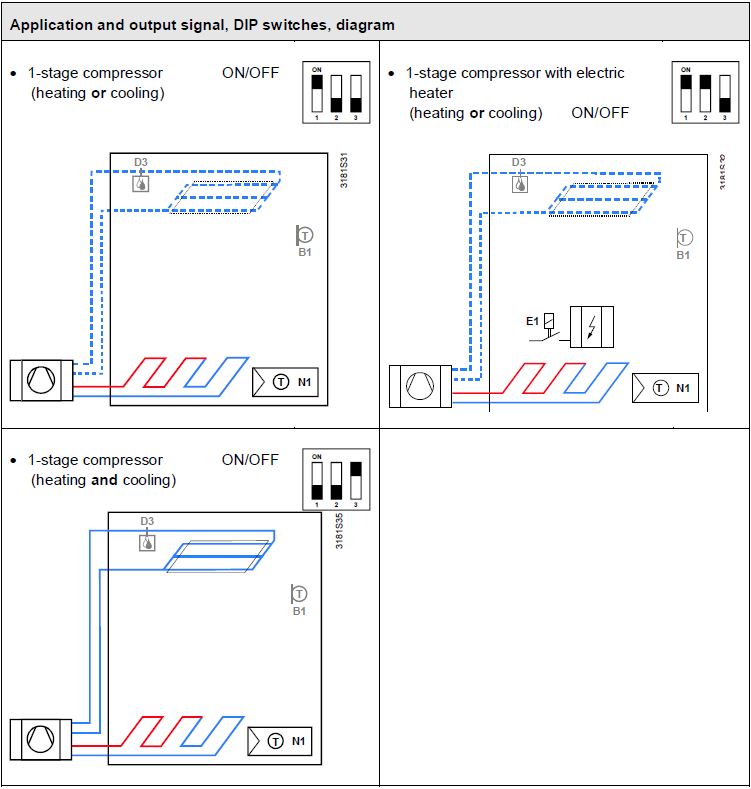
- N1 Thermostat
- E1 Electric heater
- B1 Return air temperature sensor or external room temperature sensor (optional)
- D3 Dewpoint sensor
Type summary
|
Product no. |
Stock no. |
Application |
Operating voltage | Control outputs |
Suitable for |
|
| 3-pos | ON/OFF | |||||
| RDF800 | S55770-T396 | Fan coil,
universal heat pump |
AC 230 V | 1 1) | 2 1) | Round or square conduit boxes EEU |
| RDF800/NF
2) |
S55770-T397 | Fan coil, universal
heat pump |
AC 230 V | 1 1) | 2 1) | Square conduit boxes 2) |
| RDF800/VB | S55770-T451 | Fan coil,
universal heat pump |
AC 230 V | 1 1) | 2 1) | Round or square conduit boxes EEU |
- Selectable: ON/OFF or 3-position according to applications.
- Mounting frames are not included and must be ordered separately. See “Accessories”\
Ordering
- When ordering, indicate the product number, SSN, and name.
- For example: RDF800/NF (S55770-T397) room thermostat
- RDF800 (S55770-T396) room thermostat
- RDF800/VB (S55770-T451) room thermostat
- A mounting frame must be ordered for RDF800/NF installation (See “Accessories”).
- Order valve actuators separately.
Equipment combinations
| Type of unit | Product no. | Data sheet | ||
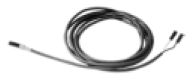
| Cable temperature sensor or changeover sensor, cable length
2.5 m NTC (3 kW at 25 °C) |
|
QAH11.1 |
1840 |
|
| Room temperature sensor NTC (3 kW at 25 °C) | 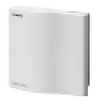 |
QAA32 | 1747 | |
| Cable temperature sensor, cable length 4 m
NTC (3 kW at 25 °C) |
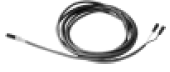 |
QAP1030/UFH |
1854 |
|
|
Condensation / Dew point monitor |
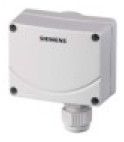 |
QXA2601 / QXA2602 / QXA2603 /
AQX2604 |
3302 |
|
| Electromotor ON/OFF actuator | 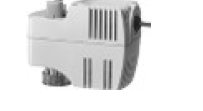 |
SFA21… | 4863 | |
| Electromotoric ON/OFF valve and actuator (only available in AP, UAE,
SA and IN) |
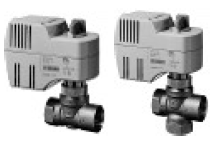 |
MVI…/MXI… |
A6V11251892 |
|
| Zone valve actuators (only available in AP, UAE, SA and IN) | 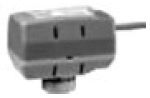 |
SUA… | 4832 | |
ON/OFF actuators
| Thermal actuator (for radiator valve) | 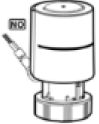 |
STP..21.. | A6V12986007 |
| Thermal actuator
(for small valves 2.5 mm) |
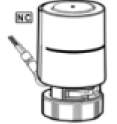 |
STA..21.. | A6V12986007 |
3-position actuators
| Type of unit | Product no. | Data sheet | |
| Electrical actuator, 3-position (for radiator valve) | 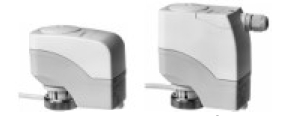 |
SSA31… | 4893 |
| Electrical actuator, 3-position
(for small valve 2.5 mm) |
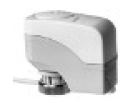 |
SSP31… | 4864 |
| Electrical actuator, 3-position (for small valve 5.5 mm) | 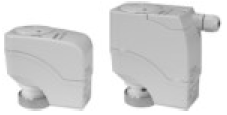 |
SSB31… | 4891 |
| Electrical actuator, 3-position
(for 2- and 3-port valves / V…P45) |
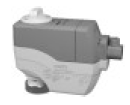 |
SSC31… | 4895 |
| Electrical actuator, 3-position (for small valve 5.5 mm) | 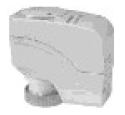 |
SSD31… | 4861 |
| Electromotor actuator, 3-position (for small valves 5.5 mm) | 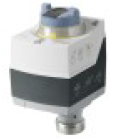 |
SAS31… |
4581 |
Note: For the maximal number of actuators in parallel, refer to information in the data sheets of the selected actuators and to this list, depending on which value is lower:
- Parallel operation of max 6 SS… actuators (3-pos) is possible.
- Parallel operation of max 10 ON/OFF actuators is possible.
Accessories
| Designation | Product no. / SSN | Data sheet | |
| Changeover mounting kit (50 pcs / package) | 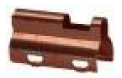 |
ARG86.3 | N3009 |
| Single mounting frame, Ivory White (for RDF800/NF only) | 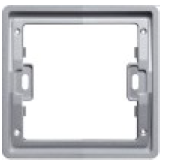 |
ARG800.1 / S55770-T370 |
— |
Mechanical design
The thermostats consist of the following parts:
- Front panel with electronics, operating elements and built-in room temperature sensor.
- Mounting base with power electronics.
- An additional mounting frame is required for RDF800/NF to complete the installation while RDF800 & RDF800/VB unit comes with its own mounting frame.
The rear of the mounting base contains the screw terminals. Slide the front panel in the mounting base and snap on.
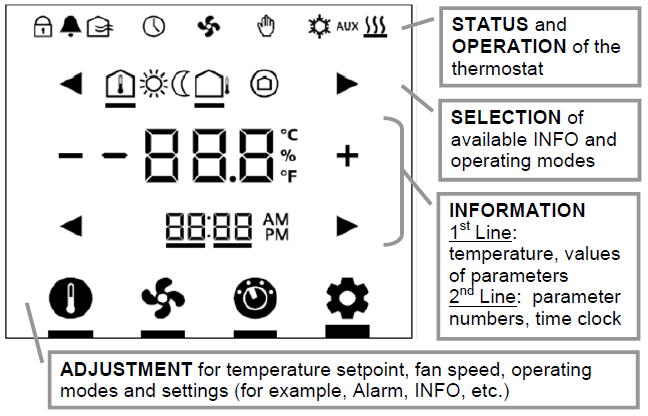
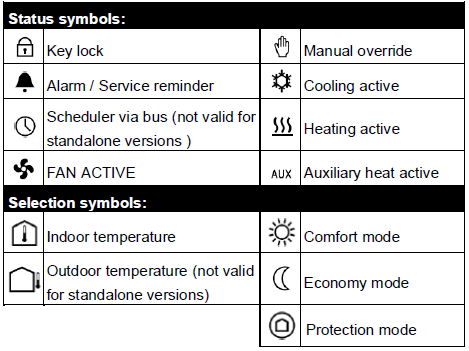
| Operation and settings |  |
|||
| Display |
|
|||
|
|
||||
| Operational icons: | ||||
| + ̶ | Increment, decrement OR selection | |||
 |
Selection OR move to next items | |||
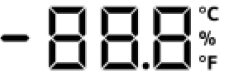 |
Temperature OR parameter values, and etc. | |||
|
|
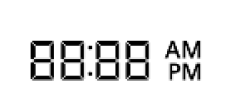
Parameter number OR password, and etc.
Time clock (12 / 24 hour) ( not valid for standalone versions) |
|||
 |
Setpoint mode (temperature only) | |||
 |
Fan mode OR fan speed mode | |||
 |
Operating mode | |||
 |
Setting mode |
|||
|
Operations |
Function |
||||
Touch |
to select setpoint value using +/–. | mode; | adjust | temperature | |
Touch |
to select fan mode; adjust fan speed using +/ –. | ||||
Touch |
to select operating mode; select ON/ECO/OFF using +/ –. | ||||
Touch |
to select the INFO screen, display room using
|
||||
| to select the desired H/C control sequence using
+/– if manual H/C changeover (P01 = 2) is selected. |
|||||
to display alarms if the  icon is displayed; use icon is displayed; use
|
|||||
| Touch | for 5 seconds | to select parameter mode (Service/Expert level). | |||
Setting parameters using the local HMI
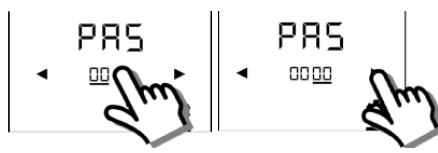
Wake up the thermostat by touching the screen display. Factory setting for the Service level password is 00 00.
Entering the Service level
- Touch and hold down the icon for 5 seconds. Then set the first 2-digit number to 00 using
 .
.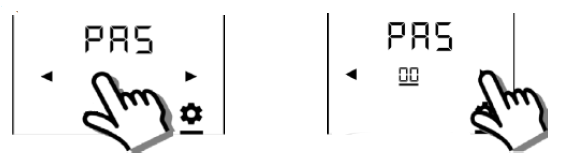
- Touch the last 2-digit number and set it to 00 using
- After 3 seconds, P (successful login) or F (fail to login) is displayed.
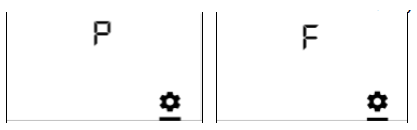
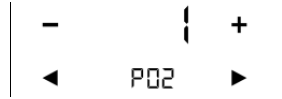
- If the login failed, reenter the correct password as per step 1 above. After successful login, the first parameter is displayed as shown in the following example:
Notes
- Touch any icon to exit.
- Touch to select any parameter and +/– to adjust values.
- When reaching END, touch END to exit.
Entering the Expert level
- Follow the same steps for entering the Expert level.
- Factory setting for Expert level password is 99 99.
Configuring parameters
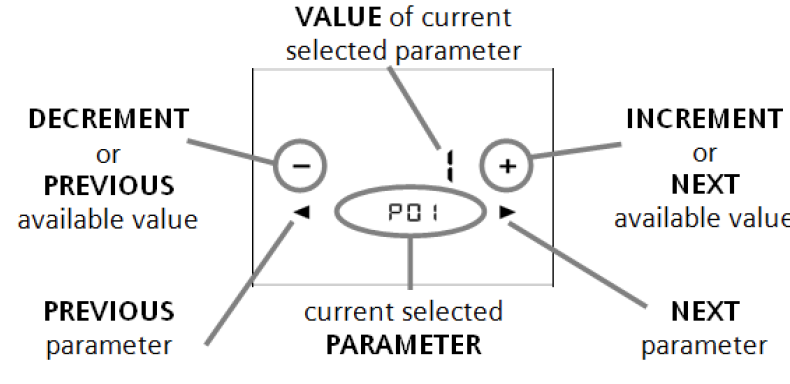
After entering the correct password, the screen displays as follows. Touchto advance or return to the desired parameter and use +/- to select the desired available value.
Resetting parameters
The factory setting for the control parameters can be reloaded using P71, by setting the value to ON.
Service level parameters
| Parameter | Name | Factory setting | Range | RDF800.. | Dependencies |
| Service level | |||||
| P01 | Control sequence | 2-pipe:
1 = cooling only 4-pipe: 4 = heating and cooling |
0 = heating only 1 = cooling only
2 = H/C changeover manual 3 = H/C changeover auto 4 = heating and cooling |
ü | |
| P02 | Operation using room op selector | 1 | 1 = Comfort – Protection
2 = Comfort – Economy – Protection |
ü | |
| P04 | Unit | 0 | 0 = °C
1 = °F |
ü | |
| P05 | Measured value
correction (for built-in/external sensor) |
0 K | – 5…+5 K | ü | |
| P06 | Standard display | 0 | 0 = room temperature 1 = setpoint | ü | |
| P08 | Comfort basic setpoint | 21 °C | 5…40 °C | ü | |
| P09 | Comfort setpoint minimum | 5 °C | 5…40 °C | ü | |
| P10 | Comfort setpoint maximum | 35 °C | 5…40 °C | ü | |
| P11 | Economy heating setpoint | 15 °C | OFF, 5…WCoolEco;
WCoolEco = 40 °C max. |
ü | |
| P12 | Economy cooling setpoint | 30 °C | OFF, WHeatEco…40 °C;
WHeatEco = 5 °C min. |
ü | |
| P13 | Electric heater when cooling | ON | ON: Enabled OFF: Disabled | ü | |
| P14 | “Screen lock” function | 0 | 0: Unlock
1: Lock 2: Setpoint adjustable |
ü | |
| P15 | Fan stage in dead zone (Comfort) | 0 | 0 = disabled
1 = low speed (Heat and Cool) 2 = low speed (Cooling only) |
ü | |
| P16 | Buzzer function | ON | ON: Enabled OFF: Disabled | ü |
Note: Parameter display depends on the selected application and function.
Expert-level parameters with diagnostics and test
| Parameter | Name | Factory setting | Range | RDF800.. | Dependencies |
| Expert level | |||||
| P30 | Heat P-band Xp/switching differential | 2 K | 0.5…6 K | ü | |
| P31 | Cool P-band Xp/switching differential | 1 K | 0.5…6 K | ü | |
| P33 | Dead zone Comfort mode | 2 K | 0.5…5 K | ü | Appl.
*) |
| P34 | Setpoint differential | 2 K | 0.5…5 K | ü | Appl.
*) |
| Parameter | Name | Factory setting | Range | RDF800.. | Dependencies |
| Expert level | |||||
| P35 | Integral action time Tn | 45 min | 0…120 min | ü | P46 |
| P36 | H/C changeover switching point cooling | 16 °C | 10…25 °C | ü | P38, P40 |
| P37 | H/C changeover switching point heating | 28 °C | 27…40 °C | ü | P38, P40 |
| P38 | Input X1 | 3 = window contact | 0 = — (no function)
1 = room temp ext. sensor/ return air temp (AI) 2 = H/C changeover (AI/DI) 3 = window contact (DI) 4 = dew point sensor (DI) 5 = enable electric heater (DI) 6 = fault input (DI) 10 = presence detector (DI) |
ü | P40 |
| P39 | Normal position input X1 | 0 (NO.) | 0 = NO. (Normally Open) 1 = NC. (Normally Closed) | ü | P38 |
| P40 | Input X2 | 1 = ext. sensor | 0 = — (no function)
1 = room temp ext. sensor/ return air temp (AI) 2 = H/C changeover (AI/DI) 3 = window contact (DI) 4 = dew point sensor (DI) 5 = enable electric heater (DI) 6 = fault input (DI) 10 = presence detector (DI) |
ü | P38 |
| P41 | Normal position input X2 | 0 (NO.) | 0 = NO. (Normally Open) 1 = NC. (Normally Closed) | ü | P40 |
| P44 | Actuator running time Y1/Y2 | 150 s | 20…300 s | ü | P46 |
| P45 | Power of electric heater on Y2 (for adaptive temperature compensation | 0.0 kW | 0.0.. 1.2 kW | ü | |
| P46 | Output Y1/Y2 | ON/OFF (1) | 0 = 3-position 1 = ON/OFF | ü | Appl. |
| P48 | ON time minimum 2-pos output | 1 min. | 1…20 min | ü | P46 |
| P49 | OFF time minimum 2-pos output | 1 min. | 1…20 min | ü | |
| P50 | Purge time | OFF | OFF: Not active
1…5 min: Active with selected duration |
ü | P38, |
| P51 | Flow temp limit floor heating | OFF | OFF, 10…50 °C | ü | P38, P40 |
| P52 | Fan control | 1 | 0 = disabled
1 = enabled 2 = heating only 3 = cooling only |
ü | |
| P53 | Fan speeds | 3-speed | 1 = 1-speed
2 = 3-speed |
ü | P52 |
| P54 | Fan overrun time | 60 s | 0…360 s | ü | P52,
Appl. |
| P55 | Fan speed switching point high | 100% | 80…100% | ü | P52, P53 |
| P56 | Fan speed switching point med | 65% | 30..75% | ü | P52, P53 |
| P57 | Fan speed switching point low | 10% | 1…15% | ü | P52, P53 |
| P58 | Fan kick start | ON | ON: Enabled OFF: Disabled | ü | P52 |
| P59 | On time minimum fan | 2 min | 1…6 min | ü | P52 |
| Parameter | Name | Factory setting | Range | RDF800.. | Dependencies |
| Expert level | |||||
| P60 | Periodic fan kick Comfort | OFF | 0…89 min, OFF(90) | ü | P52 |
| P61 | Periodic fan kick Eco | OFF | 0…359 min, OFF(360) | ü | P52 |
| P62 | Service filter | OFF (0) | OFF, 100…9900 h | ü | P52 |
| P65 | Protection heating setpoint | 8 °C | OFF, 5…WCoolProt;
WCoolProt = 40 °C max. |
ü | |
| P66 | Protection cooling setpoint | OFF | OFF, WHeatProt… 40;
WHeatProt = 5°C min. |
ü | |
| P67 | Fan start delay | 0 s | 0…360 s | ü | P52, P46 |
| P69 | Temporary Comfort setpoint | OFF | OFF = disabled ON = enabled | ü | |
| P71 | Restore factory setting | OFF | OFF = disabled ON = reload start | ü | |
| P77 | Presence Detector Mode | 1: Standard Presence Mode | 1: Standard Presence Mode 2: Hotel Presence Mode | ü | P38, P40 |
Appl: applications
| Parameter | Name | Range | RDF800.. | Dependencies |
| Diagnostics and test | ||||
| d01 | Application number | NONE = (no application) 2P = 2-pipe
2P3P = 2-pipe 3-position 2PEH = 2-pipe with electric heater 4P = 4-pipe |
ü | |
| d02 | X1 state | 0 = not activated (for DI)
1 = activated (DI) 0…49 °C = current temp. value (for AI) 00 = H/C input shorted 100 = H/C input open |
ü | |
| d03 | X2 state | 0 = not activated (for DI)
1 = activated (DI) 0…49 °C = current temp. value (for AI) 00 = H/C input shorted 100 = H/C input open |
ü | |
| d05 | Test mode for checking the Y1/Y2 actuator’s running direction3) | “—” = no signal on outputs Y1 and Y2 OPE = output Y1 forced opening
CLO = output Y2 forced closing |
ü | P46 |
| d07 | Software version | Ux.xx | ü |
This parameter can only be quit when the setting is back at “—“ Press buttons + and – simultaneously to escape.
Mounting and installation
Mount the room thermostat on a conduit box. Do not mount on a wall in niches or between bookshelves, behind curtains, above or near heat sources, or exposed to direct solar radiation. Mount about 1.5 m above the floor.
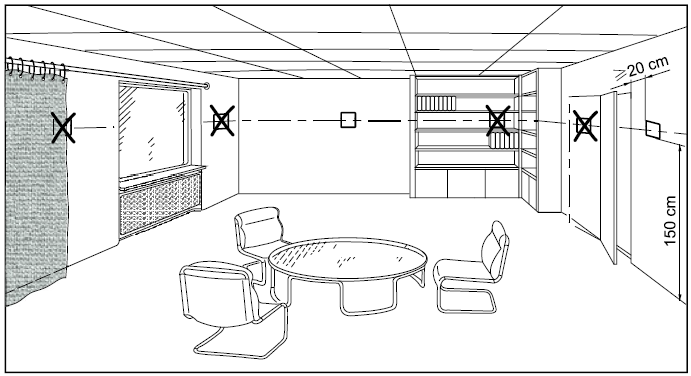
Mounting / Dismounting
- Do not apply excessive force on screws! The deformation of the mounting frame may lead to improper connections and the operation of the unit.
- Mount the room thermostat on a clean, dry indoor place without direct airflow from a heating/cooling device, and do not expose it to drips or splashes water.
- In case of limited space in the conduit box, use the mounting spacer ARG70.3 to increase the headroom by 10mm.
- Before removing the front cover, disconnect the power supply.
Wiring
See the User Manual for the installation instructions enclosed with the thermostat.
WARNING
Wire, protect and earth in compliance with local regulations.
Risk of fire and injury due to short-circuits!
- Adapt the line diameters as per local regulations to the rated value of the installed overcurrent protection device.
- The AC 230 V mains supply line must have an external circuit breaker with a rated current of no more than 10 A.
- The maximum current loading (including fan and valves) is 10 A.
- Use only valve actuators rated for AC 230 V.
- Disconnect from the supply before removing the unit from its mounting plate.
- Do not connect more than one fan coil unit to the Qs output of the thermostat.
- Do not connect terminal Y1 or Y2 to either L or N.
- Do not use terminal Y1 or Y2 as AC 230 V power supply.
- Use cables with min 230 V insulation for both SELV inputs X1-M / X2-M since the conduit box carries AC 230 V mains voltage.
- Several switches (e.g. window contact) may be connected in parallel for both inputs X1-M / X2-M. However, overall maximum contact sensing current for switch rating must be considered.
Commissioning notes
Before powering up: Set DIP switches to select the desired application before power up:
| Commissioning method |
DIP switches |
LCD display |
Applications |
|
Local setup |
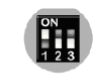 |
APP 2P |
2-pipe |
 |
APP 2PEH |
2-pipe with electric heater |
|
 |
APP 4P |
4-pipe |
|
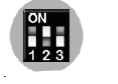 |
APP 2P3P |
2-pipe with 3-position output |
After DIP switch setting, complete the installation and power up the thermostat.
Notes
- Other DIP switch position will have no effect, i.e. NONE will be shown on LCD display when the unit is powered up if selected .
- As soon as the application is changed, the thermostat reloads the factory setting for all control parameters.
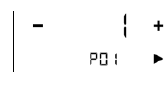
- After DIP switches are selected and the thermostat is powered up, the wizard function guides users to configure the basic parameters for normal operation according to the table below.
- Touch / to advance / return to any parameter;
- Touch + / – to change value
| LCD display | Parameter | Range | Factory setting |
|
Control sequence |
0: Heating only
1: Cooling only 2: Manual changeover 3: Auto changeover 4: Heating and Cooling |
2-pipe = 1 4-pipe = 4 |
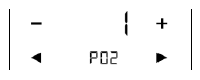 |
User operating mode profile |
1: comfort > protection
2: comfort > economy > protection |
1 |
|
Selection of
° C or °F |
0: °C
1: °F |
0 |
|
Standard display |
0: Room temperature
1: Setpoint |
0 |
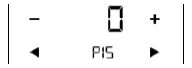 |
Fan Stage in Deadzone
(Comfort mode) |
0: Fan OFF
1: Fan speed 1 Heat / Cool 2: Fan speed 1 Cool only |
0 |
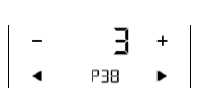 |
Functionality of X1 |
0: — No function
1: Ext / Return Temp (AI) 2: H/C changeover (AI/DI) 3: Window open detect (DI) 4: Dew point sensor (DI) 5: Enable electr. Heater (DI) 6: Fault input (DI) 10: Presence detection (DI) |
3 |
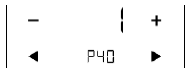 |
Functionality of X2 |
1 |
| LCD display | Parameter | Range | Factory setting |
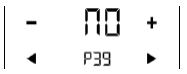 |
Operating action of X1 |
Normal Open (NO) Normal Close (NC) |
Normal Open (NO) |
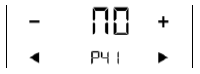 |
Operating action of X2 | ||
|
|
– |
End of wizard |
– |
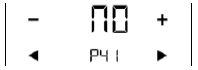
If more details are required about parameters, refer to basic documentation P3174.
Reset
To re-load the factory settings for all parameters, set the parameter P71 to ON. Restart the thermostat after reset. All LCD segments flash, indicating that the reset is correct.
3 seconds later, the thermostat is ready for commissioning by qualified HVAC staff.
Compressor-based application
- When the thermostat is used with a compressor, adjust the minimum output on-time (parameter P48) and off-time (parameter P49) for Y1 / Y2 to avoid damaging the compressor or shortening its life due to frequent switching.
Calibrate sensor
- • Recalibrate the temperature sensor if the room temperature displayed on the thermostat does not match the room temperature measured (after min. 1 hour of operation). To do this, change parameter P05.
Setpoint and range limitation
- We recommend to review the setpoints and setpoint ranges (parameters P08…P12) and change them as needed to achieve maximum comfort and save energy.
Notes: The functional descriptions for the thermostat can be referred to basic documentation (P3174).
Operation
Room temperature out of range
- When the room temperature is out of the measuring range (that is, above 49 °C or below 0 °C), – – – will be displayed.
- In addition, the heating output is activated if the current setpoint is not set to “OFF”, the thermostat is in heating mode and the temperature is below 0 °C.
- For all other cases, no output is activated.
- The thermostat resumes Comfort mode after the temperature returns to the measuring range.
- The following pages can be displayed by touching the icon, depending on priority: alarm/service reminder, manual H/C changeover, basic Information about room.
Alarm/Service reminder
- If any alarm is displayed (
 ), touch the icon to check the alarm or service reminder.
 - If there is more than one alarm, use to browse through all active alarms.
- The following table describes the detail information for all alarms and services.
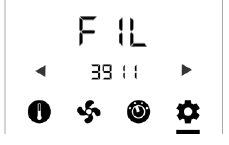
| Alarm/service | Display | Error code | Type |
| Condensation | Con | 4930 | Fault |
| Ext fault input 1 | AL1 | 9001 | Fault |
| Ext fault input 2 | AL2 | 9002 | Fault |
| Clean filter reminder (+/– to remove reminder) | FIL | 3911 | Service |
| Internal sensor error | Er1 | Fault | |
| EEPROM error | Er2 | Fault | |
| Floor heating sensor error | Er3 | Fault |
Heating/cooling manual changeover
If manual heating/cooling changeover is set using P01 = 2, touch the or twice (depending on the alarms) to select heating or cooling mode.
The selected control sequence will start in three seconds.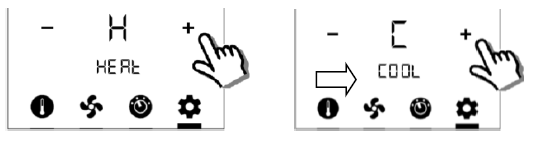
 Disposal: This symbol or any other national label indicate that the product, its packaging, and, where applicable, any batteries may not be disposed of as domestic waste. Delete all personal data and dispose of the item(s) at separate collection and recycling facilities in accordance with local and national legislation.
For additional details, refer to www.siemens.com/bt/disposal.
Technical data
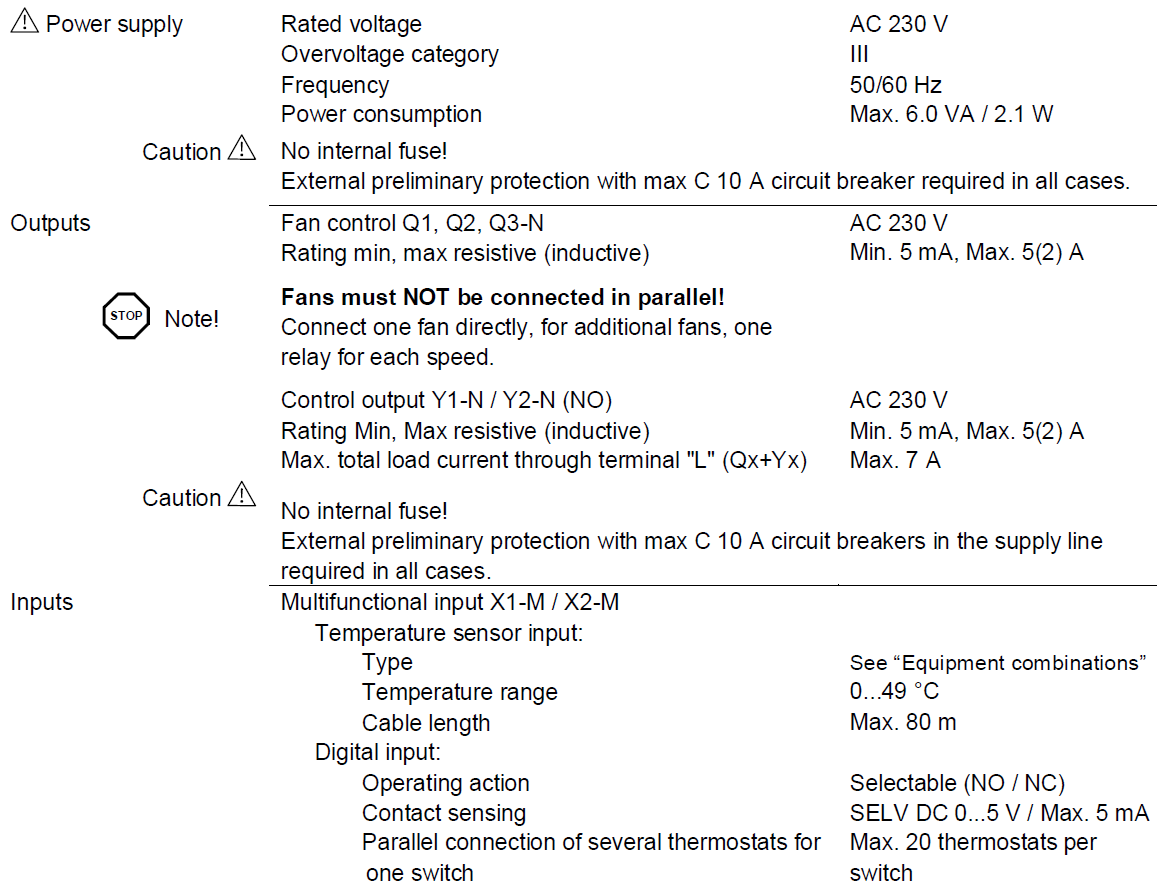
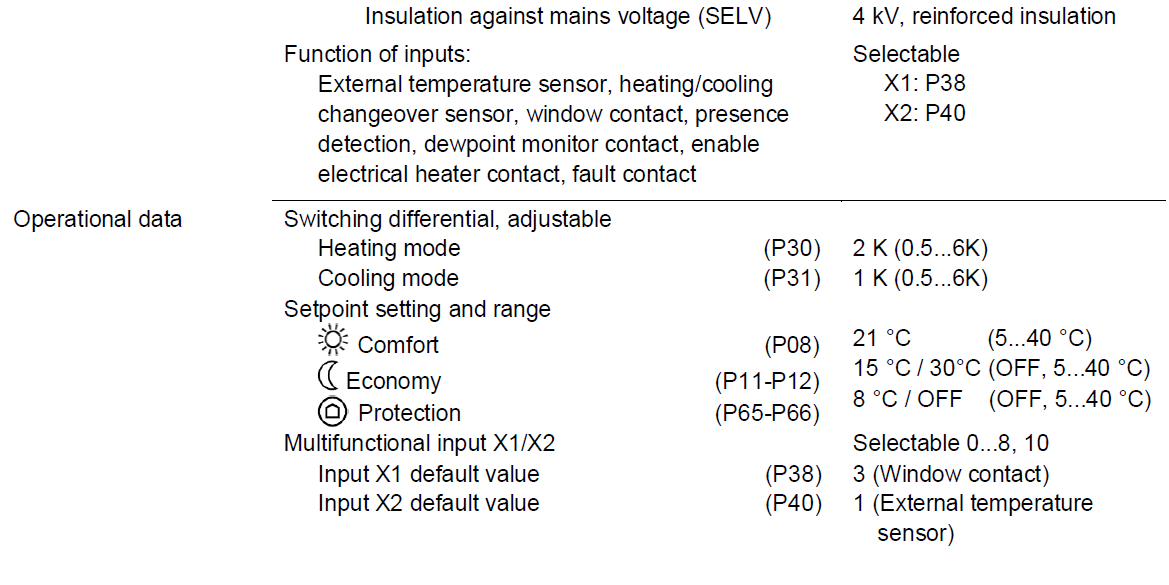
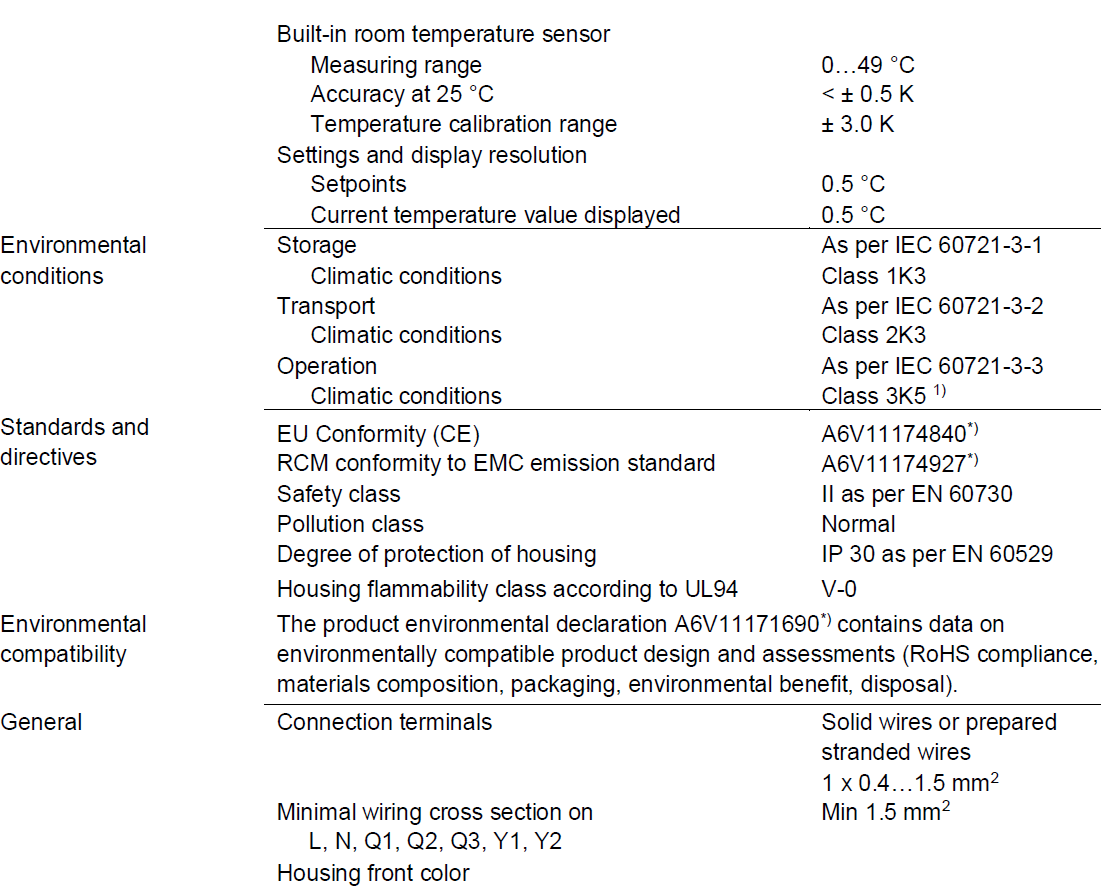

- The documents can be downloaded from http://siemens.com/bt/download.
- No condensation is allowed.
Connection terminals
RDF800, RDF800/NF, RDF800/VB
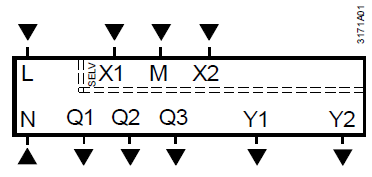
- L, N Operating voltage AC 230 V
- Q1 Control output “Fan speed 1 AC 230 V”
- Q2 Control output “Fan speed 2 AC 230 V”
- Q3 Control output “Fan speed 3 AC 230 V”
- Y1,Y2 Control output “Valve” AC 230 V (N.O., for normally closed valves), output for compressor or output for electrical heater
- X1, X2 Multifunctional input for temperature sensor (such as QAH11.1) or potential-free switch
- Factory setting: X1 = Window contact
- X2 = External sensor (function can be selected via parameter P38 / P40)
- M Measuring neutral for sensor and switch
Connection diagrams
Application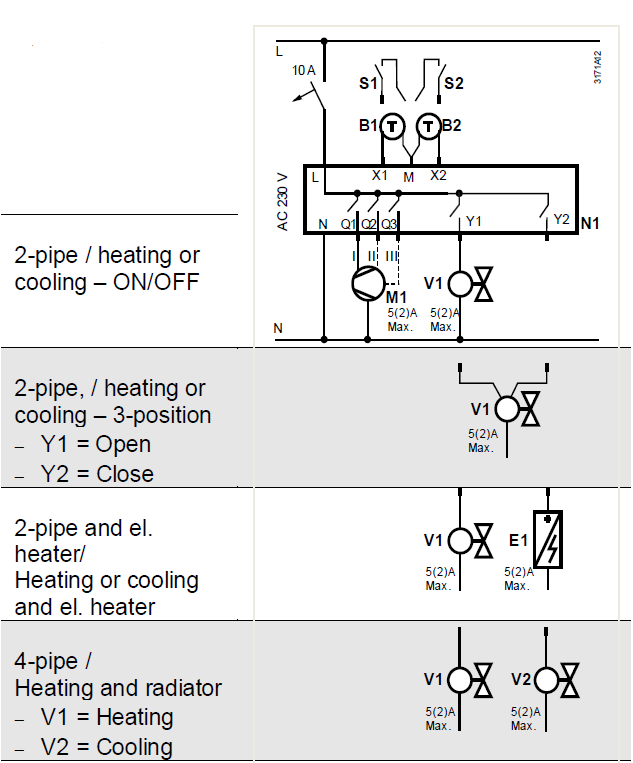
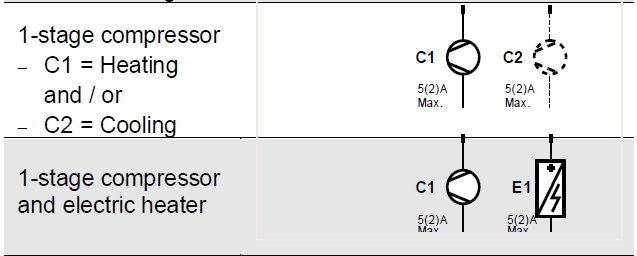
- N1 Room thermostat RDF800…
- M1 1- or 3-speed fan
- V1 Valve actuator, 2- or 3-position
- V1, V2 Valve actuator, 2-position
- E1 Electric heater
- C1, C2 1-stage compressor
- S1, S2 Switch (keycard, window contact, presence detector, etc.)
- B1, B2 Temperature sensor (return air temperature, external room temperature, changeover sensor, etc.)
- X1, X2 Inputs
Example1: With SUA21/3 2-pipe fan coil application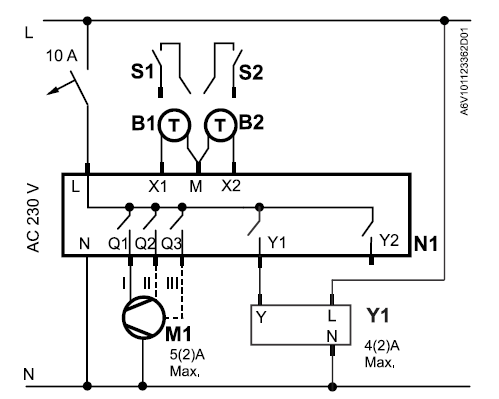 Example2: With SUA21/3 4-pipe fan coil application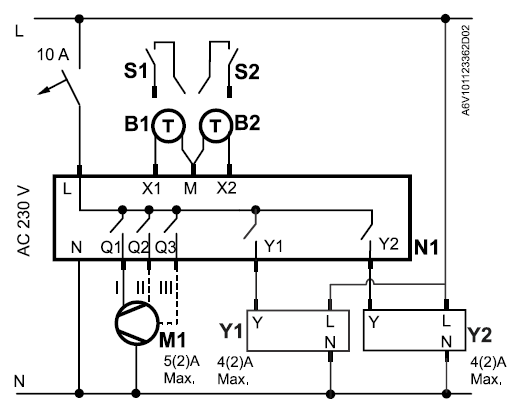
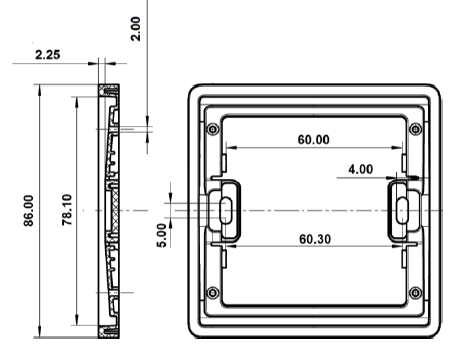
Dimensions (mm)
- RDF800/NF for square conduit boxes only
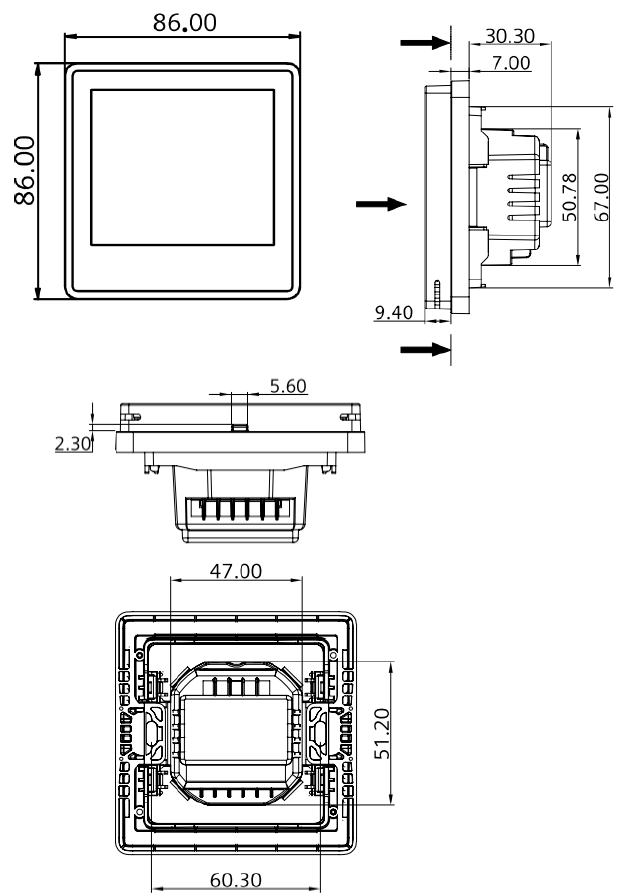
- ARG800.1 Single Mounting Frame for RDF800/NF
- RDF800, RDF800/VB for round conduit boxes
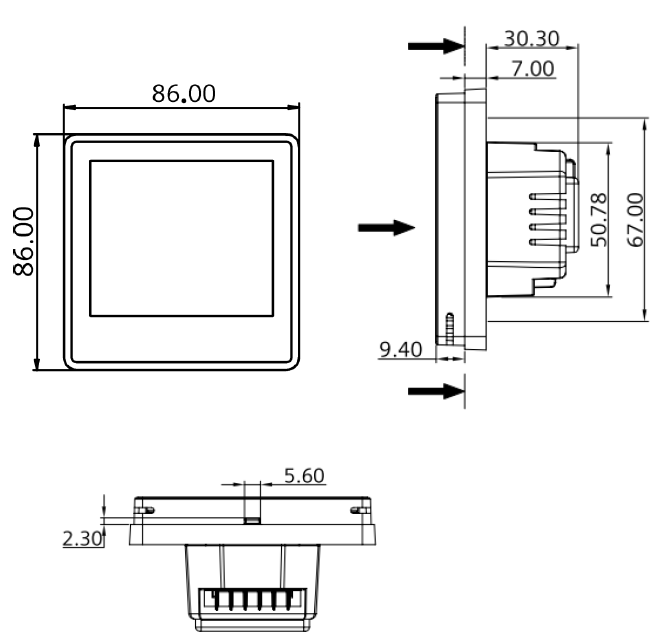
© Siemens Switzerland Ltd., 2019
Technical specifications and availability subject to change without notice.
Issued by
- Siemens Switzerland Ltd
- Smart Infrastructure
- Global Headquarters
- Theilerstrasse 1a
- CH-6300 Zug
- Tel. +41 58 724 2424
- www.siemens.com/buildingtechnologies
REFERENCE:
DOWNLOAD MANUALS:
SIEMENS RDF800 Flush mount touch room thermostat Product Specifications Guide

SIEMENS RDF800 Flush Mount Touch Room Thermostat Product Specifications Guide