RADIO THERMOSTAT CT100 Z-Wave Thermostat
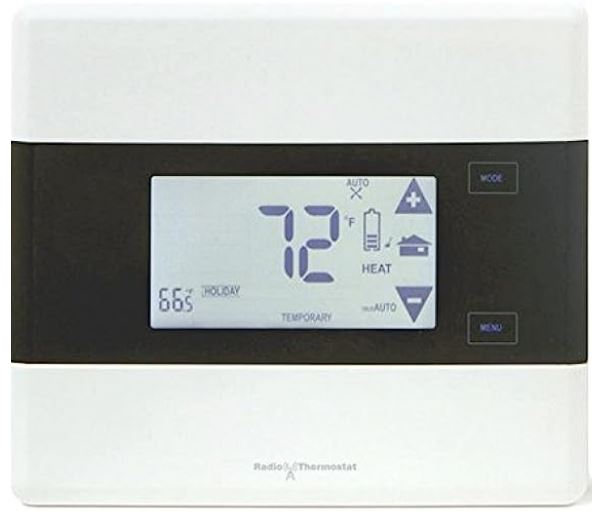
The CT100 communicating Z-Wave thermostat operates via a high-quality, easy-to-use touch screen.
To set or adjust your CT100, simply touch your finger firmly to the screen. The screen will automatically light up and you will hear a “beep.” Do not use a sharp or metallic device; it will scratch the screen.
Statement of use: 100% Compatible with all popular residential HVAC systems; 24VAC single, two-stage conventional heating systems (gas/oil/electric), heat pumps with up to two stages of heat and two stage auxiliary heat(electric or fossil), zoned forced air and zoned hot water (2 or 3 wire), millivolt systems (with a 12-24 AC or DC source), one or two stage cooling, and hybrid systems.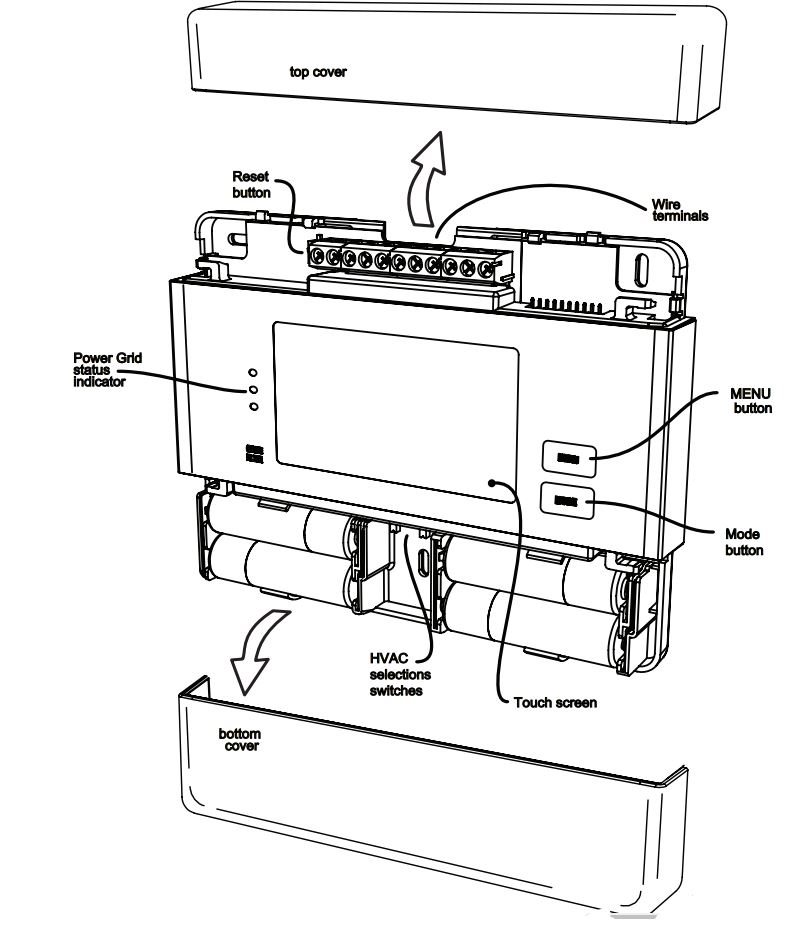
Control Screens

HOME Screen
Before you operate the CT100 please get familiar with these basic control screens. All the CT100 functions are accessed through these screens: HOME, MENU, and MANUAL. The CT100 touch screen technology allows you to select (by touching) an item and change it using the +/- arrows or the time arrows.
The HOME screen is displayed when the unit is operating. Touching the HOME icon on another screen will always return you to this screen.
To set a Mode:
Press the mode button on the front. The CT100 will step through the modes HEAT, OFF, COOL, OFF, AUTO, and OFF in order.
MENU Screen
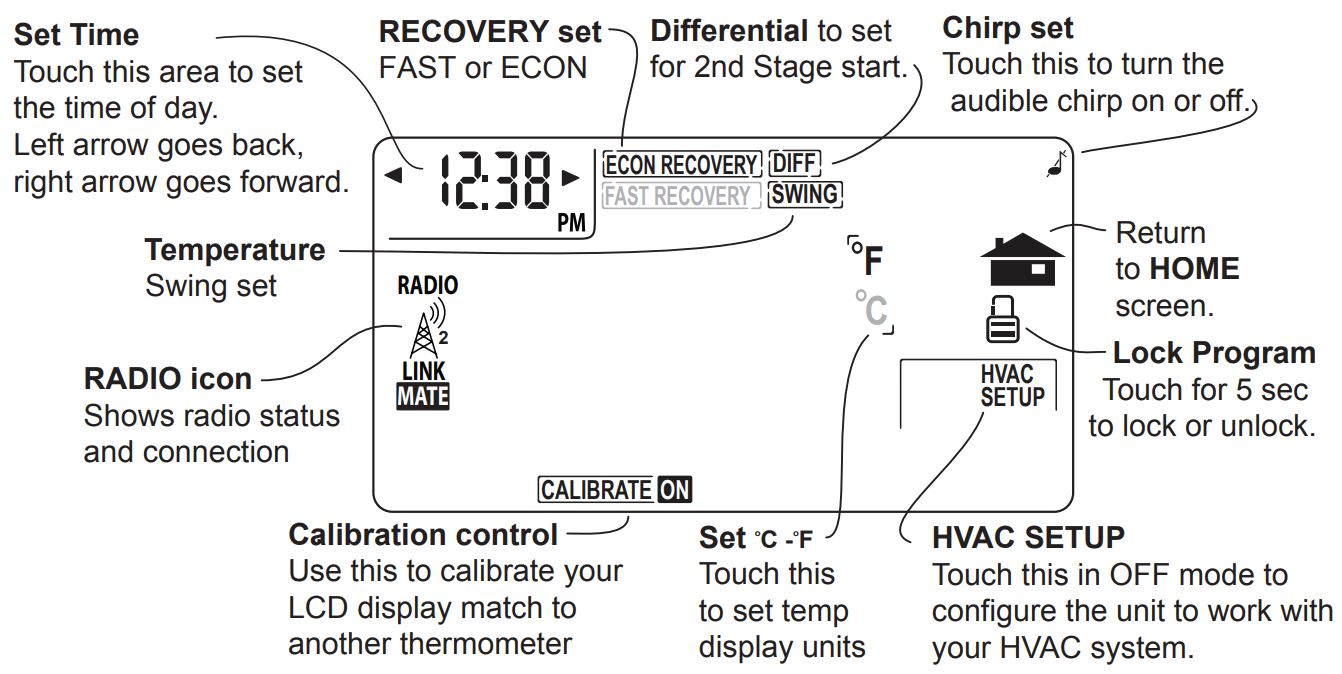
The MENU screen is the gateway to many functions or settings of the CT100. It is displayed when you press the MENU button.
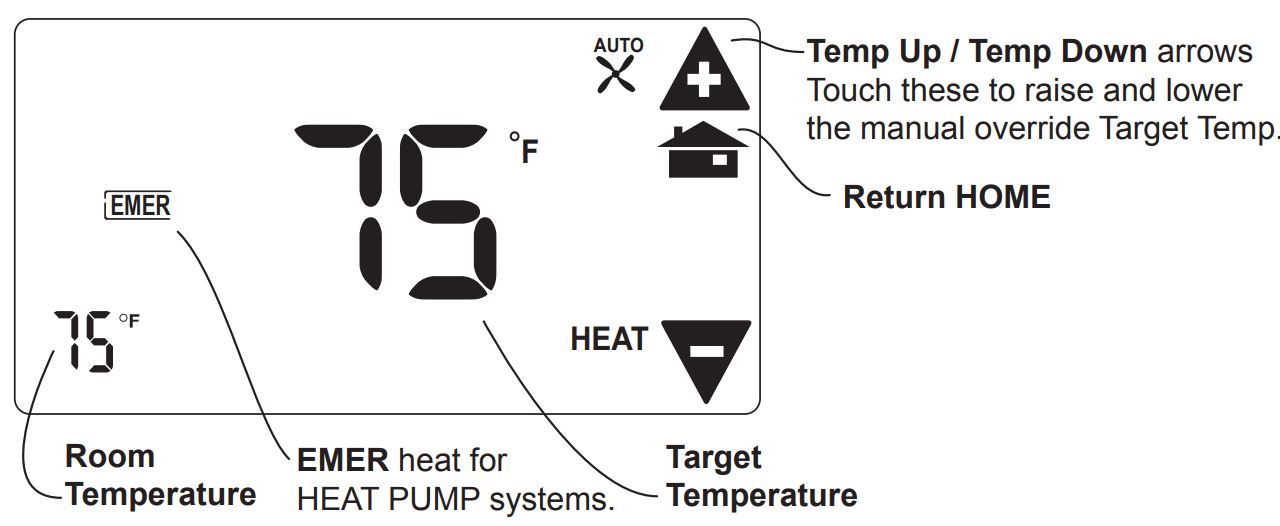
The Manual Screen control screen is where you can make temporary changes to your CT100’s operation. From the HOME screen, touch the main temperature display to use this screen.
Initial Settings
Press MENU to access the following commands (from the HOME screen).
- Set time of day
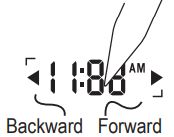
Touch the Time of Day arrows to move the time selection forward or backward until it displays the current time. Touch and hold for faster setting. - Set oF-oC display
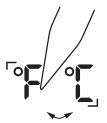
Touch the oF and it will toggle to oC. - Set audible chirp
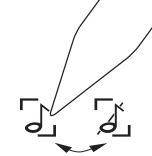
Touch the musical note icon to select the chirp or no chirp.
Return HOME by touching the home icon.
Press MENU to bring up the MENU screen.
- TIME of DAY
Touch the left (down) or right (up) arrows next to the time display to set the current time (1 minute per touch). Touch and hold the arrow for fast time set (15 minute jumps). - SWING (HVAC cycling rate) This feature allows you to set the desired variance in temperature between the CT100 setting and the room temperature required before the heating or cooling system will turn on—Swing range: 0.5 to 4.0F (.25 to 2C). For example, if SWING is set to 2.0° F and the CT100 is set to 70°F Target Temperature, the heat cycle will start when room temperature drops to 68°F. Similarly, the cooling system will start when the room temperature increases to 72°F. The HVAC then runs and will shut off at the Target Temperature.
- To set SWING:
Touch SWING.
Touch the left/right arrows to set the SWING from 0.5° to 4.0°F (.25 to 2C).
The HVAC will run more frequently at 0.5°F and less at 4.0°F. Default is 1°F. Touchto return to the MENU screen.  Chirp set – Touch this to turn the audible chirp sound on or off.
- F C Set – Touch this to switch the temperature display scale from oF to oC .
- LOCK (The CT100 has 2 lock modes)
Touch the icon for 5 seconds; the unit will go into PARTIAL lock mode. The user can temporarily override the CT100 target with the +/- buttons only.
 (1 bar)
For FULL lock: Touch the (1 bar) icon again for 5 seconds to go to full lock. No changes can be made in full lock (2 bars). Once locked, the CT100 will respond just to MENU.
To UNLOCK, Press MENU.
Touch and hold theicon for 5 seconds for 2 bars (if not there already).
Then touch and hold theicon for another 5 seconds. Each 5-second touch and hold must be separate.
Touch toreturn to the Home screen. - CALIBRATE
Your thermostat was accurately calibrated at the factory to ±1° F of the actual ambient temperature. You do have the option, however, to change the display temperature to match that of a previous thermostat, or to match another thermostat already in your home. The range of change is from -6°F to +6°F or -3°C to +3°C. - To change your Thermostat Calibration, touch MENU and then touch CALIBRATE.
Use the + / – to adjust the displayed temperature up or down, as desired.
The DELTA FACTOR that appears on the screen will also automatically increase or decrease for each 0.5° (F or C) adjustment so you can see your change. The large display will show the modified temperature reading that will be displayed on the HOME screen and used as the new room temperature.
Touch to return to the Home screen.
DIFF (Used for multiple stage systems only, not on screen for single stage)
The differential is the number of degrees between the room temperature and the Target Temperature at which the 2nd stage will be used. Default is 2°F , range is 2°F to 6°F (1°- 3°C).
Touch MENU and then DIFF. Use the arrows to set the DIFF.
Recommend 2°F for very cold climates and the 6°F for warm climates. - The CT100 has 2 manual override commands. The manual screen is accessed by touching the large current temperature display in the middle of the HOME screen.
IMPORTANT: The Mode must be in HEAT or COOL to access the manual screen.
TEMPERATURE Touch the +/- arrows tot select your desired Target Temperature. Touch HOME to return to operation. - EMER (in HEAT PUMP type)
If you set your CT100 for HEAT PUMP with auxiliary heat, EMER function is available on the MANUAL screen. If you touch EMER, it displays EMER|ON. Your HEAT PUMP is disabled and auxiliary heat is your sole source of heat. This manual override stays active until you toggle EMER off. Auxiliary heat is more expensive than the heat pump so use EMER only if the heat pump cannot keep up or is defective.
Other Functions
- MODE Button
The mode button sets the CT100 to HEAT, COOL, AUTO, or OFF modes. Press it once to step to the next mode. If the CT100 is in OFF and you want to return to the mode you were previously in, touch the OFF indicator on screen. - FAN Button
The fan control is normally in AUTO mode, meaning that the fan operates automatically with the HVAC system and the thermostat. When the fan button is pressed the fan goes ON; the fan will run continuously in this manual override until switched back to AUTO by pressing the FAN button again.
[NOTE: Fan ON function is available in the OFF mode to allow simple ventilating.] RESET button The RESET button re-boots the CT100 processor. It does not effect the target temperatures that have been stored in permanent memory. - Compressor Protection The CT100 has a minimum cycle time of 4 minutes to protect your compressor in cool and in heat pump (if you have one). The Home screen will show a small clock and A/C during this time and the compressor will not come on until the 4 minute delay is over.
Communicating Thermostat
The CT100 has a built in Z-Wave radio. This allows your thermostat to communicate with other systems.
Network INCLUSION
- Set your primary controller to INCLUDE mode, to add the thermostat as a node on your network (see your specific controller’s User Manual for detailed instructions.)
- Press and release the MENU button on the thermostat.
- Press the MATE button – This will bring you to the network screen and a large r1 will be displayed.
- Press the MATE button, this will initiate the mating process. When a device has joined a network the word LINK will appear under the radio tower.
Your controller will indicate the thermostat was successfully added to its network (see your specific controller’s User Manual for details).
Network EXCLUSION
- Set your primary controller to EXCLUDE mode, to remove the thermostat as a node on your network (see your specific controller’s User Manual for detailed instructions.)
- Press and release the MENU button on the thermostat.
- Press the MATE button – This will bring you to the network screen and a large r1 will be displayed.
- Press the MATE button, this will initiate the mating process. When a device been removed from a network the word LINK below the radio tower will disappear.
Your controller will indicate the thermostat was successfully removed from its network (see your specific controller’s User Manual for details).
Z-Wave and Battery Power
When your thermostat is running on battery power, the Z-Wave radio will turn off to help conserve battery life. The CT100 Z-Wave radio module supports Z-Wave beaming, which allows other devices in the network to wake up the Z-Wave module and accept commands, and then go back to sleep. The node type is fixed during network inclusion. If C-Wire is not present and the thermostat is battery powered during network inclusion, the thermostat will remain a frequent listening routing slave (FLiRS) node until the thermostat is removed from the network via network exclusion.
Z-Wave and C-Wire Power
When your thermostat is running on C-Wire power, the Z-Wave radio will stay on and actively help in routing messages within the z-wave network. The node type is fixed during network inclusion. If C-Wire is present and powered during network inclusion, the thermostat will remain an always listening node until the thermostat is removed from the network via network exclusion.
Caution HVAC Setup and Z-Wave
Do not change the HVAC setup or HVAC selection switches if the thermostat is included to Z-Wave network. The HVAC system must be changed, first EXCLUDE the thermostat from the network, change the HVAC setup, and INCLUDE the thermostat to the network.
REFERENCE:
DOWNLOAD MANUALS:
RADIO THERMOSTAT CT100 Z-Wave Thermostat Operation Guide
