
MI-HEAT TP520 Programmable Thermostat

CONTROLS AND SETTINGS
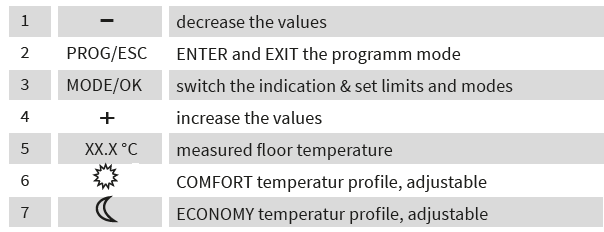
When using the COMFORT temperature profile, the set comfort temperature will be maintained. When using the ECONOMY temperature profile, the set temperature will be reduced to the desired minimum temperature for saving energy.
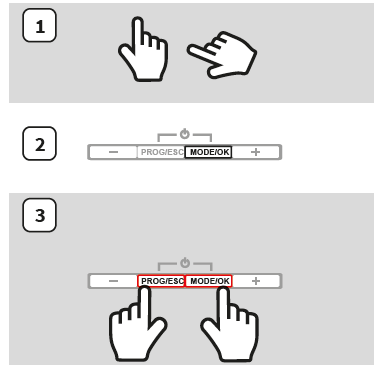
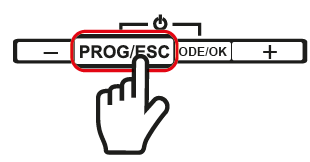
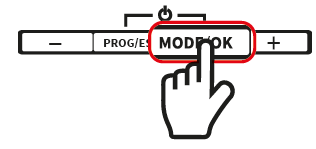
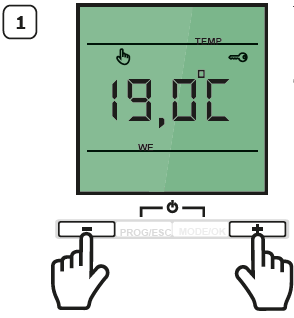
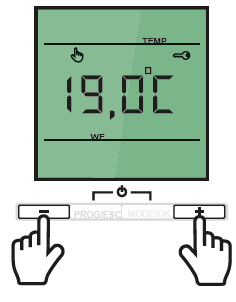
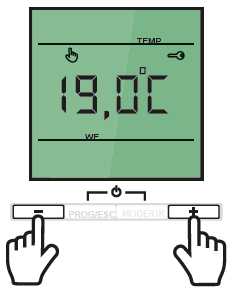
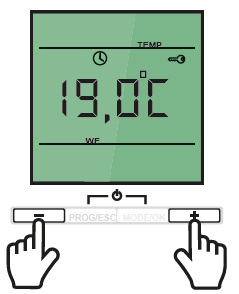
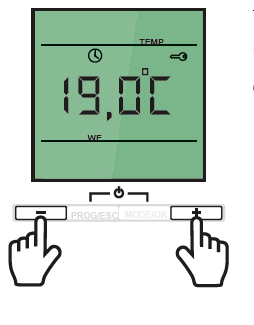
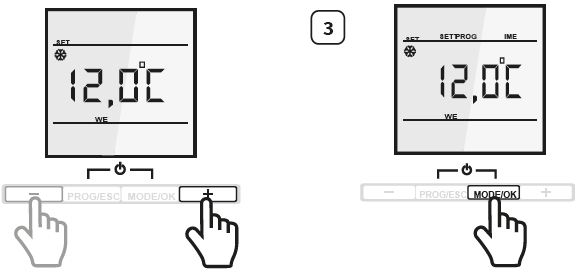
- Hands are used to symbolize which buttons (single or together) need to be pushed and how long to be held.
- The buttons that must be pushed for the described action are dark highlighted
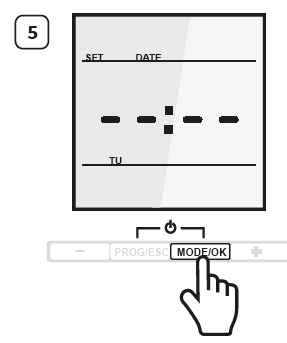
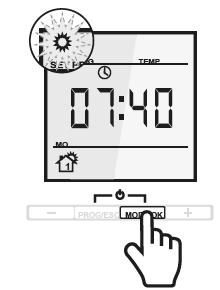
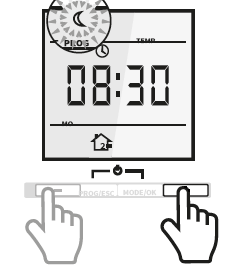
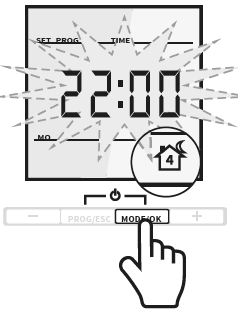
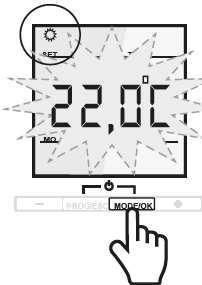
- To switch on the device, push the PROG/ESC and MODE/OK buttons simultaneously.
- The first switch on time may take up to 30 seconds, because the built in electric double-layer capacitor is uncharged or has lost it‘s charge after being disconnected to the power supply and must first be charged.
When no changes are made within 40 seconds, the thermostat will lock automaticaly.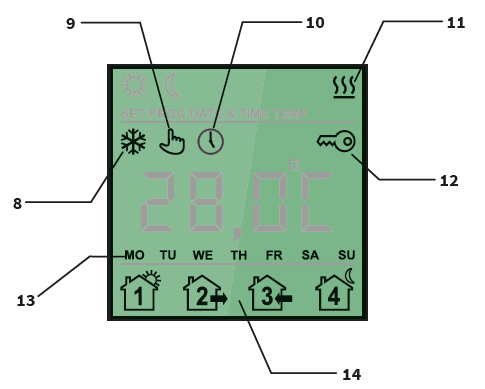

SAFETY WARNINGS
- Only qualified electricians are allowed to work on electrical connections and the electric supply of the device according to national laws and regulations.
- Otherwise the warranty invalidates. Switch off power from all wiring before installing, testing or replacing the thermostat.
- Only use electrical plastic wall mounting boxes for the thermostat installation.
- Ensure that the sensor can be placed into and removed from the corrugated tube (Ø 16mm); once during installation of the tubing and again before installation of the floor finish
INSTALLATION
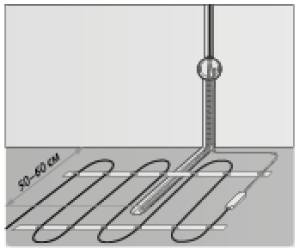
Sensor installation
The floor temperature sensor cable has to be placed into a seperate corrugated tube according to EN 61386-1. The sensor should be placed centrally between the heating conductor. Route the heating mat cold lead through the second corrugated tube. Do not cross the cold lead over or place it closer than about 2 cm to the mat heating wires! A standard plastic round recessed electrical box with a 230 VAC power supply is preferred for installation at the chosen thermostat location. A ground fault circuit breaker (30 mA) should be used for the 230 VAC heating mat circuit. Ensure that the sensor can be placed into and removed from the corrugated tube (Ø16mm); once during installation of the tubing and again before installation of the floor finish!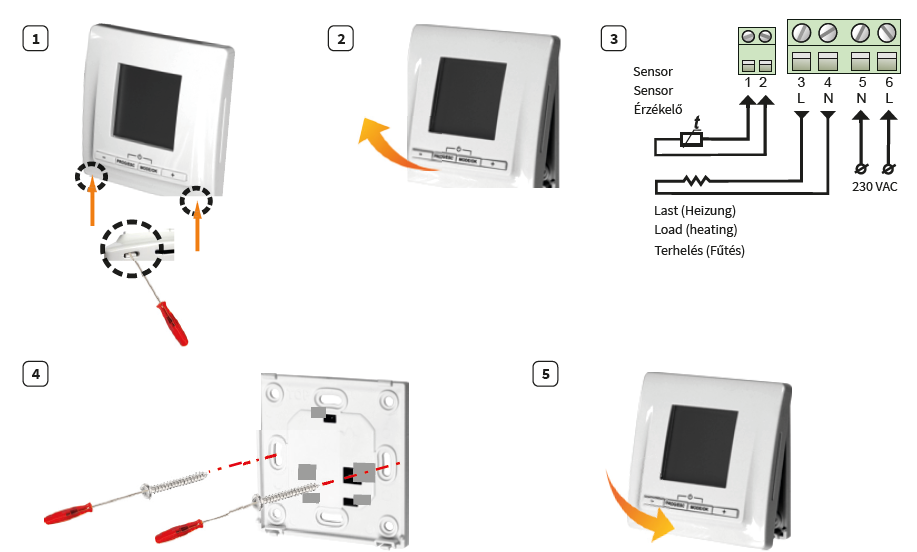
Attention:
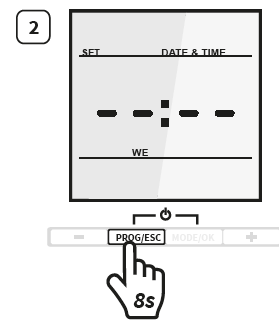
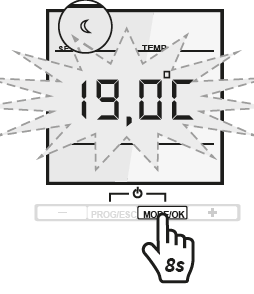
The date and time have to be newly set aft er each interruption of the voltage supply. All other settings remain. In order to change the date and time during the operation, please press and hold the PROG/ESC button for 8 seconds.
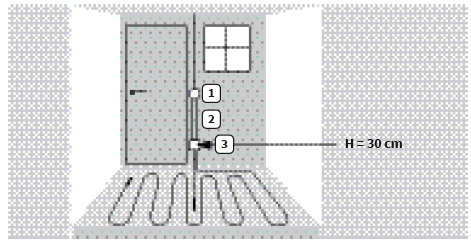
THERMOSTAT INSTALLATION FOR TWO OR MORE HEATING MATS
- Electrical thermostat; Power supply distribution cable NYM 3 x 1,5 mm²
- Corrugated tube for the temperature sensor or the cold lead (both are not to be installed inside the same tube)
- Recessed electrical box (only necessary for more than one heating mat)
SELF-LEARNING
Attention:
For example, if you programmed 20 °C from 6:00 to 8:00, the heating will open in advance to preheat and will change automatically depending on the heating habit.
- 1x Exit without saving
- 4 Sec. Event time programming
- 8 Sec. Set date
- 1x Confirm settings
- 2 Sec. Screensaver selection
- 4 Sec. Operation mode selection
- 8 Sec. Set temperature
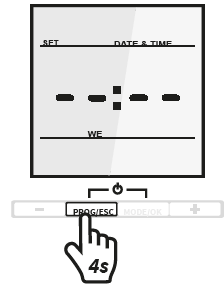
SET DAY AND TIME
- Unlock the thermostat
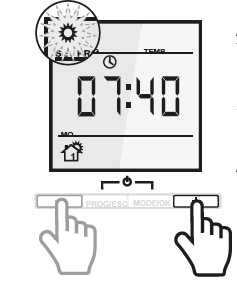
- Press and hold the PROG/ESC button for 8 seconds.
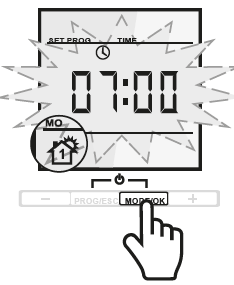
- Press the MODE/OK button. The weekday will start to blink.
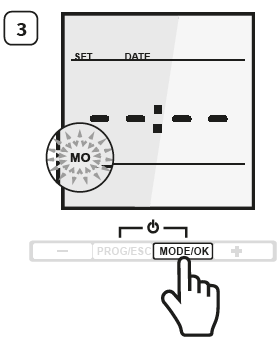
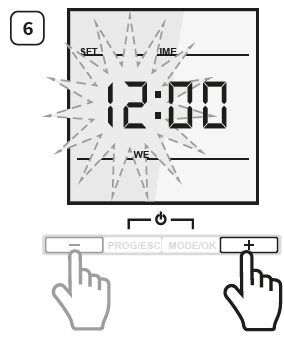
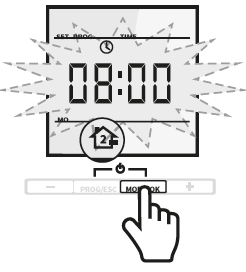
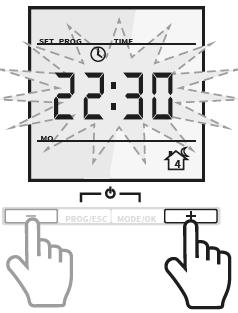
- Set the actual weekday with the “ + ” or “ – ” button.
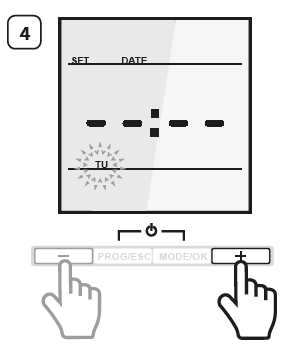
- Confirm the setting with the MODE/OK button.
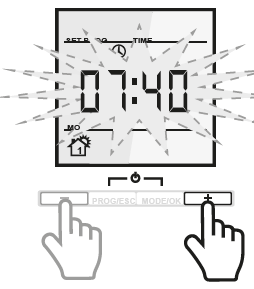
- Set the hour with the “ + ” or “ + ” button. Confirm the selection with MODE/OK button
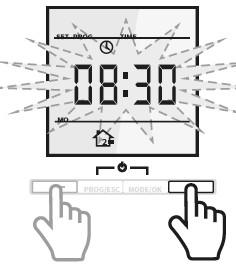
- Set the minutes with the “ + ” or “ – ” button.
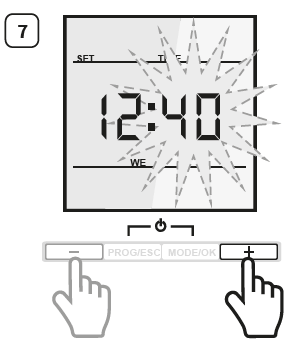
- Confirm the setting with the MODE/OK button.
OPERATION MODE DESCRIPTION
 CONSTANT TEMPERATURE MODE
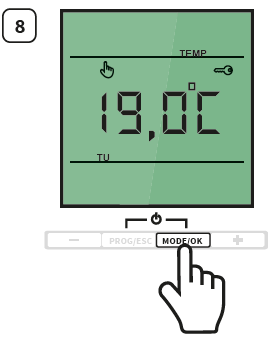
- The thermostat constantly maintains the desired floor temperature. The temperature is adjustable from +12°C up to +35°C.
 PROGRAM MODE
- Depending on time and day of the week the thermostat automatically switches to the COMFORT or ECONOMY temperature profile. The temperature is adjustable from +12°C to +35°C.
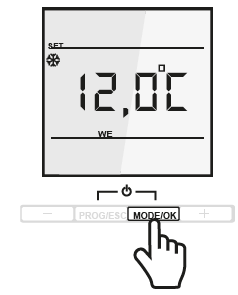
 FROST PROTECTION MODE
- This mode is suitable to keep temperature in the premise when nobody is inside for a longer time period and in order to avoid building damages. The temperature is adjustable from +5°C to +12°C.
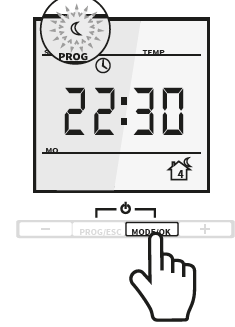
OPERATION MODE SELECTION
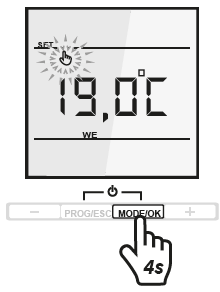
- Unlock the thermostat
- Press and hold MODE/OK button for 4 seconds. The operation mode will start to blink on the display.
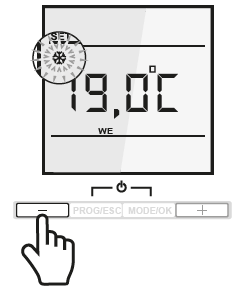
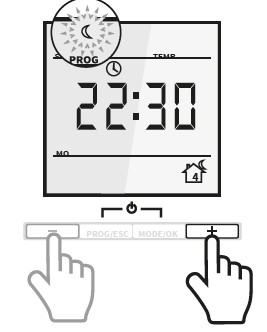
- Choose the Programm Mode using the “ – ” button.
- Confirm the setting with the MODE/OK button
MANUAL OPERATION MODE SETTINGS
-
- Unlock the thermostat
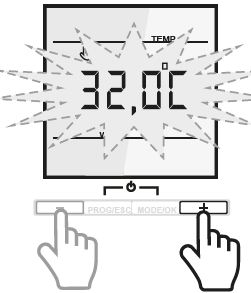
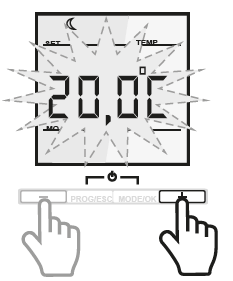
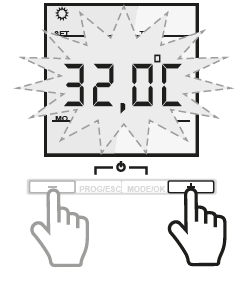
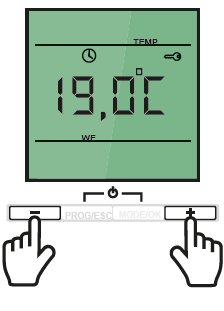
- Set the floor temperature using the “ + ” or “ – ” button.
- Unlock the thermostat
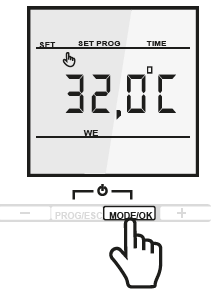
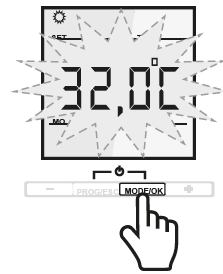
- Confirm the setting with the MODE/OK button.
EVENT TIME PROGRAMMING
- Unlock the thermostat.
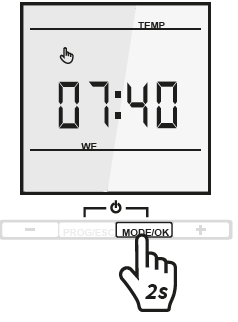
- Press and hold the PROG/ESC button for 4 seconds
WAKE UP EVENT
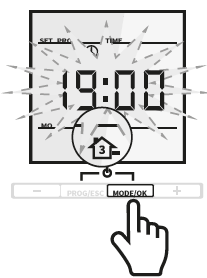
- Press the MODE/OK button. The clock time will start to blink.
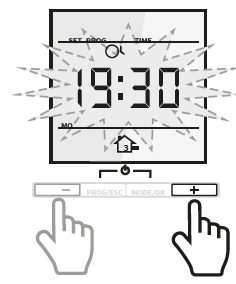
- Set your WAKE UP time using the “ + ” or “ – ” button.
- Confirm the setting with the MODE/OK button
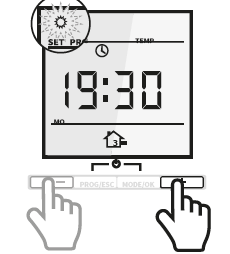
- Set the COMFORT temperature profile with the “ + ” or “ – ” button.
LEAVING HOME EVENT
- Press the MODE/OK button. The time will start to blink.
- Set your LEAVING HOME time using the “ + ” or “ – ” button.
- Confirm the setting with the MODE/OK button.

- Set the ECONOMY temperature profile with “ + ” or “ – ” button.
COMING HOME EVENT
- Press the MODE/OK button. The clock time will start to blink
- Set your COMING HOME time using the “ + ” or “ – ” button.
- Confirm the setting with the MODE/OK button

- Set the COMFORT temperature profile with “ + ” or “ – ” button.
 GOING TO SLEEP EVENT
- Press the MODE/OK button. The clock time will start to blink
- Set your GOING TO SLEEP temperature using the “ + ” or “ – ” button.
- Confirm the setting with the MODE/OK button
- Set the ECONOMY temperature profile with “ + ” or “ – ” button
DEFAULT SETTINGS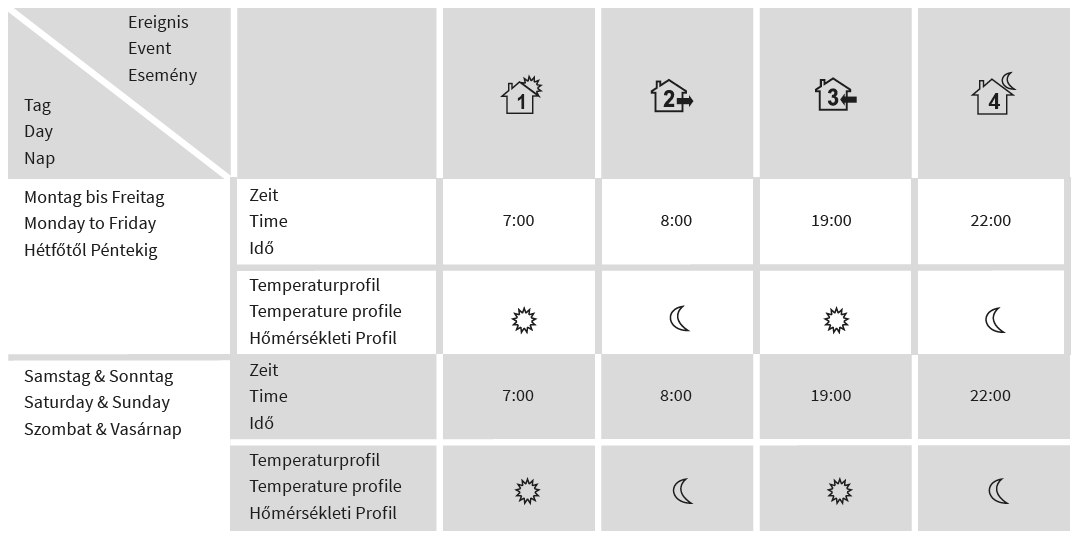
TEMPERATURE PROFILE SETTINGS
- Unlock the thermostat
- Set the desired ECONOMY temperature profile with the “ + ” or “ – ” button.
- Set the desired COMFORT temperature profile with the “ + ” or “ – ” button.
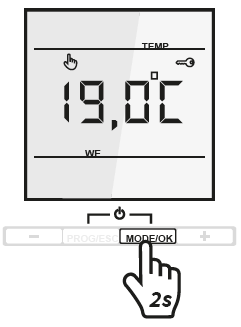
- Press and hold the MODE/OK button for 8 seconds. The symbol for the ECONOMY apears and the temperature starts blinking
- Confirm the setting with the MODE/OK button
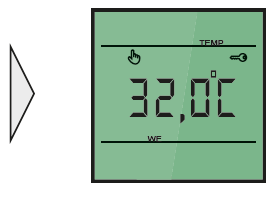
- Confirm the selection with MODE/OK. Setup is completed and the display shows the actual temperature.
FROST PROTECTION MODE
Unlock the thermostat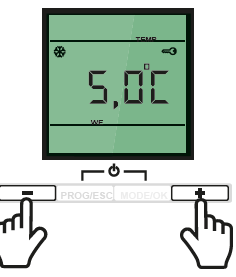
SCREENSAVER
- Unlock the thermostat
- The default screensaver is the floor temperature. Press and hold MODE/OK key for 2 seconds. The screensaver will change to the clock time.
- If you press and hold MODE/OK key for 2 seconds again, the screensaver will change back to the floor temperature.
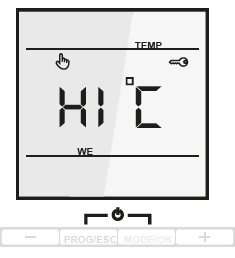
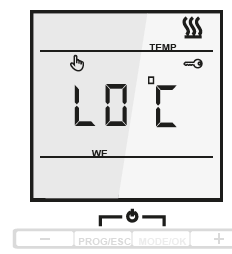
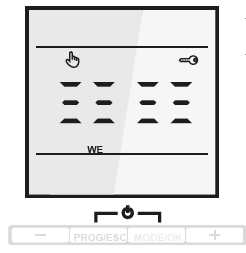
ALARM INDICATION
- HI °C appears on the display when the surface heating is more than +45°C.
- LO °C appears on the display when the heating system fails to heat the surface to more than +5°C.
- Appears in display by SENSOR FAILURE
TECHNICAL DATA
CLAIMS
In case of a claim during the warranty period please contact the seller. The sensor will need to be sent together with the thermostat for processing a claim.
WARRANTY
Warranty period – 2 years from date of purchase.
In case of a failure during guarantee period casued by a manufacturing defect, the customer has the right to supplementary performance. The warranty does not cover any damages due to inadequate handling, damages through a third party, wrong installation (not following the manual) or its consequential damages. Please keep your receipt. For any warranty claims you have to show your sales receipt.
GUARANTEE CARD
- The filled-out resistance acceptance test certificate is necessary for warranty claims.
- First measurement: Before and after installation of the heating mat
- The sensor can be removed through the corrugated tube (Ø 16mm) during installation of the heating mat
- Second measurement: Before and after installation of the flooring.
- The sensor can be removed through the corrugated tube (Ø 16mm) before installation of the flooring .
All information given are believed to be reliable and correct according to the best of our knowledge. Modifications, mistakes and printing errors do not justify claims for compensation. The manufacturer‘s and supplier‘s only obligations for this product are those in the general business terms of delivery. Specifications are subject to change without prior notice.
Reference
Download Manual:
MI-HEAT TP520 Programmable Thermostat Installation Guide
![]()
Leave a Reply