HW WiFi 2 Programmable THERMOSTAT
Menu Structure
- User setting
- WiFi Setting
- User setting
- Date
- Display
- Brightness
Advanced Setting
- Temperature Control
- Floor Protection
- Switch Differential
Heating Schedule
- View / Edit Schedule
- Advanced Setting
- Thermostat Info
- Time
- Screen Saver
- Room Sensor
- Calibration Adaptive
- Function Factory Reset
- Reset to Factory Schedule
- Heating Schedule
- Unit
- Child Lock
- Floor Sensor
- Calibration
- Open Window
General Operation
Congratulations on the purchase of your new Hotwire Floor Heating System. We know that you will love it for years to come. This manual outlines how to program your thermostat and connect to your WiFi. You can even connect to Google Home or Amazon Alexa. The thermostat can be programmed from the screen however it is much easier to use the App so we encourage you to download the “Smart Life” app. There are a variety of videos on our Website and YouTube channel to help with programming the thermostat and using the App. We know you will love being Hotwired!
Display symbols
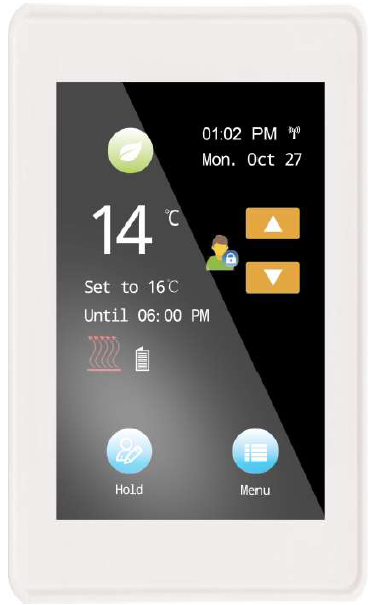
The function of the buttons and symbols shown on the home screen varies according to the chosen operating mode. Scheduled Operation home screen:
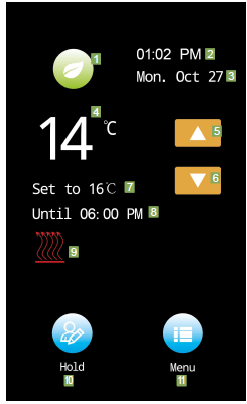
- Program Mode
- Time.
- Day.
- Current target temperature/setpoint.
- Tap here to increase the temperature.
- Tap here to decrease the temperature.
- Heating Schedule
- Heating Schedule
- Heating is activated
- Hold/Holiday
- Menu
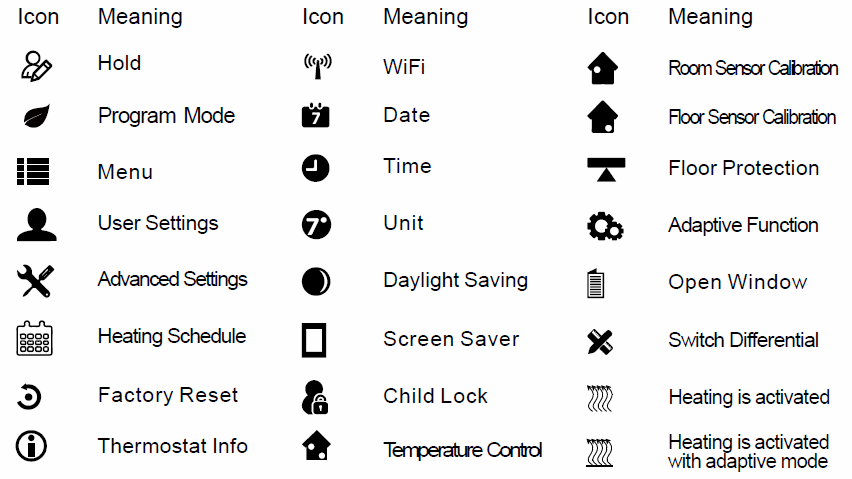
Icons
User Settings
Under User Settings, you can change the settings of the following items. Note: if an item is grayed out, it is not available due to other settings.
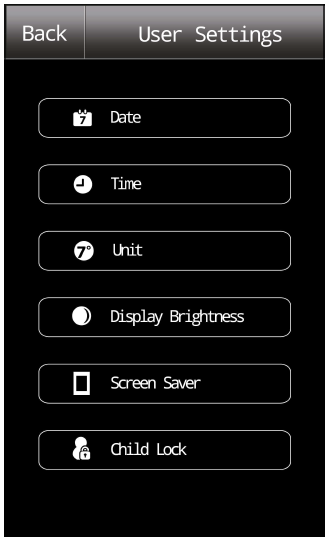
- Date
- Time
- Unit
- Display
- Brightness
- Screen Saver
- Child Lock
Date
This allows your screen to change the date.
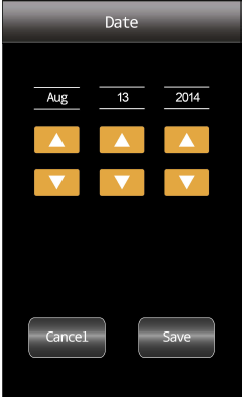
- Tap the “Arrow Up” or “Arrow Down” button to set the date, month, and year.
- Confirm your choice with “Save” or discard it with “Cancel”
Time
This allows you to change the time, which is used by the screen clock to control your heating schedule.
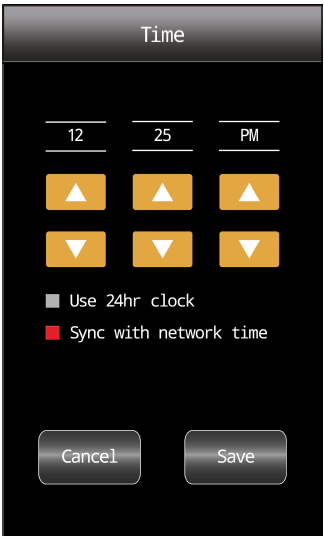
- Tap the Arrow Up or Arrow Down button to set the hours minutes and AM PM
- Tap the time format that you prefer.
- Use 24hr clock
- Sync with network time
- Confirm your choice with “Save” or discard it with “Cancel”
Unit
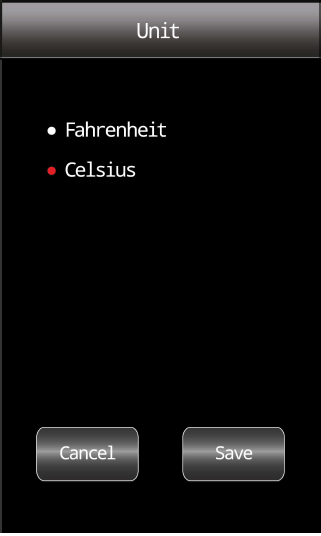
- Tap the unit that you prefer:
- Celsius
- Fahrenheit.
- Confirm your choice with “Save” or discard it with “Cancel”
Screen Saver
This allows screen you to select the time delay of the Screen Saver.
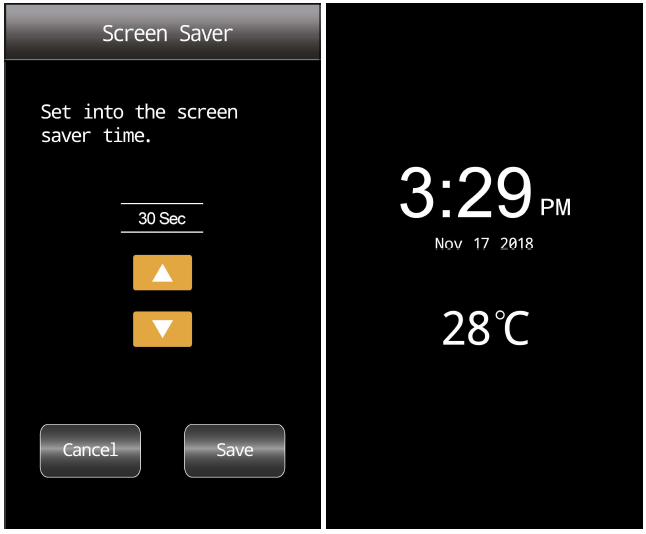
- Confirm your choice with or discard it with “Save” or “Cancel”
Display Brightness
This option allows you to change the brightness of the display.
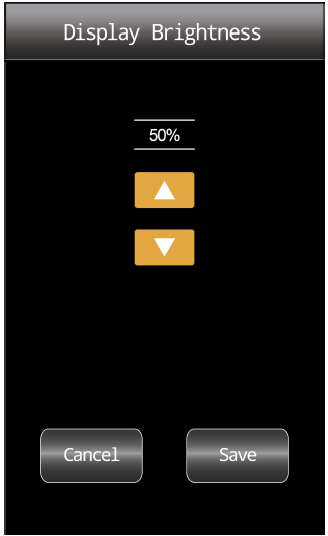
- Select one of the five levels of brightness using the Arrow Up or Arrow Down button
- Confirm your choice with “Save” or discard it with “Cancel”
Child Lock
The child lock prevents children and others from tampering with the thermostat and changing any of its settings.
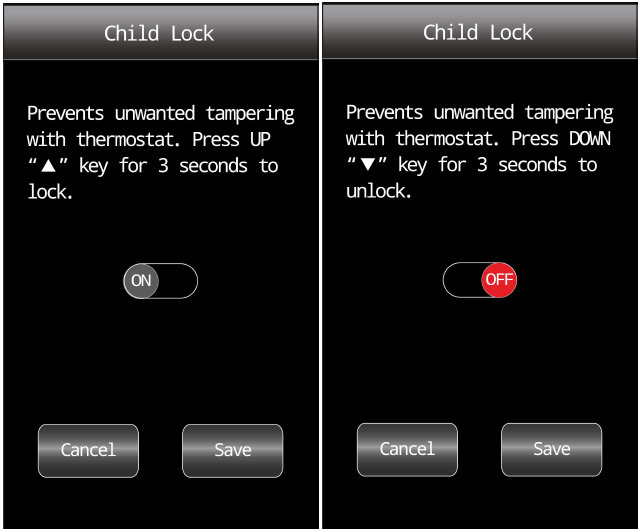
- Tap the OFF/ON button to the setting that you prefer
- Confirm your choice with or discard it with “Save” “Cancel”
Temperature Control
This allows you to choose which sensor is used to control the screen the heating system
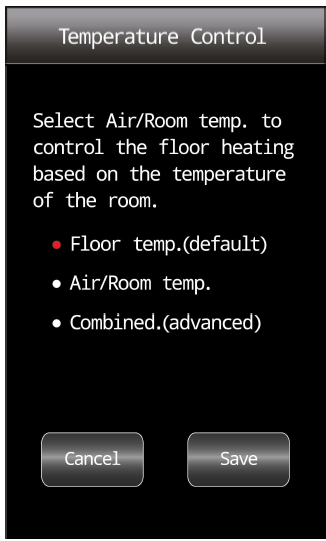
- Floor: With this setting, the floor sensor controls the heating system.
- Room/Floor Protection: With this setting, the room sensor built into the thermostat controls the heating system while the floor sensor limits heating according to the temperature limits set under
- Menu/Advanced Settings/Floor Protection. Room: With this setting, the room sensor built into the thermostat controls the heating system.
Note! Floor Protection is not active while using the Sensor Application“Room”.
Advanced Settings
Under Advanced Settings, you can change the settings of the following items.
Note: if an item is grayed out, it is not available due to other settings.
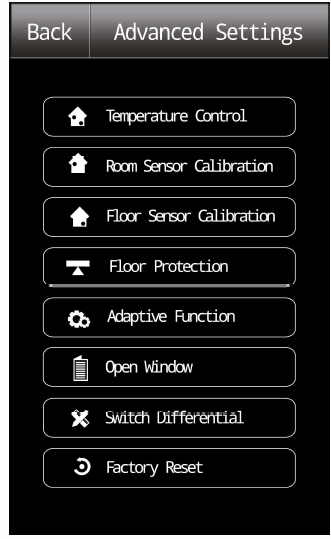
- Temperature Control
- Room Sensor
- Calibration
- Floor Sensor
- Calibration
- Floor Protection
- Adaptive Function
- Open Window
- Switch Differential
- Factory Reset
Floor Sensor Calibration
This option allows you to calibrate the floor sensor.
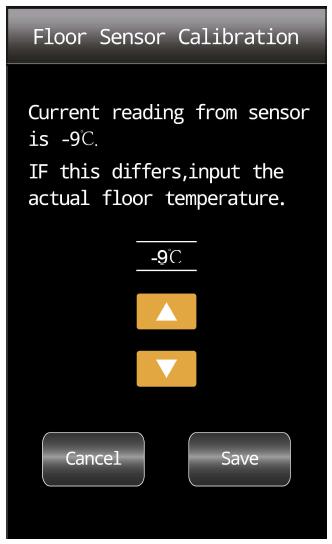
- Use the “Arrow Up” or “Arrow Down” button to set the floor temperature actually measured
- Confirm that you want to calibrate the sensor with “Save” or cancel with “Cancel”
Floor Protection
This option ensures that the floor temperatures are kept within range.
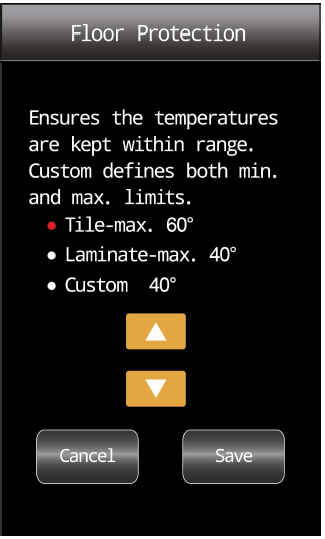
- Choose the floor protection which is relevant for your floor.
- If Custom is chosen you must define minimum and maximum temperatures for the floor
- Use the Arrow Up or Arrow Down buttons to set the minimum and maximum temperatures
NOTE
If the maximum floor temperature is set too high-temperature sensitive floor types may be permanently damaged
Adaptive Function
With this feature enabled, the room will already have reached the target/setpoint of the temperature at the beginning of a scheduled event.
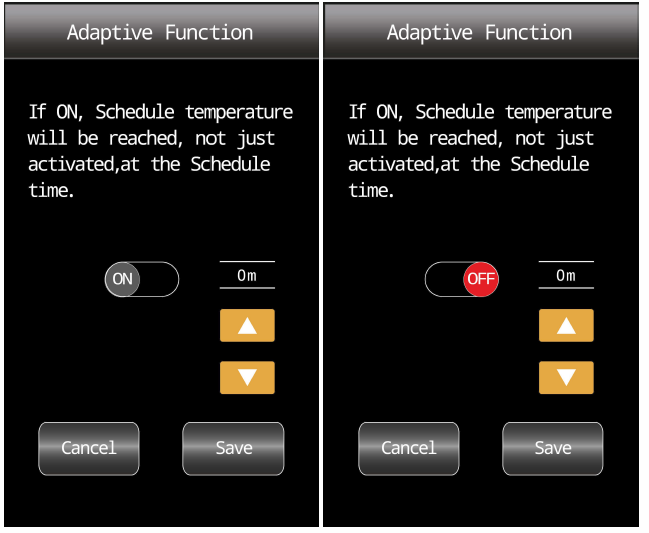
- Tap the OFF/ON button to the setting that you prefer
- Confirm your choice with or discard it with “Save” or “Cancel”
Open Window
The thermostat can detect an open window by registering a rapid drop in temperature. With the function enabled, the thermostat shuts off the heating for 30 minutes if an open window is detected.
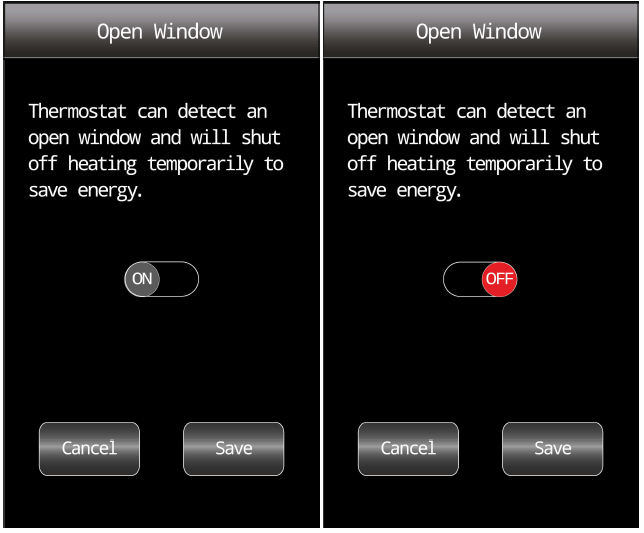
- Tap the OFF/ON button to the setting that you prefer
- Confirm your choice with or discard it with “Save” or “Cancel”
Switch Differential
This option allows you to change the switch differential.
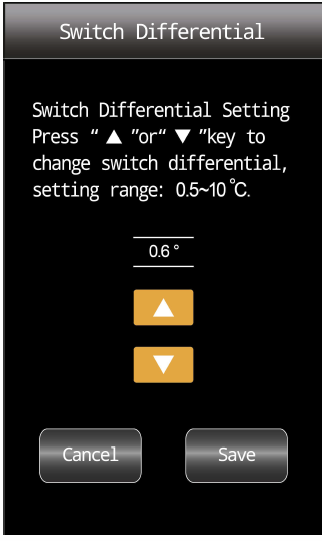
- Use the “Arrow Up” or “Arrow Down” button to set the switch differential range.
Factory Reset
This option allows you to restore the thermostat to factory settings Note This action cannot be undone and all of your personal settings will be lost
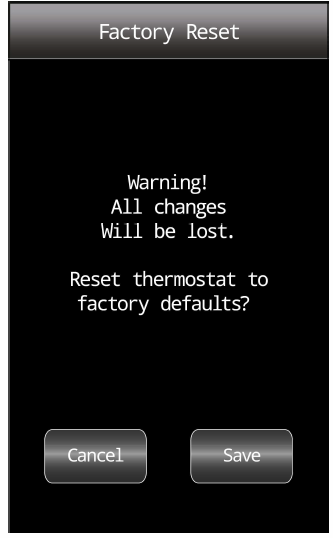
- Tap Reset Thermostat if you want to restore the factory settings
- A confirmation screen will be displayed. Factory Reset
Note! All personal settings will be lost.
Heating Schedule
The heating schedule allows you to control the temperature automatically according to a programmed schedule of your choice
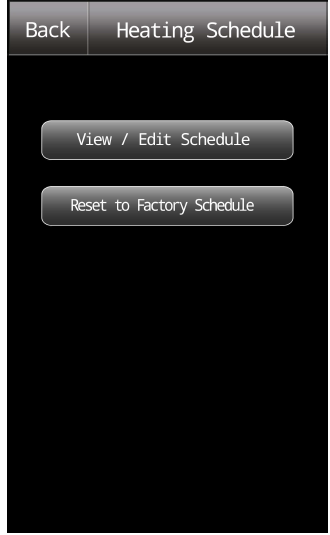
- Tap the View/Edit Schedule “ ” button to access the various schedule options.
- Tap the “Reset to Factory Settings” button if you want to restore the factory settings.
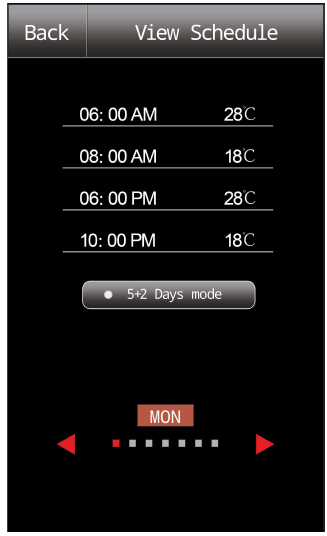
Heating Schedule 1/2
This screen consists of a list of four events. The first event is the time you want your floor heating to turn on the in the morning. The second will turn it off in the morning. The third and fourth events will control the evening timing. The temperature set at the second and fourth events is a setback temperature. ie This temperature will be maintained even if the floor heating is off. Generally, you should set this temperature to a minimum. This will ensure your heating will not switch on outside the programmed times. Press the 5+2 button to toggle between programming each day separately or having weekdays as one setting and weekends at different times. Press the right arrow to change the day(s) you are programming.
Room Sensor Calibration
This option allows you to calibrate the room sensor.
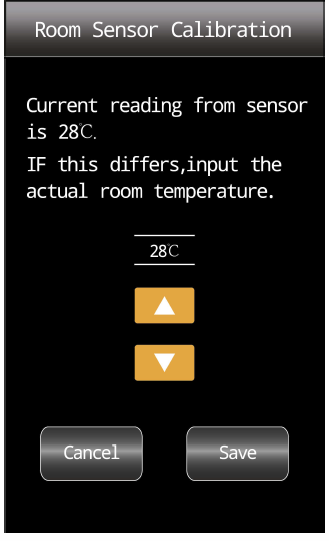
- Use the “Arrow Up” or “Arrow Down” button to set the room temperature actually measured.
- Confirm that you want to calibrate the sensor with “Save” or discard with” Cancel”. If the temperature is confirmed with “Cancel”, a confirmation screen will be displayed briefly
Heating Schedule 1/2
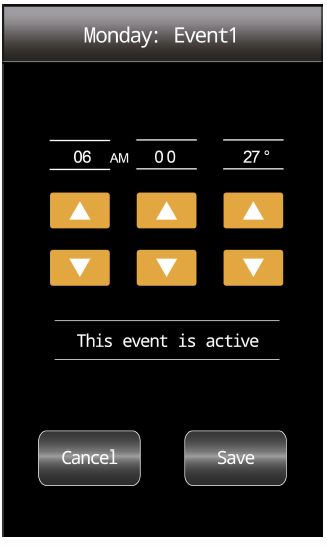
- To change the start time for the event, tap the “ Arrow Up” and “ .Arrow Down” buttons
- To change the temperature for the event, tap the “Arrow Up” and “Arrow Down” buttons.
- To toggle between the event being active or inactive tap The event is active or The event is an inactive button
- The text shown on the button reflects the current activity status of the event
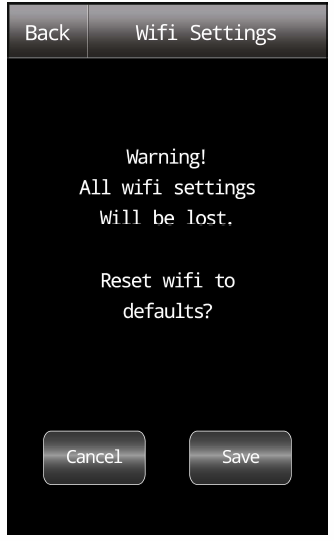
WiFi Setting
Hold Operation Adjust
Allows you to maintain the displayed target temperature/setpoint or a Manual Override for longer than just the next event change or for a specific time period. You can use the “Hold” option to specify the length of time the displayed target temperature/setpoint should last. When the set time period has elapsed, the thermostat will automatically revert to Scheduled Operation.
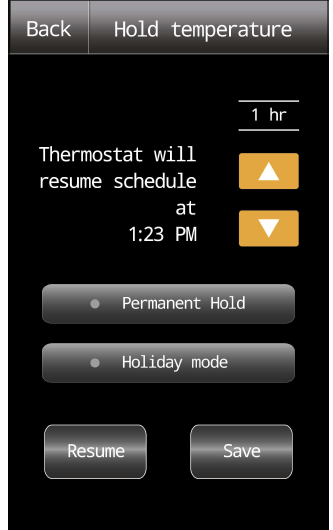
- Permanent hold
- Holiday model
WiFi Connection
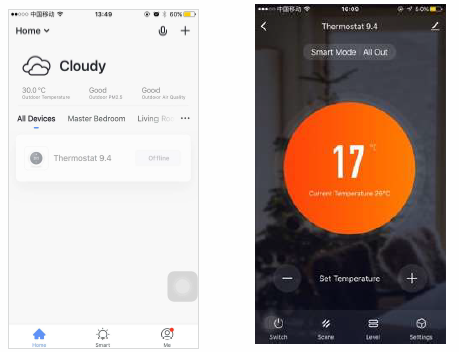
Step 1: Scan the QR code through a browser or download the APP from the major application markets to install it. Simply search for, “Smart Life”. You can also control your Hotwire Floor Heating via Your Google Home or Amazon Alexa. Once the app is downloaded and connected simply press the relevant button. There are full-step thorough videos on our YouTube channel.
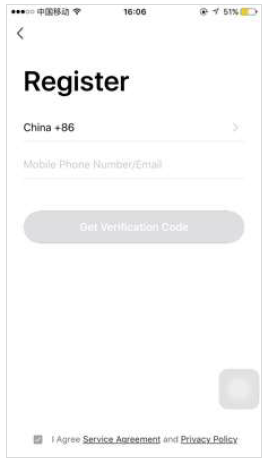
Step 2: Click the APP, and log in through the registered phone number or email address.
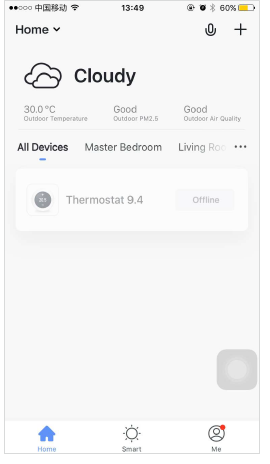
Step 3: Click Add Device at the bottom of the screen.
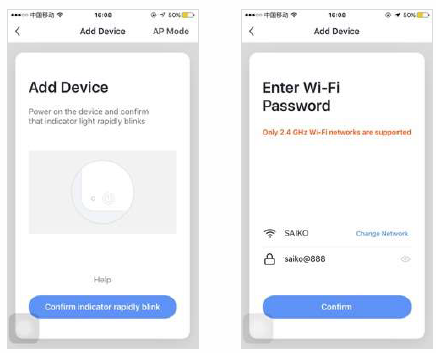
Step 4: Check the thermostat WiFi is flashing. f not, operate the thermostat according to the APP tips until it flashes quickly. Click the Make sure WiFi is flashing quickly” button.
Step 5: Fill in the phone with the WiFi network password, and click “confirm.
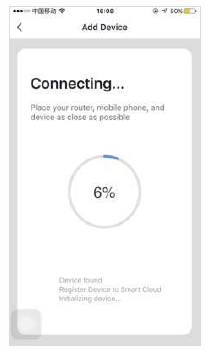
Step 6: Click “Done after the APP is connected to the thermostat successfully.
 Step 7: You can check the real-time temperature, and make some basic adjustments on the main screen.
Mounting steps 2/2
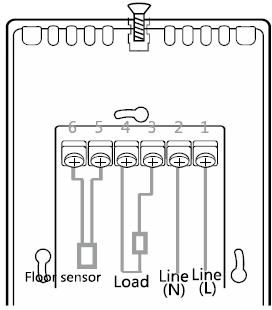
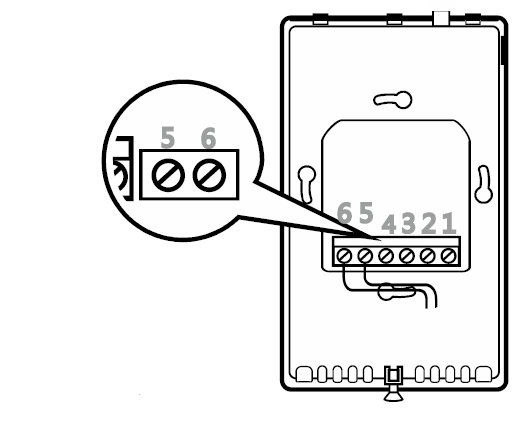
- Connections on the power base. ace small strips of electrical tape over terminals to prevent contact with ground wire.
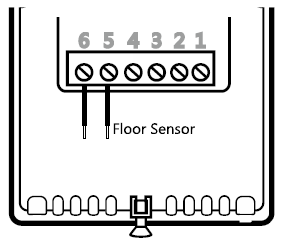
- The floor sensor must not come in contact with electrical wires in the wall and must be routed outside the electrical box. Thread the floor sensor through a hole in the power base. Push electrical wires to the back of the electrical box.
- Push the power base into the electrical box. Secure power base to the wall
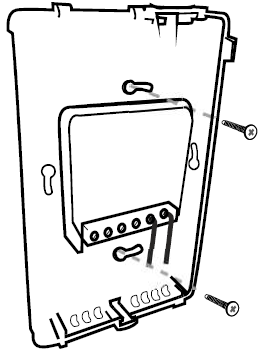
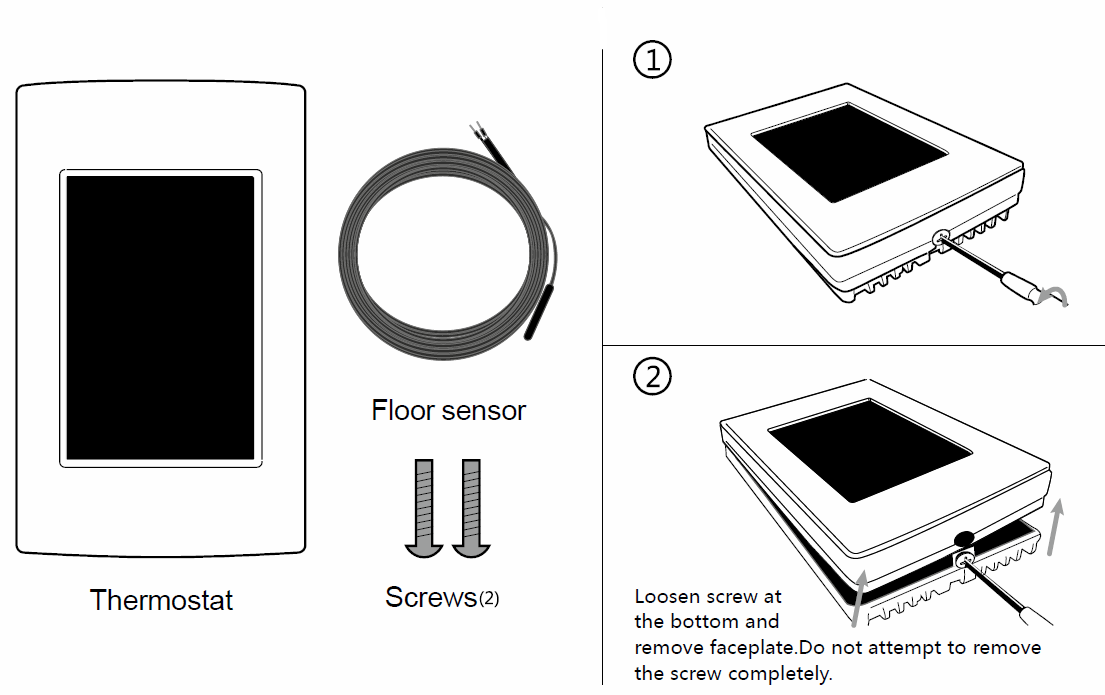
- Make sensor connections. Remount faceplate.
Mounting steps 1/2
Reference
Download Manual:
Hotwire HW WiFi 2 Programmable THERMOSTAT INSTRUCTION MANUAL

Hotwire HW WiFi 2 Programmable THERMOSTAT INSTRUCTION MANUAL