Hotowell HTW-31-KT19T Wireless Thermostat
General
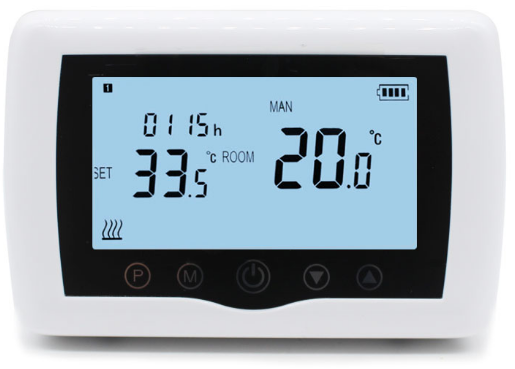
HTW-31-KT19T wireless thermostat(Transmitter) is used in heating-only or cooling-only systems to maintain selected room temperature. The controller acquires the room temperature with its integrated sensor and maintains the set point by delivering control commands.
Functions
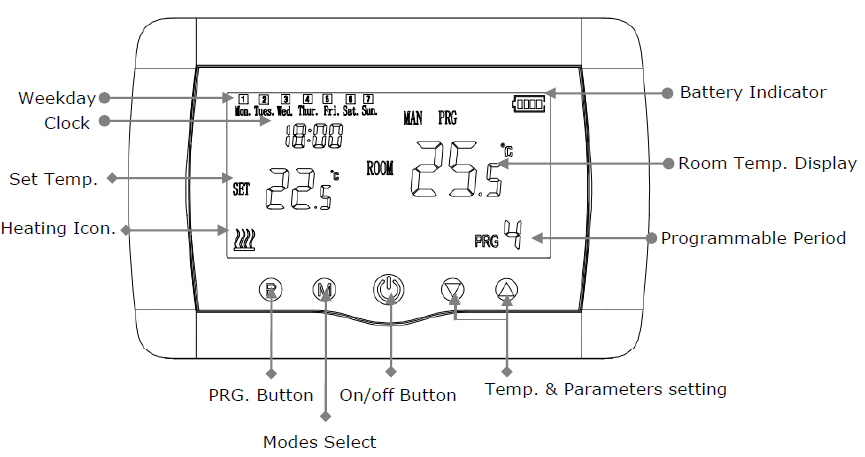
- The large display can be clearly read with the background lighting.
- Four buttons make it easy to use.
- MAN Mode and PRG. Mode
- 4 periods of each day programmable(5+1+1)
- The display shows the set temperature as well as the measured temperature, and time.
- Temperature display in degrees Celsius.
Technical Data
- Thermostat operating voltage: 2 x AAA, alkaline batteries.
- Frequency: 868Mhz/433Mhz
- Channel selection: By programming the thermostat and the receiver.
- Switching options: 5+1+1
- Temperature settings: 5°C ~ 30°C, 0.5°C increments.
- Accuracy: +/- 0.5°C
- Thermostat dimensions: Surface mounted, 135mm x 87.5 mm x 23.2mm.
- Color: White
- IP protection rating: 30.
- Certification: CE/RoHS
PRG Schedule Setting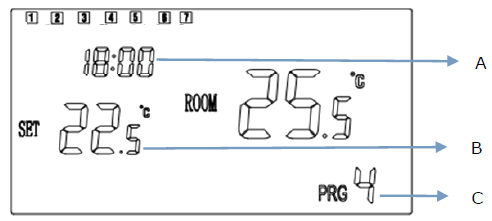
The weekday is fixed from Monday to Sunday(1~7), and each day has 4 periods(1~4). Each press of the P button can into the next item setting. The time and temperature of each period can be set in the following steps.
- Press P and hold for 3 seconds, press the P button three times to skip clock adjust, then the time display flash (A), and change the value of the up and down buttons. each press is 15mins
- Press the P button, the temperature display flash(B), and change the temperature with the up and down buttons.
- Press the P button to the next period (C).
- The other period settings follow the same way.
Example:
| Monday to Friday | Saturday | Sunday | ||||||||||
| Period | 1 | 2 | 3 | 4 | 1 | 2 | 3 | 4 | 1 | 2 | 3 | 4 |
| Time | 6:30 | 8:00 | 18:00 | 22:30 | 8:00 | 10:00 | 18:00 | 23:00 | 9:00 | 12:00 | 19:00 | 0:00 |
| Temp. | 21°C | 18°C | 21°C | 16°C | 21°C | 21°C | 21°C | 16°C | 23°C | 21°C | 16°C | 21°C |
Clock Adjustment
- Long Press the P button for 2-3 seconds
- You will see the 00:00 hour information. Set the minute with up and down buttons. Proceed with the P button.
- Set the hour with up and down buttons.
- Proceed with the P button.
- Select the day with up and down buttons.
- Proceed with the P button.
- Save your settings by pressing the ON/OFF button or wait about 15 seconds.
Temp Calibration
If the temperature on the display does not agree with the room temperature effectively measured, the temperature sensor can be recalibrated. For that purpose, long press the M button for 2 seconds when the controller is off. Then, the temperature displayed can be changed by a maximum of +/- 8 °C by pressing the up and down buttons. Five seconds after the last push of a button, the controller will automatically return to off status. Or, the controller will return to the main display by pressing the “On/Off” button.
Code Pairing & Code Unlink(If With)
- At control centre(HTW-31-X8 ), press KEY button(K1-K8), indicator flashing
- On the thermostat, turn off the thermostat, and hold the “SET” button for 3 seconds, it will show the code on display, then press the “SET” button again, until the indicator on the control center (LED1-LED8) stops flashing, code pairing finish.
- You can check if the thermostat and HTW-31-X8 work fine by setting the temp higher than room temp, then the system should start heating, when heating, the LED on HTW-31-X8 will be on, which means the corresponding actuator is working now. ID Pair success.
- If you want to unlink the thermostat and HTW-31-X8 channel, you can power off HTW-31-X8, then power on the HTW-31-X8 and long press the channel KEY button within 1 minute, when you see that Channel on and off, the unlink success.
Installation
For portable use, the HTW-31-KT19 foot pod must be installed to control the unit as can be seen in the figure below.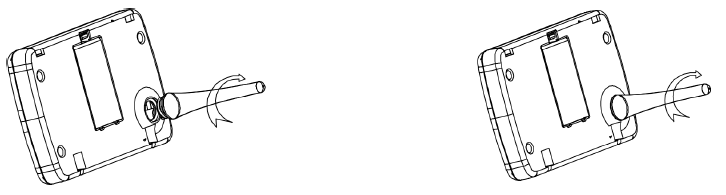 For wall mounting, first, the wall bracket should be mounted on the wall, then the control unit and the wall bracket must be fitted as shown in the following figure.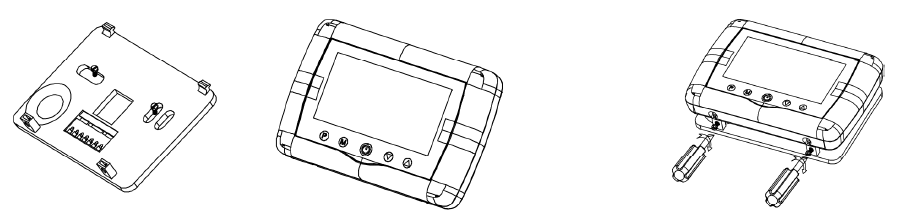
Dimensions
Unit: mm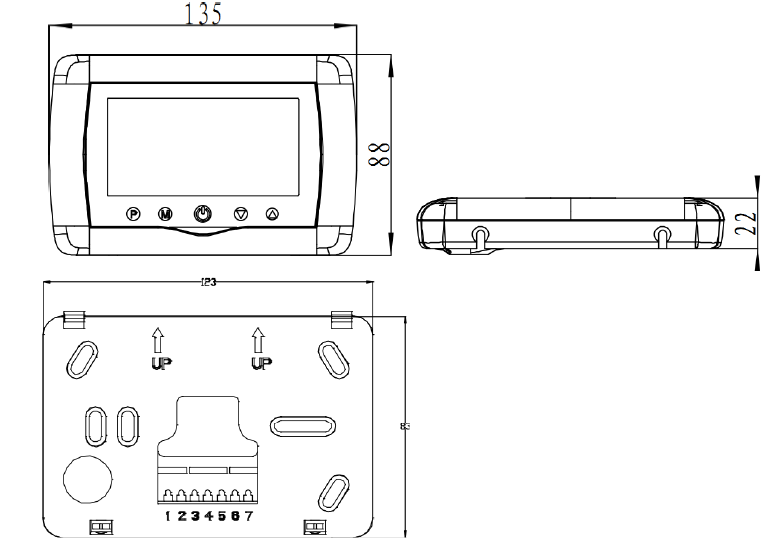
Reference:
DOWNLOAD MANUALS:
Hotowell HTW-31-KT19T Wireless Thermostat User Manual
