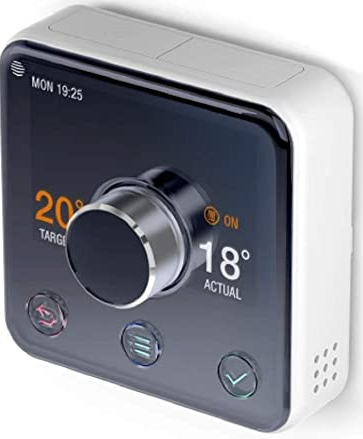
HIVE B011B3J6B8 Active Heating Thermostat
Here’s what you’ll need to install Hive Active Heating.
- A working as central heating system
- An existing broadband connection with a spare Ethernet port
- An Android or Apple smartphone to control your heating via the app or an up-to-date web browser.
Installation order
For quick and efficient setup install Hive Active Heating in this order
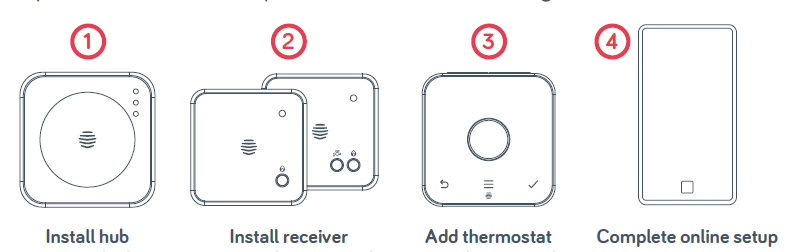
The Hive Hub
If you already have a Hive Hub just put it into pairing mode. To do this press the button at the rear of the hub for a second and release it. The middle light should now flash AMBER showing it is in pairing mode. Then move on to sta e . If you are not installing a hub just now skip to step.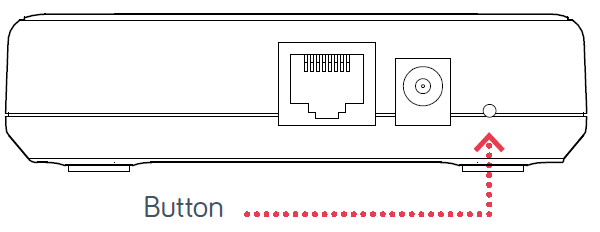
Installing your hub
To install the hub, there must be a broadband connection with a spare network port and a power socket must be nearby. Once this has been located, connect the hub as follows
-
- Connect the hub to the household’s broadband router using the network cable provided.
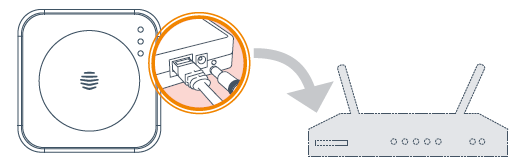
- Fit the power cable into the hub and plug it into a power socket.
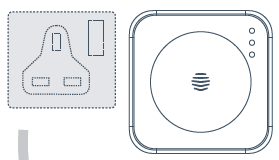
- Wait for the middle light to flash AMBER. During start-up the GREEN li ht will flash, followed by the AMBER li ht. This usually takes 5-10 minutes.
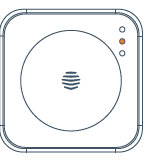
- Connect the hub to the household’s broadband router using the network cable provided.
Connecting the hub
Once the AMBER light is flashing the hub is set up and you can move on to installing the receiver. If no lights are displayed immediately after the hub has been turned on, check all cables are connected and the power socket works. If the problem still persists contact Hive Technical Support.
Hub lights and what they mean
| Colour | Pattern | What does this mean? | Notes |
| GREEN | Flashing | Installation and start-up. The hub is attempting to connect to the Hive servers and update itself. | Do not disconnect the hub.
If flashing continues after 15 minutes, contact Hive Technical Support to confirm that it has connected. |
| AMBER | Flashing | Installation. The hub is actively seeking to connect to the receiver and thermostat. | The hub will search for devices for 2 hours at a time. It will then pause, and show solid AMBER. |
| AMBER | Solid | Installation. The hub has paused its search for other devices. | To restart the search, simply turn the hub off then on. The AMBER flashing light should then return. |
| GREEN | Solid | Normal operation.
The hub is connected. |
This happens once the hub, receiver and thermostat are all installed and synchronised. |
| RED | Solid or
Flashing |
Error. The hub has failed to connect to the Hive servers. | Check that the hub is plugged in and that the broadband is working. If the problem persists, call Technical Support. |
The receiver
- Before fitting isolate the mains electricity supply to the central heating system. Confirm it is isolated and secured in the off position for the duration of the installation. Remember to always follow appropriate safe electrical isolation procedures and test to confirm that the supply is isolated before touching any electrical connections.
- This product should only be installed by an electrically skilled person competent in the installation of electrical accessories. The wiring must comply to the current edition of BS7671 (The IET Wiring Regulations), and the appropriate Building Regulations or Standards in place.
- The Hive receiver is double-insulated so doesn’t need an earth connection. You’ll find a tether on the backplate to secure an earth wire if needed.
This product is designed for fixed wiring installation only. It must be supplied via a switched fused spur with a minimum contact separation of 3mm (both live and neutral) and fitted with a 3A fuse.
Installing the correct receiver
Hive Active Heating has two types of receiver
-
- Single channel receiver for combi boilers and additional plumbed heating zones
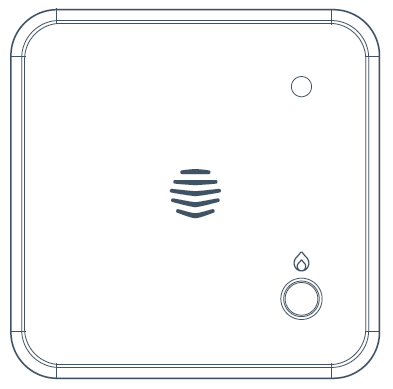
- Dual channel receiver for conventional boilers with hot water tanks
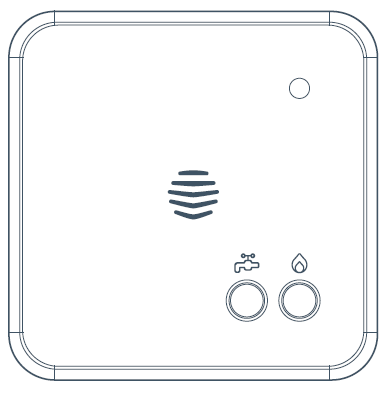
- Single channel receiver for combi boilers and additional plumbed heating zones
Wiring labels
Use the labels provided and attach them to the wires to help you remember which one is which during the installation
Installing the receiver
You should fit the receiver in a convenient location close to the boiler or central heating system. Make sure it’s at least cm away from lar e metal objects, such as a boiler or hot water cylinder, to avoid interference with radio signals. Take care to avoid any cables and pipes that may be buried in the walls. Once you’ve found a suitable location, install the receiver as follows:
-
- Loosen the screws on the underside of the receiver and remove the backplate by pulling the bottom of it away from the front panel
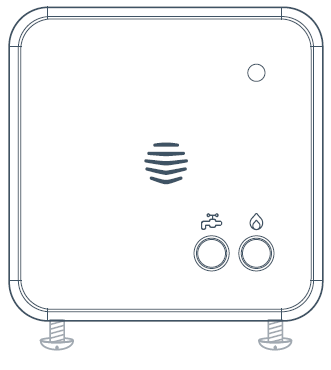
- Fix the backplate to the wall with the terminals at the top.
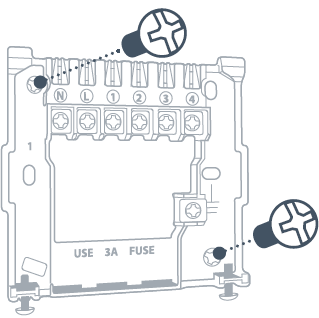
- Run a cable from the boiler or wiring center (if required), then continue on to the next section to wire up the backplate
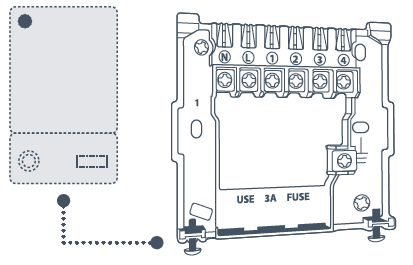
- Loosen the screws on the underside of the receiver and remove the backplate by pulling the bottom of it away from the front panel
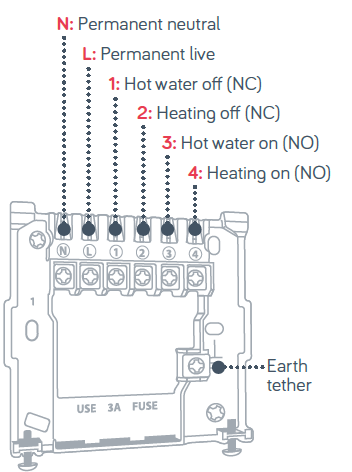
2b – Single channel receiver wiring!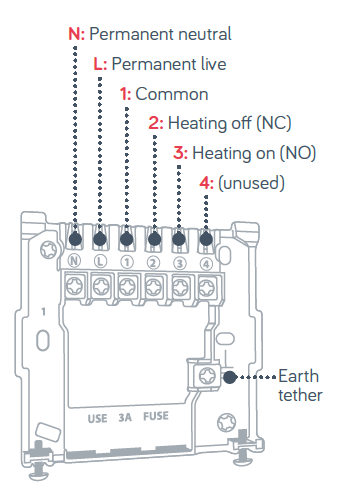
2b – Dual channel receiver wiring!
Testing the boiler
- Visually check the wiring! to confirm that the connections have been carried out correctly, referring! to the labels on the wires and any photos graphics took before the replacement bean
- Confirm that the receiver’s front panel is in place and that it is safe to commission the boiler
- Check the middle light on the Hub is flashing Amber – if it isn’t, !o back to step 1
- Restore power to the central heating! system – the receiver’s status light should flash AMBER. This means it’s ready to connect to the hub and thermostat
- Test the receiver’s wiring to the heating! system by pressing the Central heating button. The GREEN light the Central heating the button should come on and the boiler should fire up.
- Once you’ve completed these tests, leave the receiver switched on with the status light flashing – this means it’s ready to connect to the hub and thermostat. Next, install the thermostat.
Important information: Replacin! existing! controls
If there’s an existing single zone timer or a wireless receiver, you should replace it with the Hive receiver. Hive receivers are backplate compatible with a number of common boiler controls that may already be fitted in the home. If the exists! the controller doesn’t have a compatible backplate, remove it completely and wire in the Hive receiver in its place. If needed you can use a stand-off plate (SP, supplied separately) to create space to accommodate existing wiring or use a decoration plate (DP) when replacing a larger controller. If the exists controller does have a compatible backplate, simply remove the front panel of the existing controller and snap the Hive receiver front panel on in its place.
- Single channel receiver compatibility: WR1 receiver, UT2, and EMT2 timers
- Dual channel receiver compatibility: UP2 and EMP2 pro!rammers
Important information: Replacin! an existing thermostat
If you’re replacing! an existing! wired thermostat, you should ensure that the pre-existing! wires and connections are made safe. This can be achieved by disconnecting! or briding out the wired thermostat in the wiring center or boiler. Where cables are left at the wireless thermostat position, they should be housed and terminated within an enclosure to prevent access. If you’re replacing! an existing! wireless thermostat, decommission it by detaching it from the wall and removing its batteries.
Gravity-fed and part-pumped systems
Gravity-fed and part-pumped systems are wired differently to standard boilers. With these, the hot water relay switches on the boiler, whilst the heating relay opens a valve, operates a pump, or both, to divert hot water to the heating If you are installing into a gravity-fed or part-pumped system, complete the wiring and then switch the Hive receiver to ‘gravity-fed’ mode as follows:
- Switch off the power to the boiler and receiver
- Wait at least 5 seconds, then switch the boiler and receiver back on
- Press and hold the hot water button for at least 10 seconds
- The receiver status light will flash BLUE for 3 seconds when entering ‘gravity-fed’ mode. Or GREEN for ‘fully pumped’ mode. Fully pumped mode is the default for new devices.
Important information: Multizone receiver installation
If you’re installing Hive Multizone, you’ll need to install all the receivers before proceedin to the next step
Six single-channel receivers
One dual-channel and five single-channel receivers

Important information: Stand-alone installation
For Hive Active Heatin! a hub, a receiver and a thermostat are installed. When this service hasn’t been bou!ht, the thermostat and receiver can also be installed without a hub. This is known as ‘stand-alone’ mode. Follow the steps in the next section if the thermostat and receiver are in! to be installed without a hub in ‘stand-alone’ mode (where Hive Active Heatin! hasn’t been purchased). In ‘stand-alone’ mode the thermostat acts as a standard wireless programmable thermostat without the remote heatin! control features and functionality of Hive Active Heating!.
Activation stand-alone mode
- Remove the batteries from the thermostat
- Switch off the boiler and receiver
- Wait at least 5 seconds, then turn the boiler and receiver back on.
- The receiver’s status li! ht will be! in to flash AMBER
- Press and hold the heat! button for at least 10 seconds – until the status li! ht be! ins to flash WHITE. The receiver is now in ‘stand-alone’ mode and is searching for a thermostat
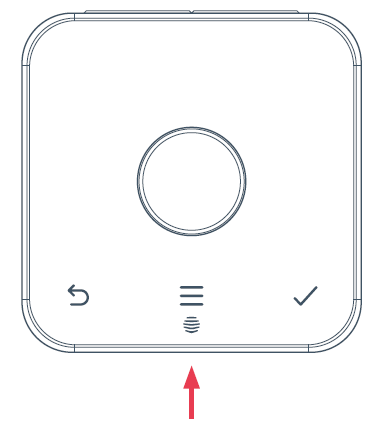
- Insert the batteries into the thermostat, press and hold down the menu
 and back
 buttons on the thermostat and follow the factory reset instructions on the screen
 - After about 10 seconds, ‘Welcome’ and ‘Searchin!…’ will be displayed on the screen. If the thermostat shows ‘REJOIN’ then
To switch back to ‘remote heating mode:
- Switch the hub off and then on again. If it begins to flash AMBER continues on to step
- if all the lights of out and the hub does not flash AMBER, login to hivehome.com, open the ‘Devices’ page, and click ‘Add devices’.
- The hub should now begin to flash AMBER.
- Now follow steps 1-5 on page 19, but note that the lights will be different.
- At step 3 the receiver’s status light will initially flash WHITE/PINK and in step 4 it will change to AMBER (for ‘remote heating) once you have held the
 Central heating button down.
 - At any time you can check what mode the receiver is set to by switching it off and then on. When power is restored the status light will flash for 5 seconds –
- AMBER for Hive Active Heating WHITE for ‘stand-alone’ mode.
Receiver lights and what they mean
| Light | Colour | Pattern | Meaning | Notes |
| Central heating | GREEN | Solid | Heating is on. | |
| Central heating
|
GREEN | Flashing | Commands queued.
The receiver has received 2 or more commands to switch the boiler on or off within 1 minute. Or, Heating Boost mode with target temperature lower than room temperature. |
The Hive receiver protects the boiler from damage that may occur if it’s switched on and off very quickly. Once the boiler has been switched on (or off), it will not change state again for 1 minute as a protective measure. |
| Hot water
|
GREEN | Solid | Hot water is on. | This light is only present on dual channel receivers. |
| Hot water
|
GREEN | Flashing | Commands queued.
The receiver has received 2 or more commands to switch the boiler on or off within 1 minute. |
See ‘Central heating’. |
| Light | Colour | Pattern | Meaning | Notes |
| Status | GREEN | Solid | Normal operation. The receiver is connected to the rest of the Hive system and operating normally. | |
| Status | BLUE | Solid | The system is in
gravity-fed mode and is connected to the rest of the Hive system. |
See gravity-fed mode section of this manual on page 15. |
| Status | AMBER | Flashing | Installation. The receiver is trying to connect to other Hive devices. | The receiver will search for devices for 40 minutes at a time. |
| Status | WHITE | Flashing | The receiver is in stand-alone mode and is actively seeking to connect to a Hive thermostat. | The receiver will search for
a thermostat for 40 minutes. If no thermostat is found within this time it will stop searching and the status light will turn solid WHITE. |
| Status | AMBER
or WHITE |
Solid | Installation. The receiver has paused its search for other devices. | To restart the search, simply turn the receiver off and then on.
This will return it to the AMBER or WHITE flashing state. |
| Status | RED | Solid | Error. The receiver has lost its wireless connection to the thermostat. | Whilst in this state heating and hot water will default to off. They can be switched on manually by pressing the ‘heating’ and ‘hot water’ buttons on the receiver (hot water only available on dual channel receivers). For help call Hive Technical Support. |
- The receiver has lights on its front panel to show what it’s doing!
- A single-channel receiver has two lights – Status and Central heating!
- A dual-channel receiver has an additional light for Hot water. This is what the lights mean:
The thermostat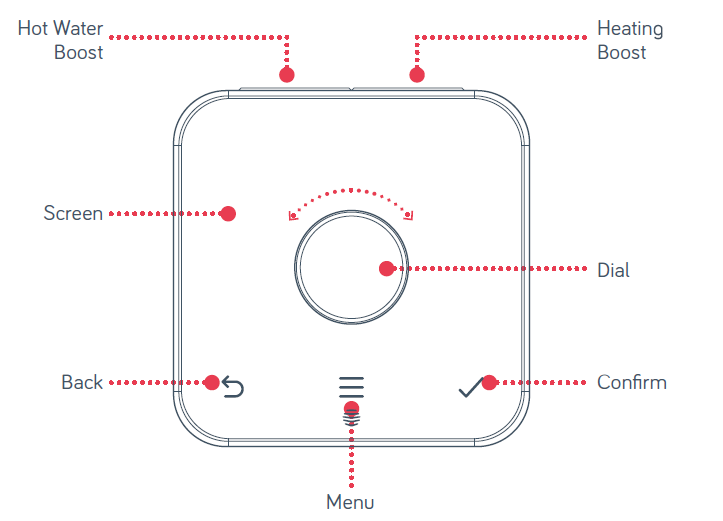
3a – Selecting a location for the thermostat
The thermostat should be fixed to an internal wall, 1.5m from the floor and away from heat sources that could affect its operation, such as radiators and areas in direct sunlight ht. To make accurate temperature reading s, the thermostat needs a free flow of air, so make sure it’s installed in an area not covered by curtains or similar objects. The thermostat should not be installed in the same room as a radiator that’s controlled by a thermostatic radiator valve (TRV). Installing the two in the same room may result in the central heating bein permanently on.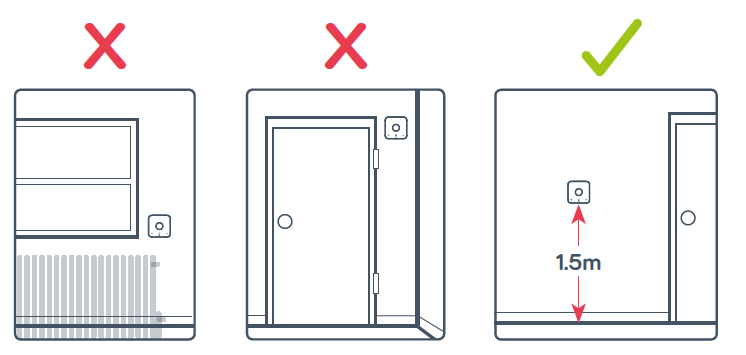
3b – Wall mounting the thermostat
- Remove the backplate of the thermostat by pressing the lever at the bottom and pulling away from the front of the device.
- Once you’ve found a suitable location, fix the backplate to the wall using the appropriate fixings.
- The backplate is desi need for 3.5mm/size 6 or size 8 screws. Be careful to avoid any cables and pipes that may be buried in the wall
Confirming the hub is ready to connect
Before inserting the batteries into the thermostat, check the hub is flashin AMBER – this means it’s ready to connect. If it is showing a solid AMBER li ht, turn it o! then on, and then switch the receiver and boiler o! and then on an ain too. The hub should then be in to flash AMBER and be ready to connect.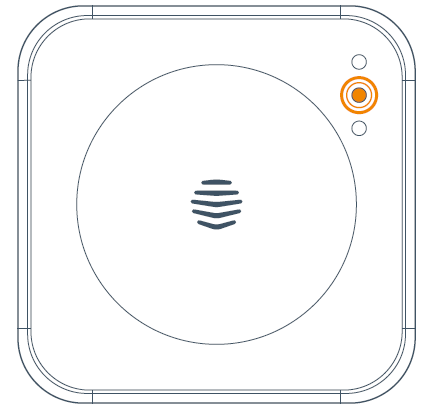
Insert the batteries and connect them to the hub and receiver
-
- The battery compartment is located at the back of the thermostat and is only accessible when the front of the thermostat is removed from the backplate.
- Insert the 4 x AA batteries provided. If you are installing Hive Multizone only insert batteries into one thermostat at a time.
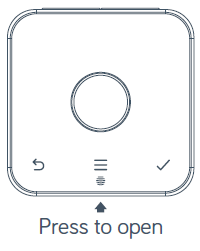
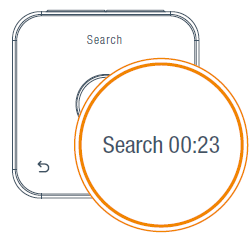
- The thermostat display will show ‘Search’ – meaning it’s searching for the hub and receiver. A timer will show how long the thermostat has been searching. If this lasts for longer than five minutes contact Hive Technical Support and they will diagnose any problems
-
- The receiver will display a solid GREEN status li ht or a BLUE li ht if it’s in gravity-fed mode. If installing Hive Multizone the status li ht will o GREEN on one receiver only. This is correct as the batteries should only be inserted into one thermostat at a time.
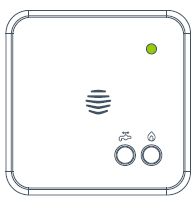
- The thermostat will then o onto the ‘Welcome’ pa es and a solid GREEN li ht will appear on the hub.
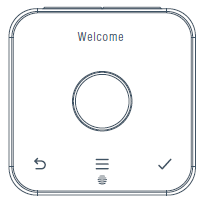
- The receiver will display a solid GREEN status li ht or a BLUE li ht if it’s in gravity-fed mode. If installing Hive Multizone the status li ht will o GREEN on one receiver only. This is correct as the batteries should only be inserted into one thermostat at a time.
Final steps
Installation is almost complete. All that’s left to do is:
- Hook the thermostat onto the backplate and click it in place
- Remove the screen protector from the front of the thermostat
- Confirm the system is properly configured by checking
- The thermostat is displaying room temperature
- The receiver’s status lights is solid GREEN or solid BLUE
- The hub has solid GREEN lights
Controlling your thermostat remotely
- Download the Hive app
- Login using! the email address and password you registered with
- Select ‘Hub’ then enter the hub ID when prompted. This is the ABC-123 formatted number on the underside of the hub
- Once the hub ID has been entered, the setup is complete and you’ll land on your Hive dashboard
- Tap on your thermostat to control it remotely.
Multizone
Important note:
Hive Multizone is not compatible with Nano 1 hubs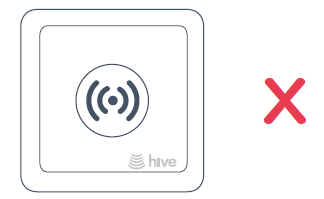
Addin additional heating zones
If you’ve not done so already, install all additional receivers and power them up. For new receivers, their status lights should be double flashing AMBER. Please see pa e 16 for more information on receiver installation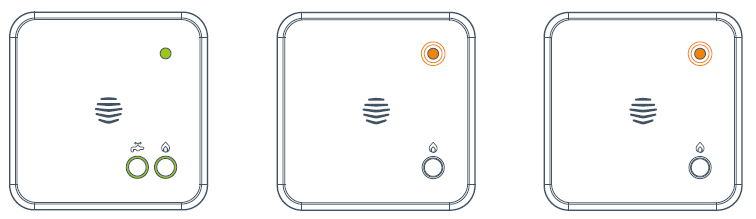
Using the hub
- Press the button at the rear of the hub for 1 second and release it. The middle LED should start to flash AMBER
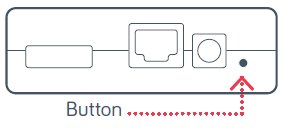
- Now add the batteries to one new thermostat
- Wait until the thermostat display stops showing ‘Search’. Now check that the status light on one of the receivers that were previously flashing AMBER has turned solid GREEN
- If there are still more zones to install, repeat steps 2-3
- When all zones have been added, press the button on the rear of the hub to exit from pairing mode. The middle LED will stop flashing
Using the Hive app or online dashboard:
- Please note, if installing Hive Active Heating to a hub that is already connected to other Hive products, you must use the button on the back of the hub to install the first zone. Any additional zones can be added through the Hive app or online dashboard using the steps below.
- Download the Hive app or to hivehome.com
- Login using the email address and password you registered with OR If you haven’t already a Hive account, tap ‘Create Account’ on the app Login screen or create one at hivehome.com/re!ister. Once you’ve created your account then you’ll need to lo! in.
- If prompted to do so, enter the hub ID – this is found on the underside of the hub, for example, ABC-123
- S elect menu in the smartphone app or setting on the website
- Select Install Devices, then select Add Heatin! Zone and follow the on-screen instructions.
Can we help?
You can view our handy how-to-use videos along with hints and tips at hivehome.com/support
Need help?
- If you’re a qualified professional installing
- Hive Active Heating yourself and need any help during the installation process, just visit our technical support pa e at hivehome.com/installation
- If you need further help, you can email our support team at [email protected]
REFERENCE
DOWNLOAD MANUAL
HIVE HAH2INSTAMZ-01 Active Heating Thermostat User Guide