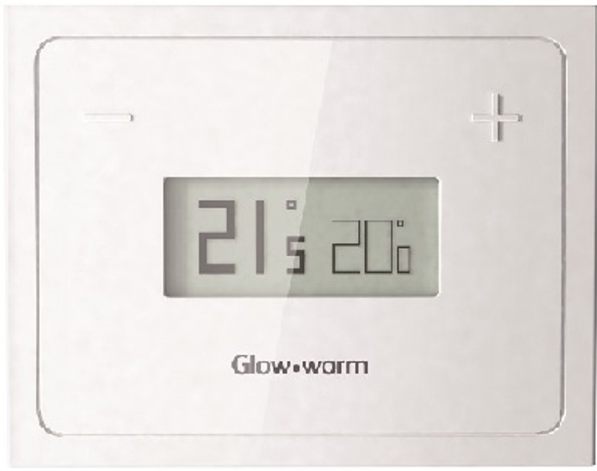
Glow-Worm Migo Smart Thermostat
Safety
Classification of action-related warnings
The action-related warnings are classified in accordance with the severity of the possible danger using the following warning signs and signal words:
Warning symbols and signal words
- Danger!
Imminent danger to life or risk of severe personal injury - Danger!
Risk of death from electric shock - Warning.
Risk of minor personal injury - Caution.
Risk of material or environmental damage
Intended use
In the event of inappropriate or improper use, damage to the product and other property may arise.
The Glow-worm Migo controller controls a heating installation with a Glow-worm boiler with an eBUS interface in a way that is weather-controlled and time-dependent.
In addition, the hot water generation from a connected domestic hot water cylinder can be controlled.
Operation is permissible with the following components and accessories:
- Domestic hot water cylinder (conventional)
Intended use includes the following:
- observance of the operating instructions included for the product and any other system components
- compliance with all inspection and main-tenance conditions listed in the instruc-tions.
Safety
- Intended use also covers installation in ac-cordance with the IP class.
- The use of the product in vehicles, such as camper vans and caravans, is not classed as intended use. Units that are not classed as vehicles are mobile homes or those that are installed in a fixed and permanent location (known as “fixed installation”).
- Any other use that is not specified in these instructions, or use beyond that specified in this document shall be considered improper use. Any direct commercial or industrial use is also deemed to be improper.
Caution
Improper use of any kind is prohibited.
General safety information
Installation by competent persons only
Only an approved competent person is permitted to carry out installation, inspection, maintenance and repair work on the product.
Danger caused by improper operation
Improper operation may present a danger to you and others, and cause material damage.
Carefully read the enclosed instructions and all other applicable documents, particularly the “Safety” section and the warnings.
Notes on the documentation
Observing other applicable documents
- You must observe all operating instructions enclosed with the system components.
Storing documents
- Keep this manual and all other applicable documents safe for future use.
Applicability of the instructions
These instructions apply for the following only
| Description | Article number |
| Migo | 0020197229 |
Product description
The product controls the heating installation in a way that is weather-controlled and time-dependent using a Glow-worm boiler with an eBUS interface and the hot water generation of a connected domestic hot water cylinder
Conditions: Heating
- You can use the product and associated app to set a desired temperature for a room for different times of the day and for different days of the week.
- The product is a weather compensator.
- The product receives the current outside temperature via the Internet connection. When the outside temperature is low, the product increases the flow temperature of the glow worm heating installation.
- If the outside temperature increases, the product lowers the flow temperature. The product therefore responds to the fluctuations in the outside temperature and uses the flow temper-ature to ensure that the room temperature remains constant at the set desired temperature.
Conditions: Hot water generation
- You can use the product and associated app to set the tem-perature and time period for the hot water generation.
- The heat generator heats the water in the domestic hot water cylinder until it reaches the set temperature.
- The time period defines when hot water should be ready in the domestic hot water cylinder.
Design of the product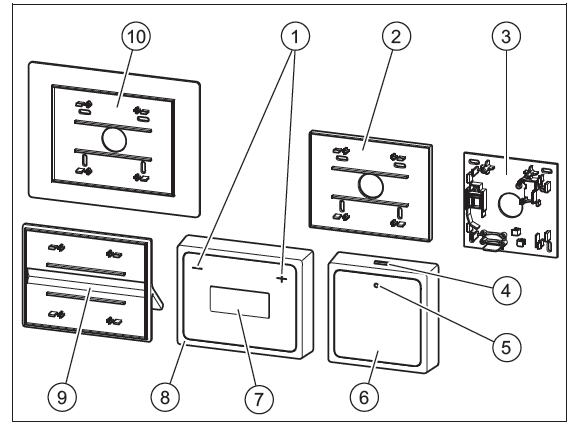
- – and + buttons
- Small wall socket: Thermostat
- Wall socket: The communication unit
- Bluetooth button/comfort protection mode button
- Status LED
- Communication unit
- Display
- Thermostat
- Product stand
- Large wall socket: Thermostat
Display
| Symbol | Meaning |
 |
The connection between the thermostat and communication unit is being established |
 |
The connection has been established; nor-mal operation |
 |
The connection has been broken |
Information on the identification plate
The identification plate is mounted on the rear of the communication unit and the thermostat in the factory.
| Information on the
identification plate |
Meaning |
 |
Barcode with serial number (on the communication unit only),
7th to 16th digit = product article number (on the communication unit only) |
| Information on the identification plate | Meaning |
 |
→ “CE label” section |
| Migo | Product Description |
| V mA | Operating voltage and current consumption |
 |
→ “Recycling and disposal” section |
CE label
- The CE label shows that the products comply with the basic requirements of the applicable directives as stated on the identification plate.
- The declaration of conformity can be viewed at the manufacturer’s site.
- The manufacturer hereby declares that the type of radio equipment used in the product complies with directive 2014/53/EU. The complete text of the EU declaration of conformity can be viewed at the manufacturer’s site.
Operation
Starting up the product
Only start up the product once the casing has been completely closed.
Preventing malfunctions
- Ensure that the room air can freely circulate around the thermostat and that the thermostat is not covered by furniture, curtains or other objects.
- In the rooms in which the thermostat is installed, open the radiator valves completely.
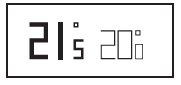
Checking and setting the room temperature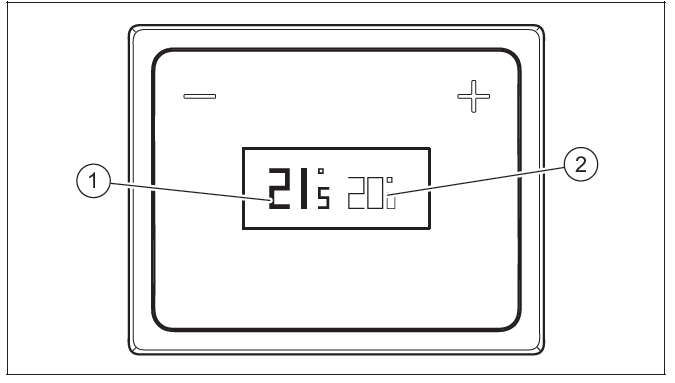
- Check the display of the current room temperature (1) and the set target temperature (2) in the display
- If required, use the – and + buttons to set the set target temperature (2) to the required value
Installing the app
- You can use your smartphone or tablet to apply any settings beyond the basic functions.
- Use your mobile device to download the app from http://migo.glow-worm.co.uk. Alternatively, search for Migo on Google Play™ or in the App Store™.
- Install the relevant app on your mobile device.
- When first setting up the connection, establish a Bluetooth connection between the product and your device (→ Page 8). Configure the WLAN settings for the product via the Bluetooth connection.
- Observe the additional instructions in the app.
Establishing a wireless connection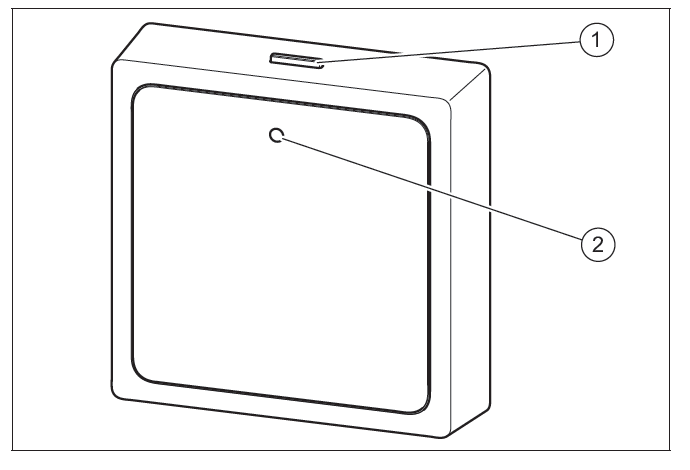
- Activate the Bluetooth connection on your mobile device.
- Press and hold the Bluetooth button/comfort protection mode button (1) on the communication unit (for at least five seconds).
- The status LED (2) flashes blue on the communication unit.
- Use the app to implement the WLAN settings. To do this, observe the instructions in the app.
- For security reasons, only connect the product to an encrypted WLAN. Note that Wi-Fi Protected Setup (WPS) is not supported.
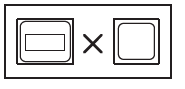
Restoring the connection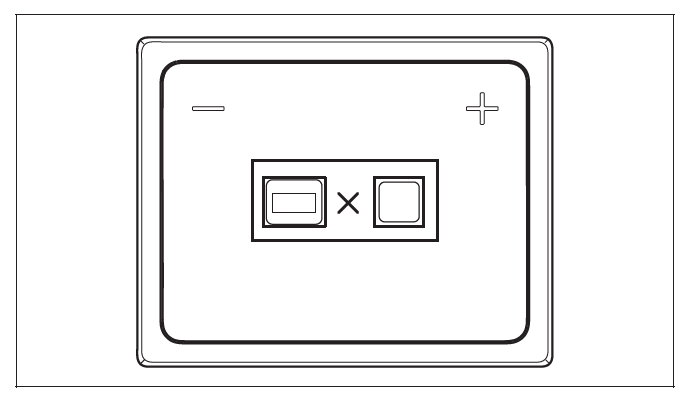
If the above display view is shown, reduce the distance between the thermostat and the communication unit in order to restore the connection
Comfort protection mode
- If the product has no connection to the Internet, the product’s operating mode cannot be set using the app.
- In this case, comfort protection mode can be activated directly on the communication unit.
- When comfort protection mode is activated, the room temperature is regulated to the target value that is set on the thermostat, regardless of the time periods that are set. In addition, hot water is prepared, irrespective of the set time periods.
Activating/deactivating comfort protection mode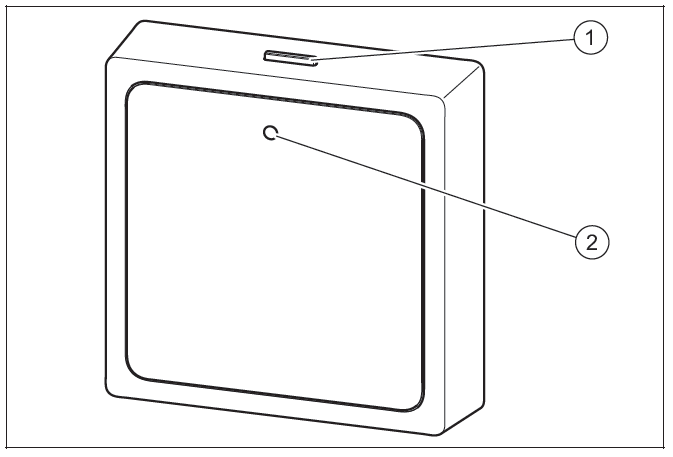
- Press the Bluetooth button/comfort protection mode button (1) briefly on the communication unit.
- You can only activate comfort protection mode if the Internet connection is interrupted.
- The status LED (2) lights up blue on the communication unit.
- You can only activate comfort protection mode if the Internet connection is interrupted.
- Press the Bluetooth button/comfort protection mode button (1) again on the communication unit to deactivate the comfort protection mode
- The comfort protection mode is automatically deactivated as soon as the Internet connection is reestablished.
Checking the battery charge condition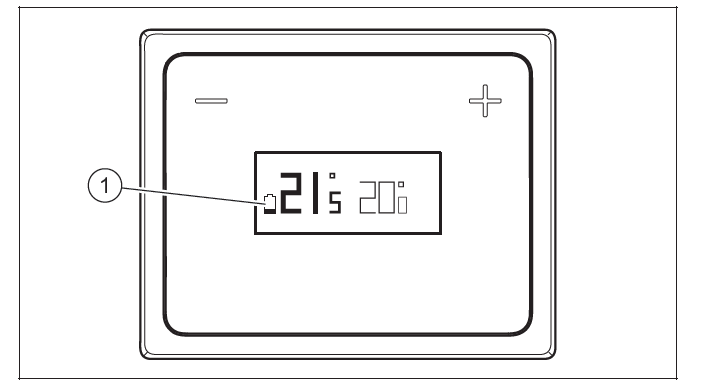
If the![]() (1) symbol appears in the thermostat display, the batteries are almost flat.
(1) symbol appears in the thermostat display, the batteries are almost flat.
If the above display view appears on the thermostat, the batteries are flat.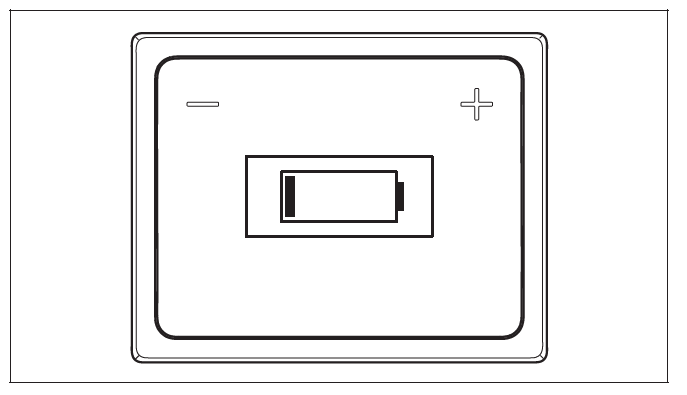
- Replace the batteries in the thermostat
Replacing batteries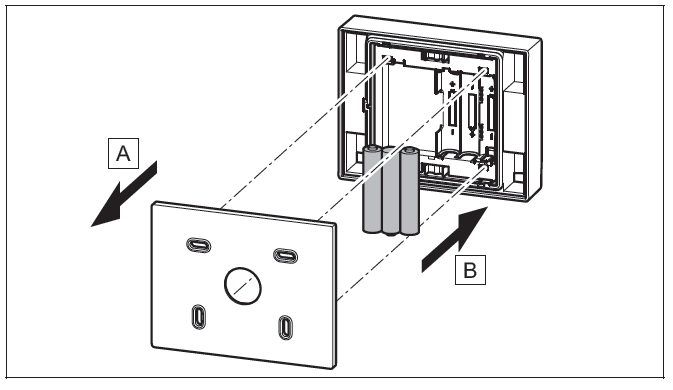
- Remove the thermostat from the product bracket or remove the product stand from the thermostat.
- Insert three new batteries (they must all be the same type). Pay attention to the correct polarity.
- Only use AAA alkaline 1.5 V batteries. Do not use rechargeable batteries.
- Place the thermostat back onto the product bracket or place the product stand back onto the thermostat. The thermostat or product stand audibly click into place.
Start screen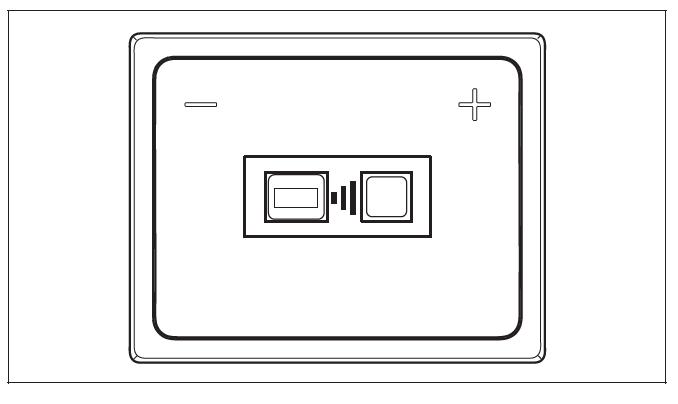
After you insert the batteries, the start screen is displayed. The start screen shows that the thermostat is searching for the communication unit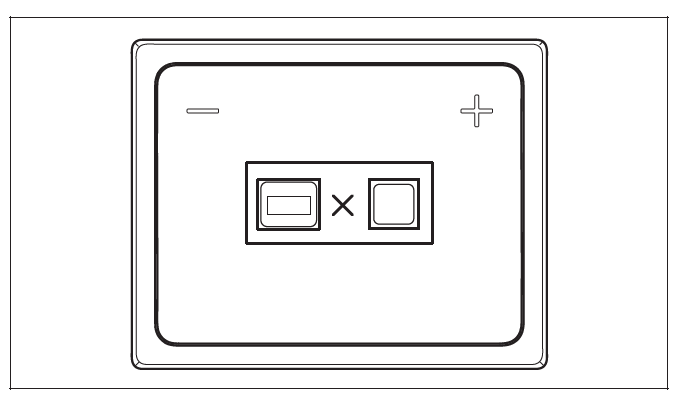
Troubleshooting
If the communication unit is not found (e.g. the distance between the thermostat and the communication unit is too great), the above display view is shown.
Troubleshooting
You can find an overview of the possible faults in the appendix. Faults – Overview (→ Page 14)
Care and maintenance
Caring for the product
- Risk of material damage caused by unsuitable cleaning agents.
- Do not use sprays, scouring agents, detergents, solvents or cleaning agents that contain chlorine.
Clean the surface of the product with a damp cloth and alittle solvent-free soap.
Decommissioning
Permanently decommissioning the product
Have a competent person permanently decommission the product.
Recycling and disposal
- The competent person who installed your product is responsible for the disposal of the packaging.
If the product is identified with this symbol: - In this case, do not dispose of the product with the household waste.
- Instead, hand in the product to a collection centre for old electrical or electronic appliances.
If the product contains batteries that are marked with this symbol, these batteries may contain substances that are hazardous to human health and the environment. - In this case, dispose of the batteries at a collection point for batteries.
Guarantee and customer service
Guarantee
For information on the manufacturer’s guarantee, you can write to the contact address that is provided on the back page.
Customer service
For contact details for our customer service department, you can write to the address that is provided on the back page, or you can visit www.glow-worm.co.uk.
Appendix
Faults – Overview
| Symbol | Meaning | Remedy | ||
 |
Batteries almost flat. | – Replace the batteries in the thermostat. | ||
| Batteries flat. | – Replace the batteries in the thermostat. | |||
| |
No connection to the communication unit. | – Reduce the distance between the thermostat and the communication unit. | ||
Legal note
“Made for iPod”, “Made for iPhone” and “Made for iPad” mean that an electronic accessory has been designed that was developed especially for the relevant connection to an iPod, iPhone or iPad, and for which the developer has certified that it complies with Apple’s performance standards. Apple shall not be liable for the operation of this device or its compliance with the safety standards and regulations. Note that using this accessory with an iPhone may impair the radio performance.
Publisher/manufacturer
GLOW-WORM Nottingham Road Belper Derbyshire DE56 1JQ
Telephone 016 34 29 23 00 – Fax 016 34 29 01 66
Technical helpline 084 4 736 00 59 – After sales service 017 73 82 81 00
www.glow-worm.co.uk
© These instructions, or parts thereof, are protected by copyright and may be reproduced or distributed only with the manufacturer’s written consent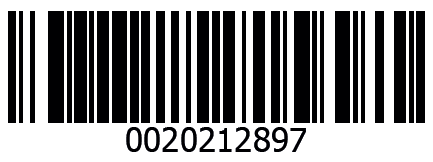
Reference
Download Manual
Glow-Worm Migo Smart Thermostat Operating instructions
Other Manual:
Glow-Worm Migo Smart Thermostat Installation Instructions