
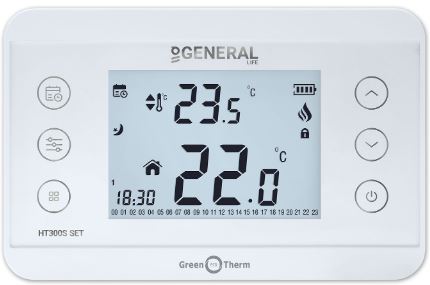
General life HT300 SET Wireless Room Thermostat
Introduction
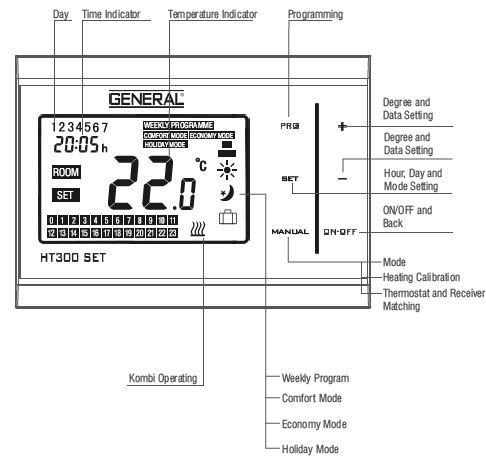
LCD Wireless Room Thermostat Controls
HT 300 SET is wireless room thermostat. The user can adjust the room thermostat in line with the requirement and get more comfortable and economic heating.
- Touch Keys, LCD Backlight Screen
- Daily and Weekly Program (7×24)
- Operating Moods: Comfort Mode, Economy Mode, Holiday Mode
- Weekly Program and Manual use
- Only heating or only cooling setting
- ON/OFF Control
- Battery DC 3 V (2 × 1,5V AAA Alkaline pil)
Use
HT 300 SET room thermostats are used for keeping the required room temperature in only heating or only cooling systems.
Place of use
- Houses
- Apartments
- Trading Areas
- Light Industrial Buildings
- Zone Valves, Thermal Valves
- Gas or Petrol Burners
- Fans
- Pumps
Functions HT 300 SET
HT 300 SET room thermostat has only heating and cooling outs. Its stabilizer gets room temperature with an integrated sensor and keeps o the required temperature by providing control commands . Switching difference is 0.5 C.
Operating
Key features of HT 300 SET room thermostat:
- Two-position control
- LCD Backlight screen
- NTC 10K sensor
Mechanical Design
The device consists of 2 parts With its digital display having electronic, drive elements and built room temperature sensor,
- A plastic body
- A mounting base
- The plastic body is mounted on a mounting base.
Battery Change
Insert 2 alkaline batteries in the battery compartment in the way as seen below. You can change the battery by removing the cover of the battery compartment. Change 2 batteries always at the same time. Pay attention to the directions while inserting the batteries.
Warning
Throw your dead batteries into the waste basket for batteries. While changing, programmed information might be deleted from the memory of the remote control device. Please look at the program chapter of the instruction book.
Mounting
In order to remove the wall hanger, loosen the screws at the bottom as can be seen in the figure. Fix the removed wall hanger 150 cm above the ground on a central place of the house. Avoid mounting HT 300 SET on the places where air circulation is too much such as door entrance or window ledge.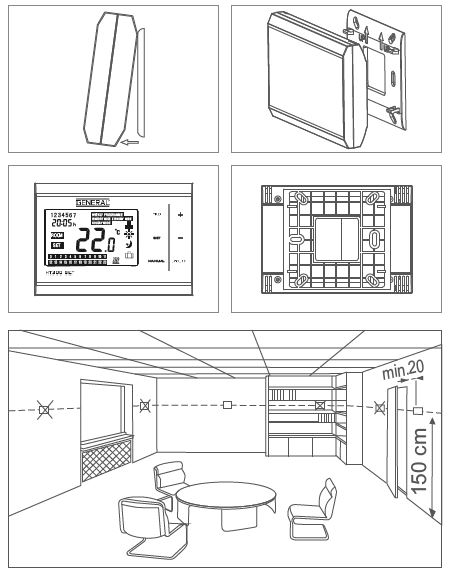
- The thermostat shopuld be mounted on a flat wall.
- Please comply the local electric regulations.
- The membrane is filled with eco-friendly gas.
- Termostat gövdesi plastik malzemeden üretilmiştir.
- If there is any thermostatic radiator valve in the reference room, keep all of them open
Heating Calibration
- Press “Manual” button while the device is off.
- SET the temperature difference by pressing “+” and “–” buttons in order to see required temperature. This value can be set between -8 and +8.
- Press “Manual” and exit the menu.
Warning: Recommended tempreture calibration is “
Technical Data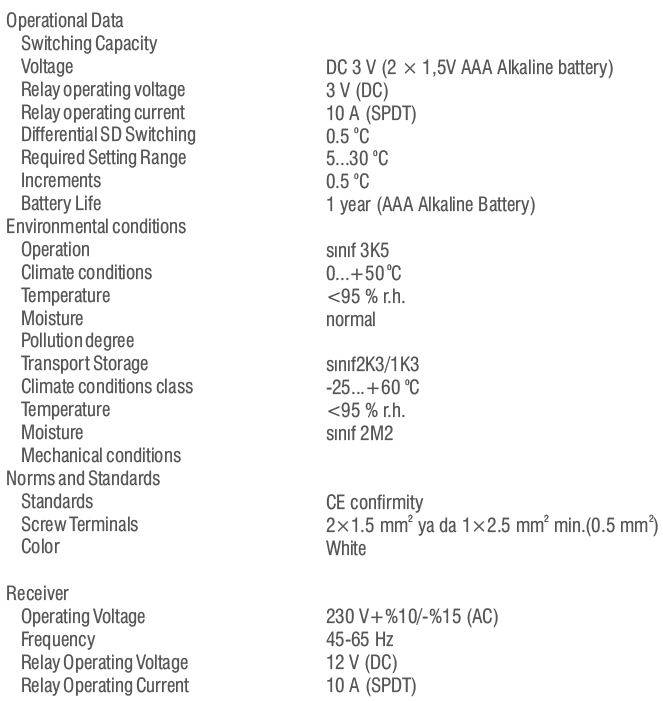
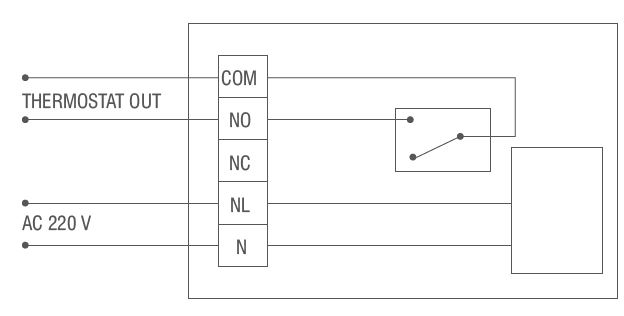
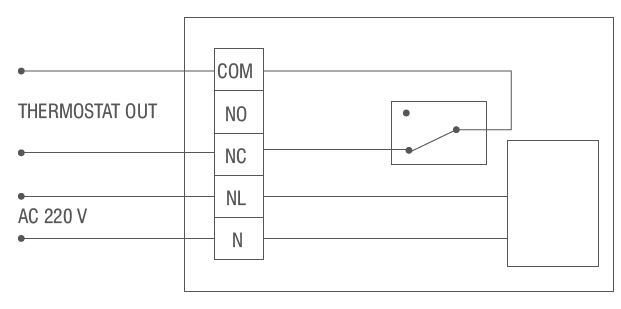
HT 300 SET WIRING DIAGRAM
WIRING DIAGRAM FOR HEATING UNITS
WIRING DIAGRAM FOR COOLING UNITS
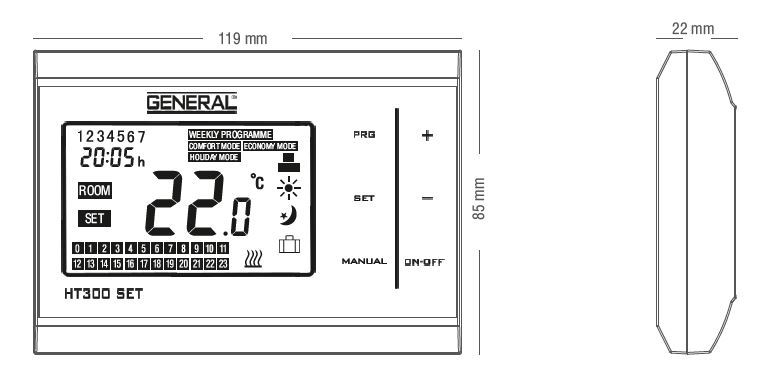
Sizes
Thermostat Size
134 mm×94mm×28mm
REFERENCE:
DOWNLOAD MANUALS:
Generallife HT300 SET Wireless Room Thermostat DATA SHEET
OTHER MANUALS:
General life HT300 SET Wireless Room Thermostat User Manual
![]()
Leave a Reply