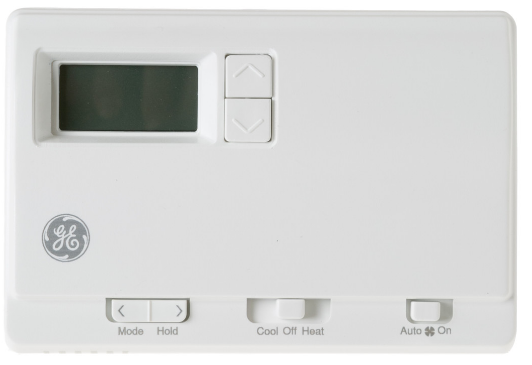
GE Appliances RAK148P1 RAC Dual Stage Thermostat
Important safety information
WARNING! Always turn off power at the main power supply before installing, cleaning or removing the thermostat.
- This thermostat is for 24 VAC applications only. Do not use on voltages over 30 VAC.
- All wiring must conform to local and national electrical and building codes.
- Do not use air conditioning when the outdoor temperature is below 50 degrees; this can damage your A/C system and cause personal injuries.
- Use this thermostat only as described in this manual.
Specifications
- Electrical rating: • 24 VAC (18–30 VAC)
- 1 amp maximum per terminal
- DC Power: 3.0 VDC (2 “AA” batteries included)
- 4 amp maximum total load
- Operating temperature range: 40°F–99°F (4°C–37°C)
- Temperature set range: 60°F–85°F (15°C–29°C)
- Accuracy: ± 1°F (± 0.5°C)
- System configurations: 2-stage heat (RAK148P1 heat pump/resistance heat); 1-stage heat (RAK164P1 resistance heat); 1-stage cool
- Timing: Anti-short cycle: 3 minutes (minimum compressor run time/off time). Note: There may be a 3 minute minimum fan run time/off time on some models.
- Terminations: R, C, W, Y, G, B (RAK148P1); R, C, W, Y, G (RAK164P1)
INTRODUCTION OVERVIEW
INSTALLATION INSTRUCTIONS
 ELECTRICAL SHOCK HAZARD — Turn off the power by unplugging the unit or by removing the fuse or switching the appropriate circuit breaker to the OFF position before removing the existing thermostat. Failure to do so could result in a risk of electric shock.
PACKAGE CONTENTS/TOOLS REQUIRED:
Package includes:
- Thermostat on base
- thermostat cover
- 2 “AA” batteries
- wiring labels
- screws and wall anchors.
Tools needed:
- Drill with 3/16″ bit
- hammer
- screwdriver
TO REMOVE THE EXISTING THERMOSTAT
- Turn off power to heating and cooling system by removing the fuse or switching off the appropriate circuit breaker.
- Remove cover of old thermostat. This should expose the wires.
- Label the existing wires with the enclosed wire labels before removing wires.
- After labeling wires, remove wires from wire terminals.
- Remove existing thermostat base from wall.
- Refer to the following section for instructions on how to install this thermostat.
TO INSTALL THERMOSTAT
IMPORTANT: Thermostat installation must conform to local and national building and electrical codes and ordinances.
NOTE: Mount the thermostat about five feet above the floor. Do not mount the thermostat on an outside wall, in direct sunlight, behind a door or in an area affected by a vent or duct.
- Turn off power to the heating and cooling system by removing the fuse or switching off the appropriate circuit breaker.
- Remove the cover by inserting and twisting a coin or screwdriver in the slots on the top of the thermostat.
- Put the thermostat base against the wall where you plan to mount it. Make sure wires will feed through the wire opening in the base of the thermostat.
- With the base level, mark the placement of the mounting holes.
- Set the thermostat base and cover away from the working area.
- you have marked for mounting.
- Use a hammer to tap supplied anchors in mounting holes.
- Align the thermostat base with mounting holes and feed the control wires through the wire opening.
- eal hole for wires behind the thermostat with nonflammable insulation or putty, or use a wall plate obtainable from a local hardware or home building store.
- Use supplied screws to mount the thermostat base to the wall.
- Insert stripped, labeled wires in matching wire terminals by pressing on the corresponding terminal contact. See the “Wiring Diagrams” section of this manual.
NOTICE Make sure the exposed portion of wires do not touch other wires. - Gently tug wire to be sure of proper connection. Double-check that each wire is connected to the proper terminal.
- Replace cover on the thermostat by snapping it in place.
- Plug the unit in or turn on power to the system at the main service panel.
- Test thermostat operation.
WIRING DIAGRAMS
Table 1: Terminals for five wires heat/cool system (RAK164P1 only)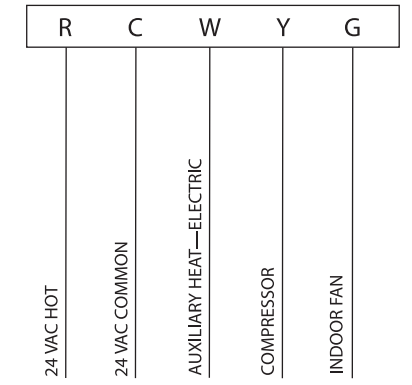
Note: Connect G terminal of the thermostat to Zoneline Gl terminal for low fan speed or terminal Gh for high fan speed. Only one can be selected.
Table 2: Terminals for six wires 2 heat/1 cool system (RAK148P1 only)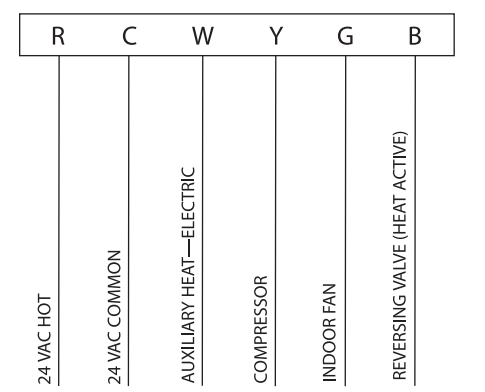
Note: Connect G terminal of thermostat to the Zoneline Gl terminal for low fan speed or terminal Gh for high fan speed. Only one can be selected.
Configuration mode
The configuration mode is used to set the RAK148P1 and RAK164P1 to match your heating/cooling system. These thermostats function with up to 2-stage heat pump systems (RAK148P1 only).
To configure the RAK148P1 and RAK164P1, perform the following steps:
Note: Operation being set will blink in the display.
- Slide the Function switch to the OFF position.
- Simultaneously hold the and buttons in for 6 seconds while the thermostat is in OFF mode.
- Press the or button to change settings within each screen.
- Press the Hold button to advance to the next screen.
Note: The Mode button will return you to the previous screen. - To exit configuration mode, slide the Function switch to Heat or Cool.
Configuration Mode Settings
The setup screens for Configuration Mode are as follows:
- Temperature Scale (F or C)—
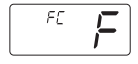
Choose Fahrenheit or Celsius.
Press the or button to select.
Press the Hold button to advance to the next screen. - Temperature Differential—
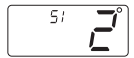
Stage 1—(1–9°F) (1–5°C)— (Factory Setting is 2°F/1°C for Each Stage)—Set the number of degrees between your “setpoint” temperature and your “turn on” temperature for first stage.
Press the or button to set differential value.
Press the Hold button to advance to the next screen. - Temperature Differential—Stage 2—(RAK148P1 only) (1–9°F) (1–5°C)—Set the number of degrees between when stage 1 turns on and stage 2 turns on.
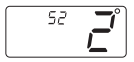
Press the or button to set differential value.
Press the Hold button to advance to the next screen. - Minimum Cool Setpoint (60, 64, 66, 68, 70, 72, 74, 76°F) (15, 17, 19, 20, 21, 22, 23, 24°C)
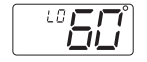
Adjust to control the minimum Cool set temperature allowed.
Press the or button to select.
Press the Hold button to advance to the next screen. - Maximum Heat Setpoint (65, 70, 72, 74, 76, 78, 80, 85°F) (18, 21, 22, 23, 24, 26, 27, 29°C)
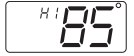
Adjust to control the maximum Heat set temperature allowed.
Press the or button to select.
Press the Hold button to advance to the next screen. - Room temperature offset (+9°F to –9°F) (+5°C to –5°C)
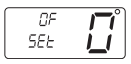
Adjust to calibrate displayed room temperature to match actual room temperature.
Press the or button to select.
Press the Hold button to advance to the next screen.
Move the Function switch to Heat or Cool position to lock the settings into memory.
Operation
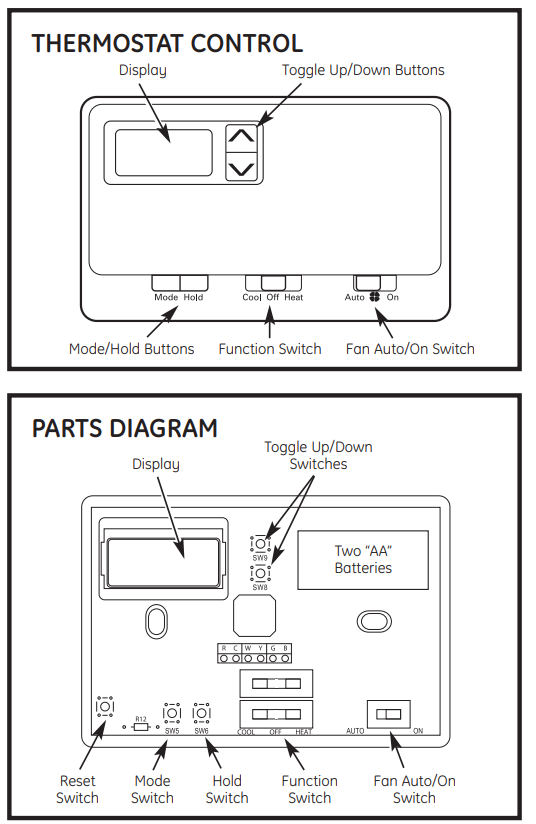
The RAK148P1 and RAK164P1 thermostats have buttons that are used to:
- Adjust the setpoints of the thermostat
- Set the modes
- Program the schedule
Setting the Room Temperature (Setpoint Temperature)
- With the Function switch at Cool or Heat, the current temperature setpoint displays.
- Press the or button until the desired temperature setpoint displays.
- The new temperature setpoint is automatically saved in memory.
Starting the thermostat
CAUTION! Do not use air conditioning when the outdoor temperature is below 50 degrees. This can damage your air conditioning system and cause personal injuries.
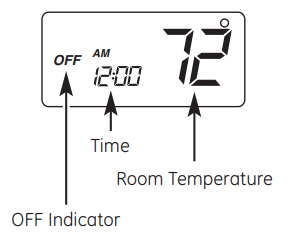
- Move the Fan Auto/On switch to the Auto position. On position runs indoor fan continuously.
- Move the Function switch to Cool or Heat, depending on the season.
Testing the thermostat
Once the thermostat is installed, it should be thoroughly tested.
CAUTION! Do not use air conditioning when the outdoor temperature is below 50 degrees. This can damage your air conditioning system and cause personal injuries.
Note: Before testing the thermostat, move the Fan Auto/On switch to the Auto position.
Cool Test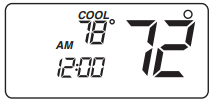
- Slide Function switch to Cool position. Cool mode screen is displayed.
- Adjust set temperature so it is 5 degrees below room temperature.
- Air conditioning should come on within a few seconds.
- Adjust the set temperature so it is 2 degrees above the room temperature and the A/C should turn off. Note: There is a 3-minute time delay and a 3 minute minimum run time for the compressor when it turns on/off. (On some models, the fan may also have a 3 minute minimum run time/off time delay.)
Heat Test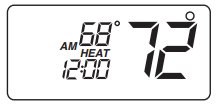
- Slide Function switch to Heat position. Heat mode screen is displayed.
- Adjust set temperature so it is 5 degrees above room temperature.
- Heat should come on within a few seconds.
- Adjust the set temperature so it is 2 degrees below the room temperature and the heat should turn off. Note: There is a 3 minute time delay and a 3 minute minimum run time for the compressor when it turns on/off. (On some models, the fan may also have a 3 minute minimum run time/off time delay).
Note: “Quick Heat Recovery” is activated each time the thermostat is switched from Off or Cool modes to Heat mode. Electric heaters are energized until the thermostat set point is reached. Heat pump operation will resume at next call for heat (heat pump only).
Fan Test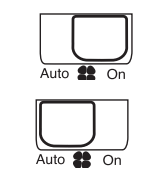
- Slide Fan Auto/On switch to On position.
- Indoor fan turns on.
- Slide Fan Auto/On switch to Auto position.
- Indoor fan turns off.
Off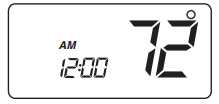
- In this mode, the thermostat will not turn on the heating or cooling devices (manual fan can operate).
- Off is also used to access Setup and Program modes.
Cool
- In this mode, the thermostat controls the cooling system.
- Press the Mode button to enter and exit the Program Cool mode.
- In Program Cool mode (PROGdisplays), the thermostat will follow the program schedule that is stored in memory.
Heat
- In this mode, the thermostat controls the heating system.
- Press the Mode button to enter/exit the Program Heat mode.
- In Program Heat mode (PROGdisplays), the thermostat will follow the program schedule that is stored in memory.
- Hold
- When in Programmable Cool or Programmable Heat, you can lock in the present settings indefinitely by pressing the
Hold button once (PROG flashes). Press Hold button again to leave Hold mode (PROG solid). For a temporary Hold period, raise or lower set temperature to desired set temperature.
The thermostat will automatically return to the programmed set temperature after 2 hours.
Setting the time and day of the week.
The time and day of the week must be set for your program schedule to operate correctly.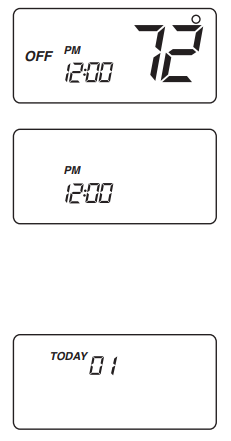
- Slide the Function switch to the Off position.
- Press the Hold button in for 6 seconds.
- Press the or button to adjust the time in hours. Press the Hold button once. Now press the or button to adjust the time in minutes.
- Press the Hold button while the time is displayed. The display shows the day currently set on the thermostat (01 = Monday, 02 = Tuesday, etc.).
- Press the or button to set the current day of the week. Note: Sliding the Function switch to Cool or Heat positions will lock the values into memory. You may also press the Hold button to enter your programming schedule.
Programming
Program Overview
The programmable thermostat has four periods (MORN, DAY, EVE, NITE) that are customizable for each day of the week. Each period will have a set time, heat temperature and cool temperature. The thermostat monitors the day and time, while maintaining the specific conditions that you have chosen for each period in your program.
Note: Operation being set will blink in the display.
- Place the Function switch in the Off position.
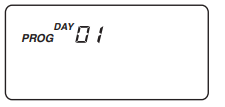
- Press the Hold button in for 6 seconds.
- Press the Hold button 3 times. DAY (01–07) and PROG is displayed.
- Press the or button to change the day you want to program (01 = Monday, 02 = Tuesday, etc.).
- Press the Hold button to advance to the next parameter.
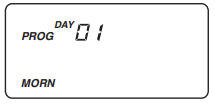
Note: You can always press the Mode button to return to the previous parameter.
Period is displayed (MORN, DAY, EVE, NITE). - Press the or button to change period of day. The display should blink the period of the day.
- Press the Hold button to advance to the next parameter.
Set time is displayed.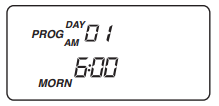
- Press the or button to adjust hours. Press the Hold button once, and then press the or buttons to adjust minutes.
- Press the Hold button to advance to the next screen parameter. Note: Transitions required after 11:59 PM must be programmed in the next day’s MORN period.
- Heat temperature is displayed (60°F to 85°F)
- Press the or button to adjust heat set temperature.
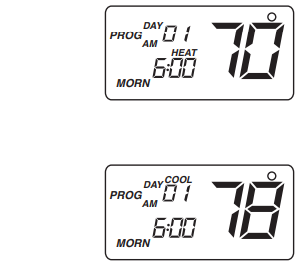
- Press the Hold button to advance to the next screen.
Cool temperature is displayed (60°F to 85°F) - Press the or button to adjust cool set temperature.
- Press the Hold button to advance to the next screen.
Repeat steps 1–13 to program each day of the week individually or follow the instructions below to program every day the same as Monday. When programming is complete, slide the Function switch to Heat or Cool to exit Programming Mode.
Repeat Programming
Once the entire Monday (Day 01) schedule is set, the following procedure can be used to copy the Monday schedule for every day of the week.
After the complete Monday schedule is set (see Programming, above), you will be at the “Day” screen:
- Press the button once. Day 01 screen displays.
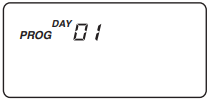
- Press the button and hold for 2 seconds. The days of the week stop flashing, locking the settings into memory. Once the schedule is locked in, you can go through each day and make any required changes. This feature speeds up the programming of the standard weekday/weekend schedule.
- Slide the Function switch to Heat or Cool to exit Programming Mode.
Factory preprogramming
The programmable thermostat comes preprogrammed with the following schedule:
Use the following personal program schedule to record your settings: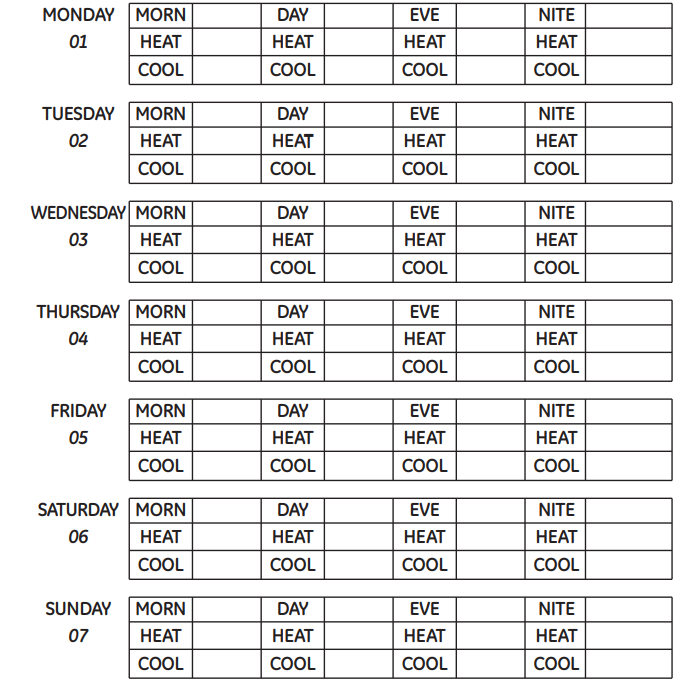
Low battery indicator
The programmable thermostats with battery backup have a low battery warning screen. Please note that the low battery warning will not display while in a programming mode or settings menu. The following are the only locations where the low battery warning may occur.
- Low battery warning, Off mode
The thermostat will display a low battery indication. The display will toggle between the normal display and the low battery indication.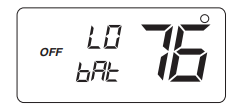
- Low battery warning, Cool mode
The thermostat will display a low battery indication. The display will toggle between the normal Cool mode display or program Cool mode display and the low battery indication.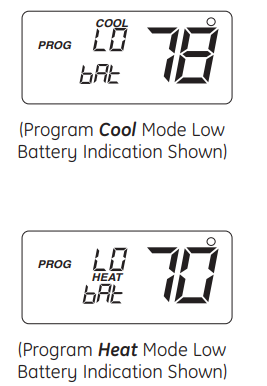
- Low battery warning, Heat mode
The thermostat will display a low battery indication. The display will toggle between the normal Heat mode display or program Heat mode display and the low battery indication.
Combination failure (power failure & low battery)
The programmable thermostats with battery backup also will indicate a combination failure; that is, both a low battery condition as well as a power failure condition. After the power is restored, the following may be indicated:
- Combination failure, Off mode
The thermostat will display a low battery indication, as well as a power failure indication (“12:00”). The display will toggle between the low battery screen and the “12:00” screen.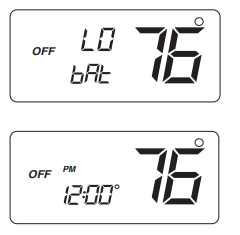
- Combination failure, Cool mode
The thermostat will display a low battery indication, as well as a power failure indication (“12:00”). The display will toggle between the low battery screen and the “12:00” screen (Non-Program Cool Mode Shown).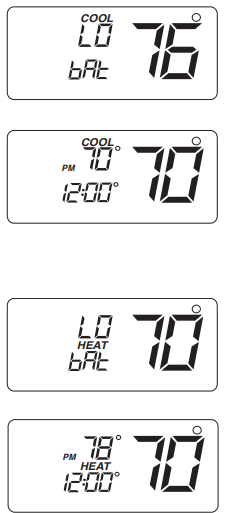
- Combination failure, Heat mode
The thermostat will display a low battery indication, as well as a power failure indication (“12:00”). The display will toggle between the low battery screen and the “12:00” screen (Non-Program Heat Mode Shown).
Troubleshooting tips
| Problem | Solution |
| No Display | Check for 24 VAC; display is blank when 24 VAC is not present |
| System fan does not come on properly | Verify that wiring is correct. |
| All thermostat buttons are inoperative | Verify that 24 VAC is present; unit will not operate when 24 VAC is not present. |
| Thermostat turns on and off too frequently | Adjust temperature differential (see Configuration Mode – Setting Temperature Differential, Stage 1, Stage 2, and Stage 3 section). |
| Fan runs continuously | Check fan selection. If set to ON, fan will run. |
| Room temperature is not correct | Verify that wall hole is plugged with putty or insulation to prevent airflow from the wall cavity. Adjust Temperature Offset (see Configuration Mode – Room temperature offset section). |
| Compressor doesn’t run or turn off immediately when changing function or setting | There is a 3 minute time delay and a 3 minute minimum run time for the compressor when it turns on/off. |
| Fan doesn’t run or turn off immediately when changing function or setting | This is normal. On some models, the fan may have a minimum run time/off time delay. |
| Problem not listed above | Press the Reset button once to reset the thermostat microprocessor. |
THERMOSTAT WARRANTY
Staple your receipt here.
Proof of the original purchase date is needed to validate the warranty.
| For The Period Of: | GE Appliances Will Replace: |
| One Year From the date of the original purchase |
Full Replacement of the thermostat which fails due to a defect in materials or workmanship. For Warranty replacement, contact your distributor. |
What GE Appliances Will Not Cover:
- Service trips to your location.
- Improper installation. If you have an installation problem, contact your installer. You are responsible for providing adequate electrical connections to the product.
- Failure of the product resulting from modifications to the product or due to unreasonable use, including failure to provide reasonable and necessary maintenance.
- In commercial locations, labor is necessary to move the unit, after it has been initially installed, to a location where it is accessible for service by an individual technician; or, if the instructions included in this manual have been disregarded.
- Replacement of location fuses or the resetting of circuit breakers.
- Damage to the product caused by improper power supply voltage, accident, fire, floods or acts of God.
- Incidental or consequential damage caused by possible defects with this thermostat.
EXCLUSION OF IMPLIED WARRANTIES—Your sole and exclusive remedy is product exchange as provided in this Limited Warranty. Any implied warranties, including the implied warranties of merchantability or fitness for a particular purpose, are limited to one year or the shortest period allowed by law.
This warranty is extended to the original purchaser and any succeeding owner for products purchased for use within the USA and Canada. In Alaska, the warranty excludes the cost of shipping or service calls to your site.
Some states or provinces do not allow the exclusion or limitation of incidental or consequential damages. This warranty gives you specific legal rights, and you may also have other rights which vary from state to state or province to province. To know what your legal rights are, consult your local, state or provincial consumer affairs office or your state’s Attorney General.
Reference
Download Manual:
GE Appliances RAK148P1 RAC Dual Stage Thermostat Installational Manual

GE Appliances RAK148P1 RAC Dual Stage Thermostat Installational Manual