
Finder Bliss2 Smart Thermostat

FIRST STEPS
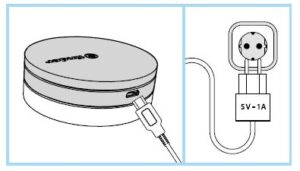
Connect the gateway to the socket using the micro USB power supply before starting the procedure.
IMPORTANT
The BLISS2 smart thermostat is only compatible with the second generation gateway
Type 1Y.GU.005.1.
- The code is shown under the black silicone cover at the top of the gateway.
- The gateway works only with 2.4GHz Wi-Fi networks.
- Check that you have a 2.4GHz network configured on your home router and that you have the network name and password before starting the procedure.
Installation
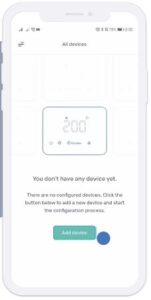
- After logging in to the new Bliss app, click on “Add device” to start the association
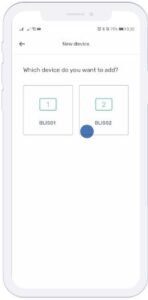
- Select “Bliss2” to star the association of the gateway and the thermostat.
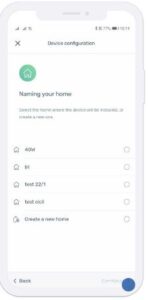
- Select an existing house (created with Yesly) or create a new one to define which system the gateway belongs to. Then press “Continue”.
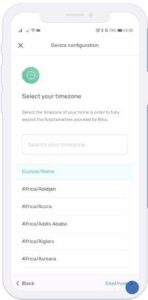
- Select the time zone you are in. The default is for Italy
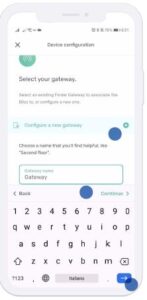
- Select “Configure a new gateway” and give it a name. Then press “Continue
- After selecting the gateway to associate, choose to connect it to the Wi-Fi network. Then press “Continue
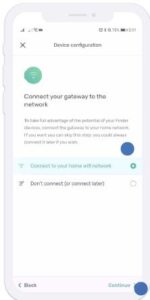
- You can choose whether to associate the gateway to the network by selecting it from those available or by scanning the QR code located behind the router.
- After choosing the network to associate with, the gateway will complete the association.
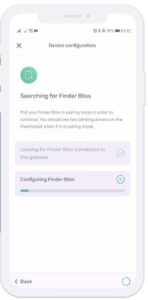
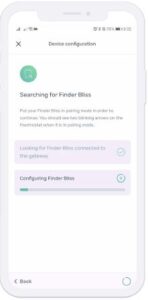
- Now you need to put the Bliss2 thermostat in “connection” mode. Go to the device and make the arrows blink.
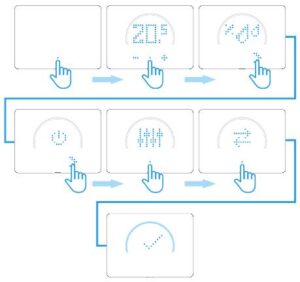
- Execute this procedure on the Bliss2: The gateway is now communicating with the Bliss2.
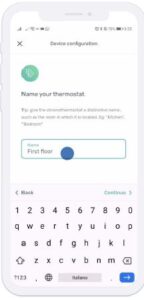
- Please, wait. When the procedure is over, give the Bliss2 a name.
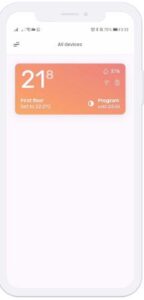
- Finder Bliss2 is properly paired. Now all you have to do is configure the temperature schedule and discover the rest of the functions of your new Smart Bliss2 Thermostat.
REFERENCE:
DOWNLOAD MANUALS:
Finder Bliss2 Smart Thermostat INSTALLATION GUIDE
OTHER MANUALS:
Finder Bliss2 Smart Thermostat USER MANUAL
![]()
Leave a Reply