 Drayton 2290B Programmable Room Thermostat

Using the new Drayton Digistat
Drayton’s latest generation of wired and wireless Digistat Thermostats bridges the gap between traditional thermostats and smart systems Providing unparalleled flexibility and the ultimate in control for the homeowner via the app You can control your heating directly from the Digistat itself using the 5 buttons and the backlit display Or if you prefer you can connect your smart phone to the Digistat using Bluetooth and control everything for the palm of your hand Digistat Smart,
Controlling the Digistat using the Wiser Home app
Of course, using your Digistat is so much easier if you use your smart phone with the free smartphone app you can adjust schedules, boost your heating, set a holiday period and set away mode, all from your smartphone in the palm of your hand with the app downloaded your smartphone connects directly to your Digistat using the phone’s Bluetooth technology with no need for home Wi-Fi, internet broadband or cloud connectivity. It’s just a simple way to use your Digistat from anywhere in the home (typical Bluetooth range)The use of the Wiser Home app will need mobile data to be enabled on your smartphone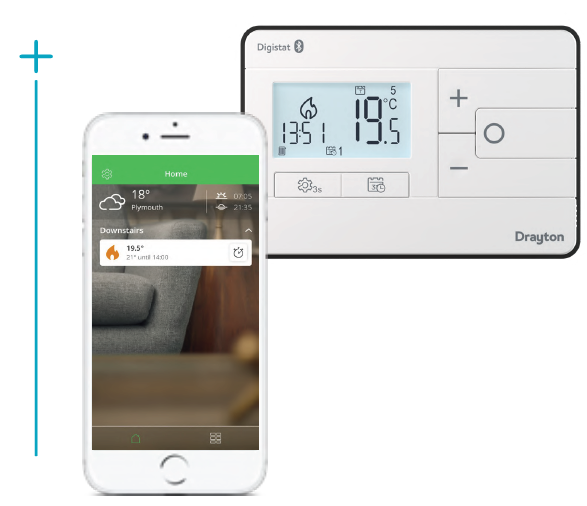
Download
Download the Wiser Home app to your smartphone
Step 1: Download the Wiser Home app
Download the Wiser Home app for your mobile device from the App Store® or Google Play™ 
System requirements
The Wiser Home app is available for Apple® iOS and Android™ mobile devices. Due to the large number of mobile devices available on the market, compatibility cannot be guaranteed with every model. The mobile device must fulfil the following minimum technical requirements
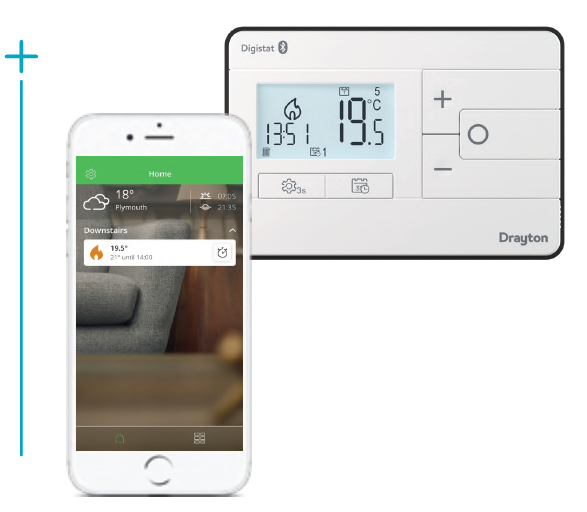
Setting up the app
Step 2: Open Wiser Home app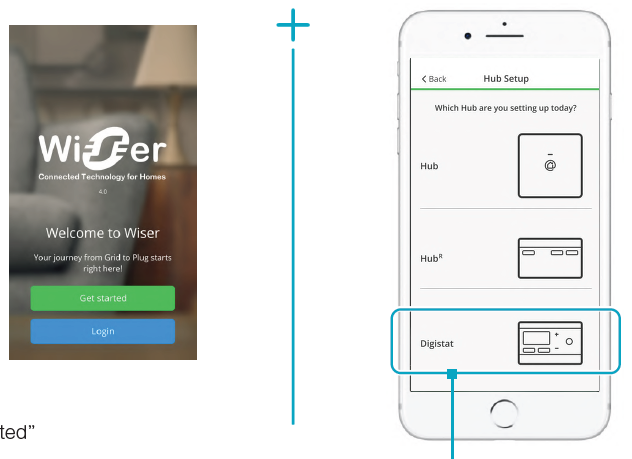
Pairing the app with your Digistat and create your account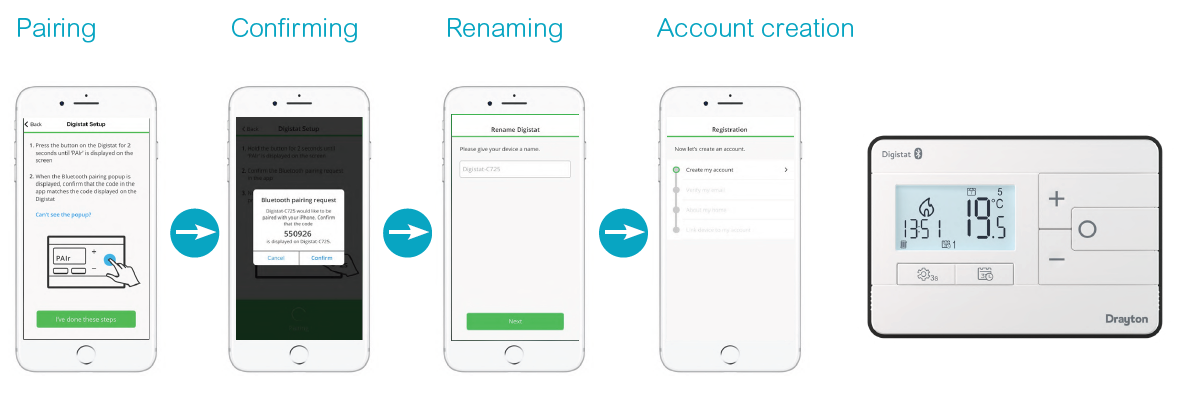
Just follow the instructions in the app
Note that using the Wiser Home app will lock the buttons on the Digistat while the app is open. A lock symbol will appear in the display top left. To go back to using the controls on the Digistat, please close all open apps
Control your heating
Home screen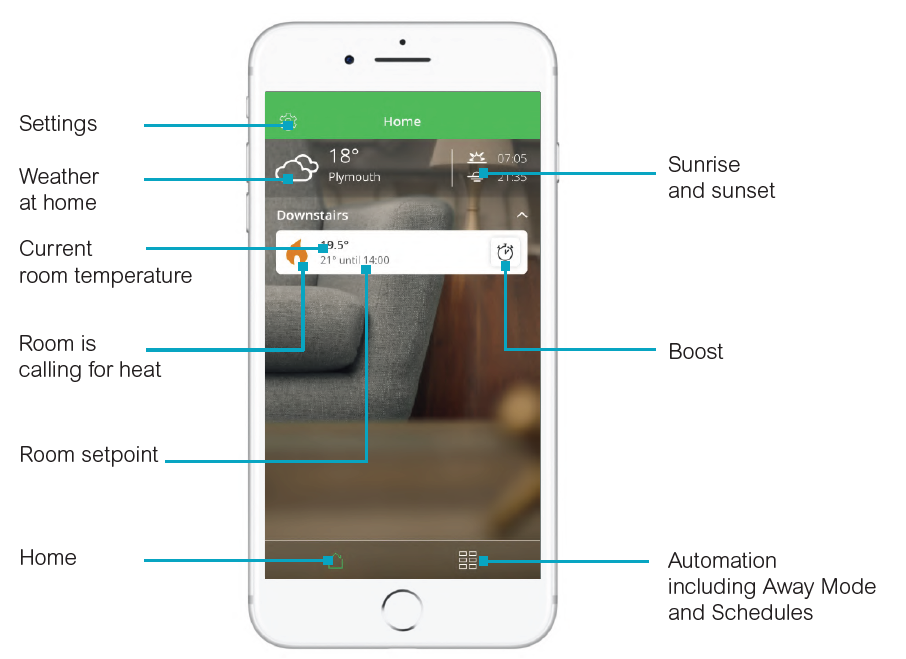
Room View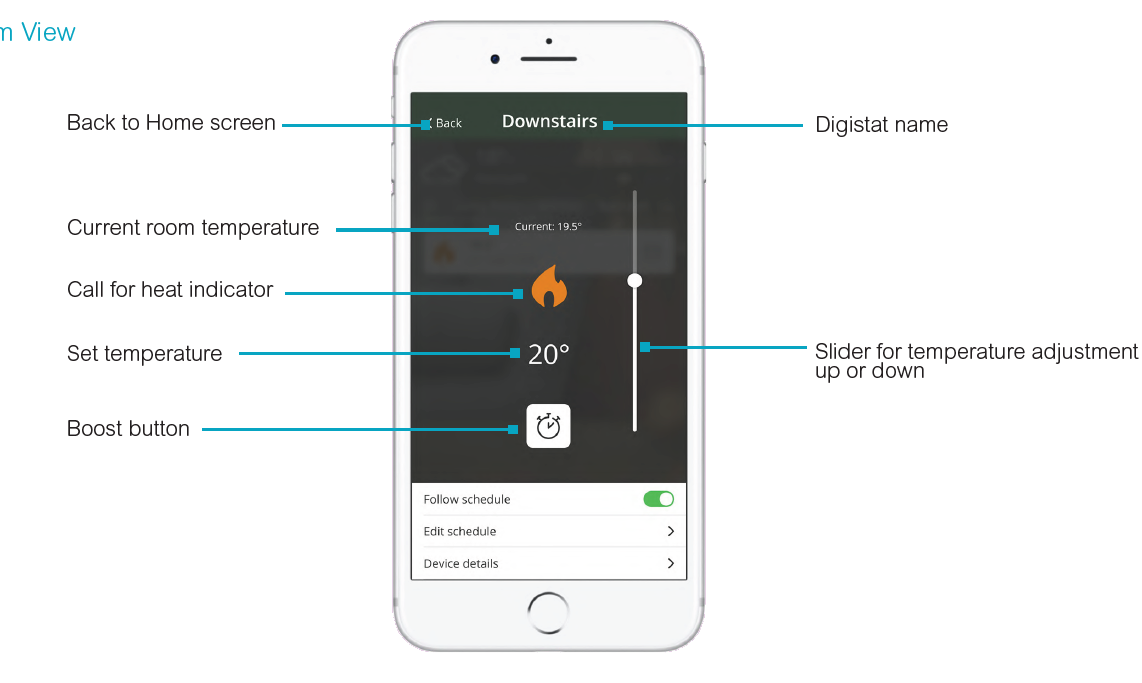
The Schedule Screen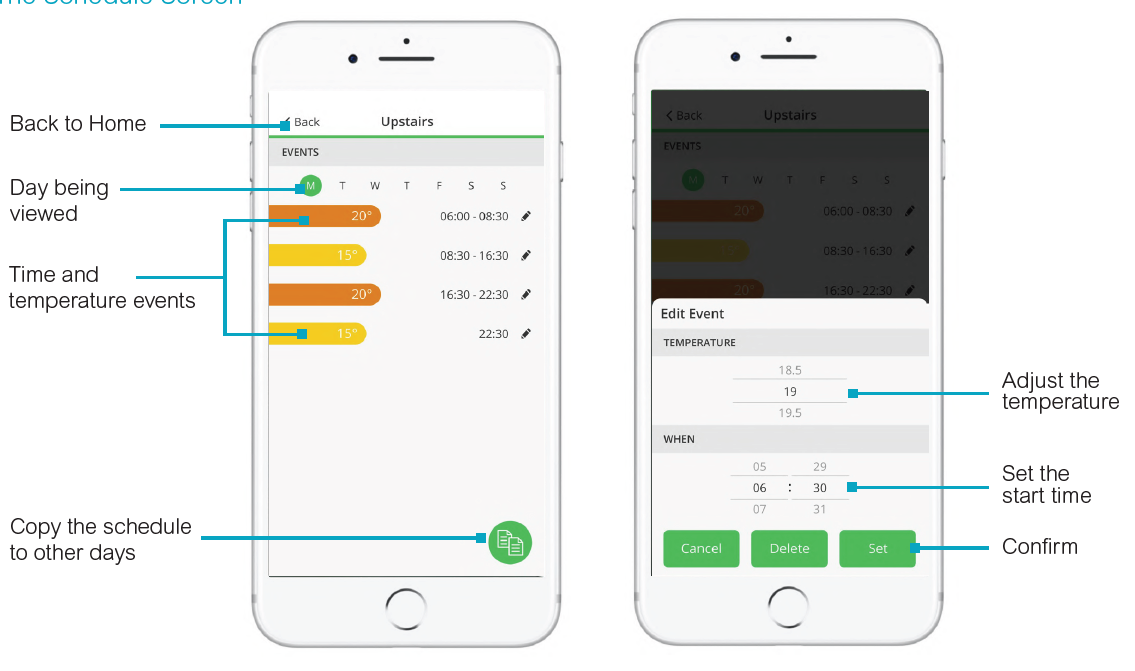
Using Away Mode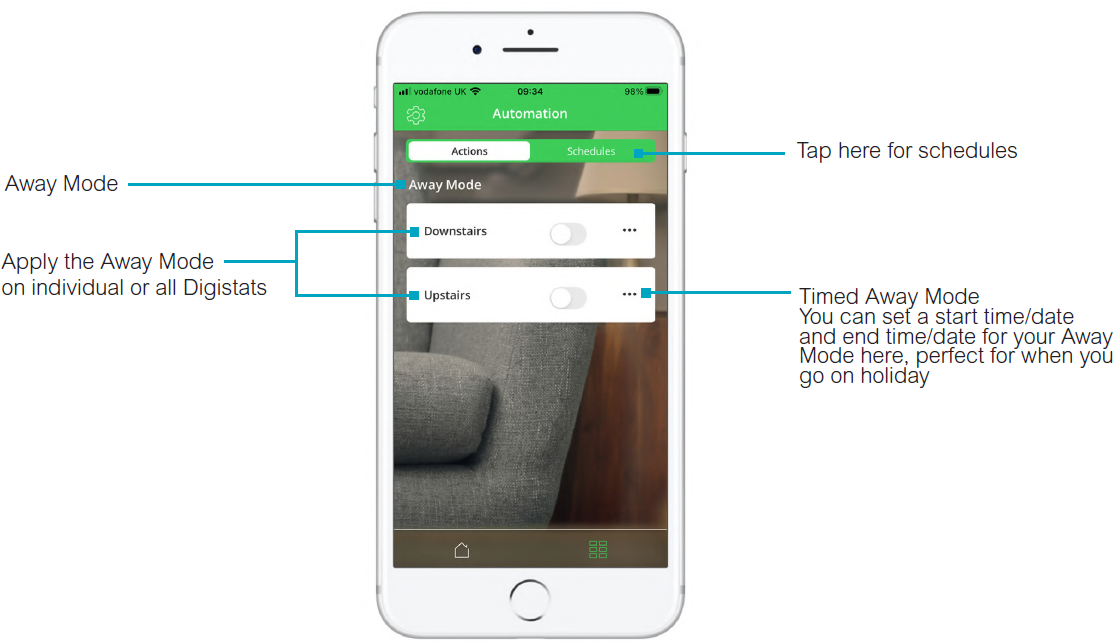
Using Smart Modes
Smart modes help to save you money or to improve comfort levels
Delayed Start
When activated Delayed Start will save you money by delaying start times, effectively adapting your schedule to optimise energy usage based on a learning mode that takes into account the thermal characteristics of your home and the weather forecast
Optimum Start
When activated Optimum Start will improve comfort on colder days when the home takes longer to heat up. This is a learning mode which takes into account the thermal characteristics of your home and the weather forecast, and it will turn on your heating earlier to ensure that the set temperature is achieved by the required time in the schedule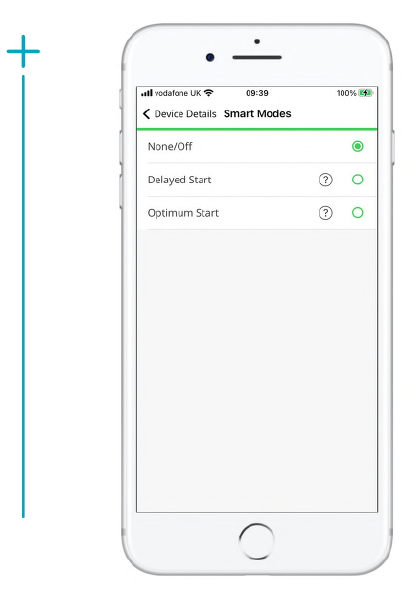
Using the Digistat without the app
The new Digistat can also be used without the app
The next pages explain how you set up the Digistat according to your lifestyle and how you make day-to-day changes such as applying a BOOST or setting Holiday Mode
Getting to know
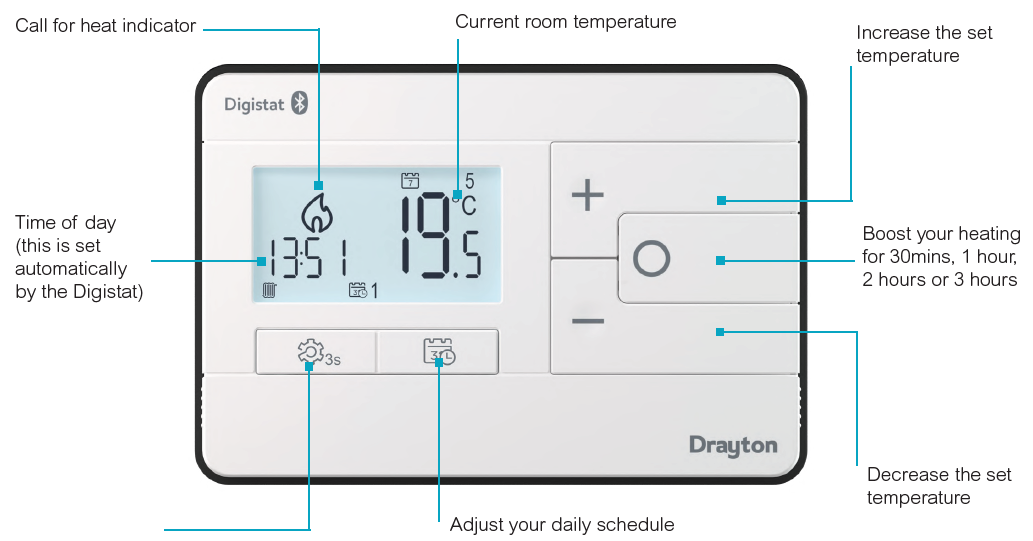
Getting to know your new Drayton Digistat – the essentials
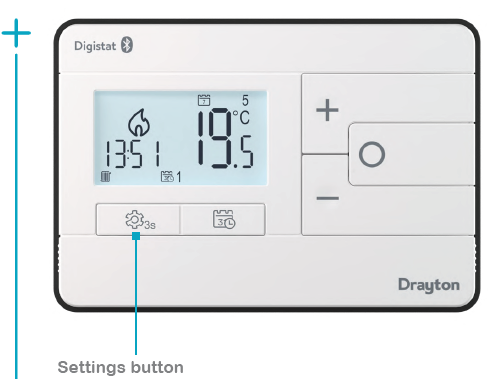
Settings button
- Press and hold for 3 seconds to access menus
- On dual-channel versions press once to change from heating to hot water, selecting with the + or – button and confirming with O.
- The radiator icon indicates heating mode; the tap icon indicates hot water
The display in more detail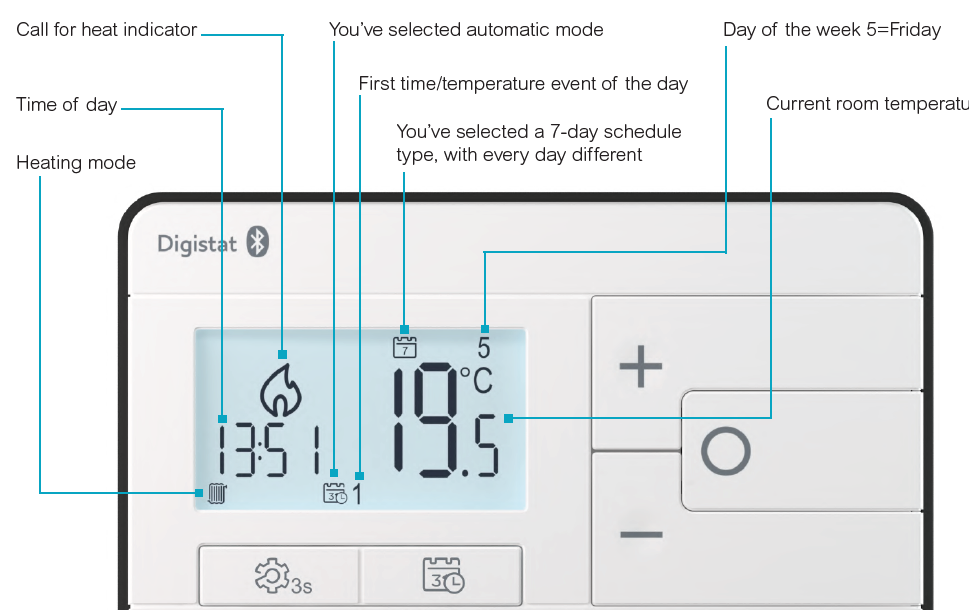
User settings (USEr 01 menu):
- Change from automatic to manual mode, or turn the thermostat OFF
- Set a holiday period (turn OFF the thermostat for a set period)
Advanced user settings (AdvU 02 menu):
- Set the time of day
- Set the date
- Choose a 12-hour or 24-hour clock
- Switch OFF daylight saving time
- Apply a temperature offset
- Lock the display
- Set the backlight ON time
- Choose between a 7-day, 5/2-day, 24hour or manual schedule
- Choose between 3 preset schedules
- Return to factory settings
User Settings, options and defaults
| USEr 01 Menu | Options
Automatic (AUTO), Manual (MAn) |
Default
Automatic (AUTO) |
Note | ||
| Mode | Automatic mode applies the set schedule | ||||
|
Set the start date and time |
Today’s date and time |
Manual mode provides temperature control only | |||
| Holiday Mode (HOL) | |||||
| Set the end date and time | In 7 days time | ||||
| Set the temperature while you are away | 10°C | ||||
Advanced User Settings, options and defaults
| AdvU 02 Menu | Menu item name | Options | Default | Note |
| Time of day | tIME 01 | Set or adjust the time | Automatically factory-set | |
| of day | by the Digistat | |||
| Date | dAtE 02 | Set or adjust the date | Automatically factory-set | |
| by the Digistat | ||||
| Clock format | 12:24 03 | 12-hour or 24-hour | 12-hour clock | |
| clock display | ||||
| Daylight saving time | dSt 04 | ON or OFF | ON | |
| Temperature Offset | OSEt 05 | -5° to +5°C in 0.1°C | 0.0°C | |
| increments | ||||
| Display Lock | LOC 06 | ON or OFF | ON | Set a 3-digit |
| code to lock | ||||
| Backlight ON time | bALt 07 | OFF, 10secs, 20 secs | 10 secs | |
| Schedule Type | ProG 08 | 7 day, 5/2 day, 24 hour, | 7 day | |
| none | ||||
| Preset schedule | PSEt 09 | 1 (heating morning and evening), 2 (heating morning, noon, and evening) or 3 | 1 | |
| (heating all day) | ||||
| Reset to factory settings | rPSt 12 | Yes or No | No |
Understanding schedules
|
Schedule Types |
Select in Advanced User settings, item Prog 08 |
|
7 day |
Every day can be programmed differently –
This is great if you have a very flexible lifestyle |
|
5/2 day |
Weekdays all the same but weekend programmed differently –
This schedule is ideal if your work days are the same every day |
|
24 hour |
Every day the same –
If you work from home or are retired then this schedule will be more suitable |
|
None |
The thermostat controls temperature only all the time –
Use this setting if you want to keep your home at the same temperature at all times |
Understanding preset schedules (selected in Advanced User settings, item PSEt 09)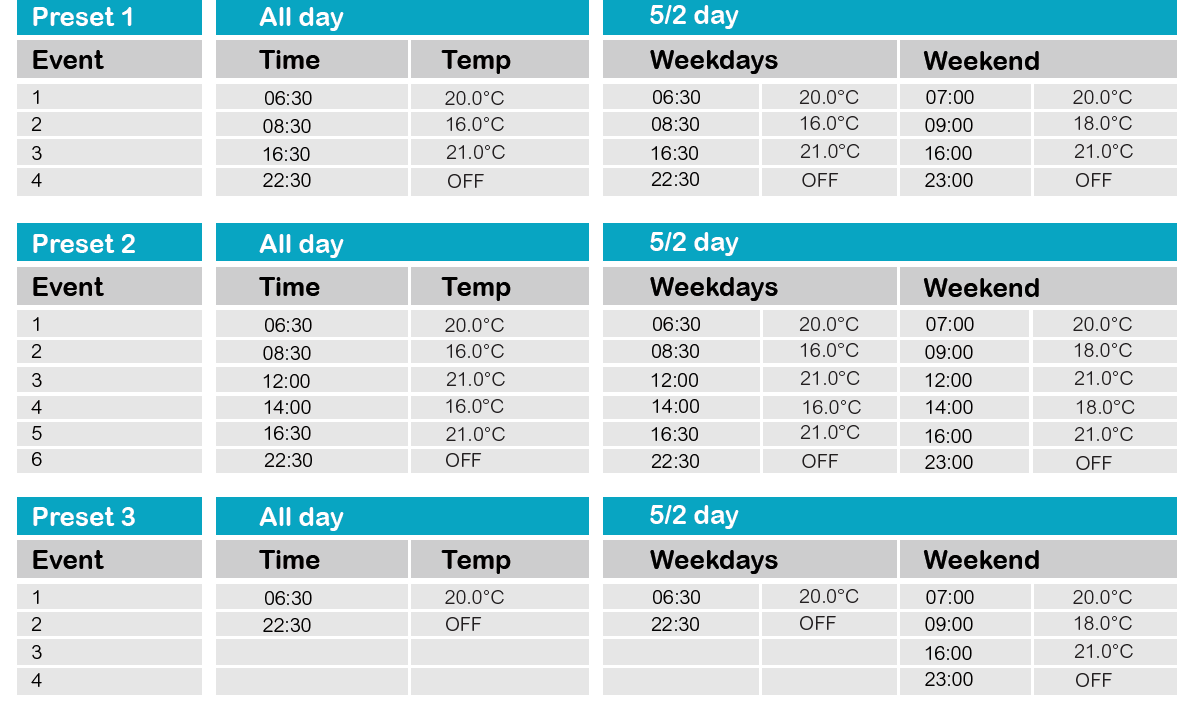
Customizing your schedule Digistat
Setting up Times/Temperatures on the Digistat
- With the product operating as normal in Auto Mode, press
 once. Use + and – to select the day or set ofdays you want to adjust the times and temperatures for. Press O to confirm.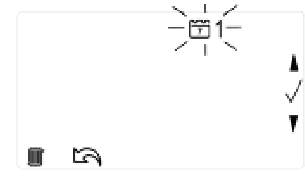
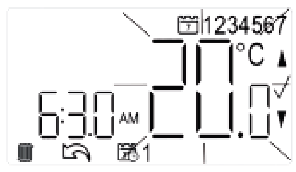
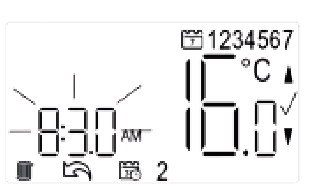
- The time on the display will now be flashing as shown, use + and – to adjust the first period start time. Press O to confirm.
- Once the time has been set the temperature on the display will now be flashing, use + and – to adjust the temperature for the first time period. Press O to confirm.
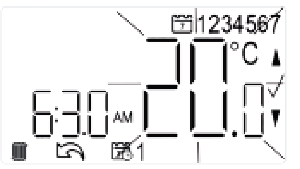
- Move to the next time and temperature periods and adjust as needed, confirming the changes by pressing O. The new schedule will be saved pressing O when the word SAVE is flashing.
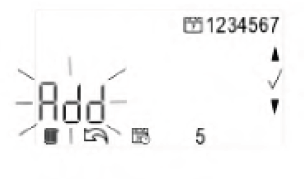
- In Pre-set Program 1 you will have 4 time periods available, to add more (max. 8 per day) press + when you see the SAVE option on-screen and time period 5 at the bottom of the screen, to scroll to the Add option. Press O to add time period then adjust time and temperature as required.
- To exit press
 to go back until you return to the home screen.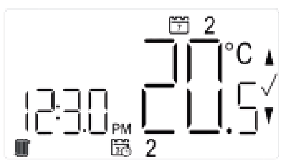
If you are using the dual-channel RF902 you can toggle between heating and hot water by pressing briefly the settings button and using the up and down buttons to select heating or hot water mode. In hot water mode ON/OFF times can be adjusted (Settings Button – Page 14)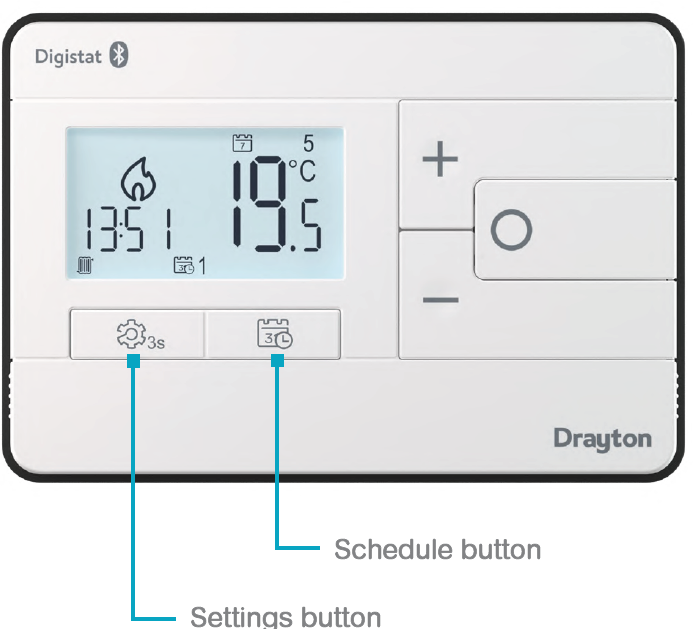
Boosting your heating
Setting a BOOST means applying a new set temperature for a short period of time
You can boost for 30 minutes, one hour, two hours or three hoursA timer symbol will appear bottom right in the LCD to indicate that a boost has been set when the BOOST has expired the normal schedule takes over after pressing the Boost Button (O) you set the length of time for the boost and then the temperature, adjusting with the + and – buttons confirming each one with O buttonThe Digistat remembers your last BOOST so if you want to repeat the previous boost you just press O onceThe BOOST can also be used to setback your heating so you can avoid heating your home while you are out. Select 15°C and up to 3 hours and confirm with the O button. If this is the previous boost you then just need to press O once to setback the heating for the time you have selected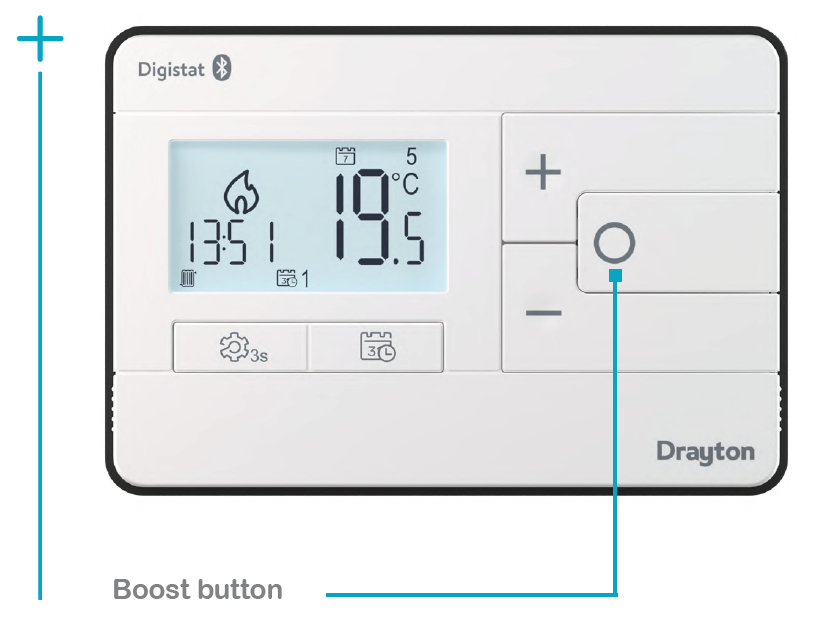
Trademarks
The Bluetooth® word mark and logos are registered trademarks owned by BluetoothSIG, Inc., and any use of such marks by Schneider Electric is under license. Other trademarks and trade names are those of their respective owners. Other brands and registered trademarks are the property of the relevant owner.
Please Note: Information in this guide is subject to change as these products evolve. Screen graphics and descriptions in this guide may not reflect exactly the latest product configuration.
NEED HELP
- Customer Service Tel: +44 333 6000 622*
- Technical Helpline: +44 333 6000 622*
- Please note that international call charges may apply to those calling from outside of the UK.
- Website: wiser.draytoncontrols.co.uk
- E-mail: [email protected]
- @DraytonHome
- DraytonControls
- DraytonHome
- DraytonHome
REFERENCE
DOWNLOAD MANUAL
Drayton 2290B Programmable Room Thermostat User Guide
other manuals:
Drayton 2290B Programmable Room Thermostat Installation Guide