
American Standard Gold 824 Smart Thermostat

The Gold 824 is an easy-to-use, programmable control with a color touch-screen. When connected with Nexia™ Home Intelligence, you can control your home’s heating and cooling system and up to 230 separate Z-Wave devices from a smartphone, PC, or tablet from virtually anywhere This guide will help you configure and connect your Gold 824 Smart Control quickly and easily.
Congratulations!
Thank you for choosing the American Standard Gold 824 Smart Control. The intuitive interface and powerful features incorporated into the compact design of the color touch-screen control represent the latest in climate control technology from the industry’s leader in residential HVAC systems.
This guide will introduce you to the unit’s many features and get you started using your Gold 824 Smart Control right away. To enjoy the full benefit of your Gold 824 Smart Control, it should be connected to a Nexia™ Home Intelligence account. Nexia is a cloud-based platform that helps the smart products in your home work together through a single, convenient application. The Gold 824 can serve as the central hub of an entire network of home automation devices.
Nexia™ Home Intelligence allows you to
- Monitor and control your HVAC system using an internet-enabled smartphone, tablet, or computer from anywhere in the world.
- Build a network of up to 230 Z-Wave-enabled products on one account.
- View weather information including the outdoor temperature, five-day forecasts, radar, and weather alerts.
- Receive text and e-mail notifications that inform you of happenings in your home.
- Receive software updates automatically.
Up to four smart controls of any combination of the 950, 850, Gold 824, and 624 are allowed on your Nexia™ Home Intelligence account for no additional cost. A monthly subscription charge may apply beyond this number of devices.
Start Here!

The User Setup Wizard guides you through the Gold 824’s User configured settings To complete the Setup Wizard and connect the Gold 824 to Nexia™ Home Intelligence, you need:
- A high-speed connection to the Internet (wired or wireless)
- Your wireless (WiFi) network name and password
- An internet browser
- A valid e-mail address
Accessing the User Setup Wizard

To access the User Setup Wizard, press MENU > SETTINGS > USER SETUP WIZARD. When the Setup Wizard is activated, the process cannot be canceled. The Wizard will guide you through the following steps:
Screen Settings
- Adjust the Screen brightness, backlight, screen saver, and color themes.
Schedule Settings
- Set the Gold 824 scheduling feature to enabled or disabled. When Scheduling is disabled, 1-Touch Presets are available.
Guided Scheduling (Scheduling Enabled)
- Automatically create schedules based on answers to a series of questions.
1-Touch Presets (Scheduling Disabled)
- Configure heating and cooling target temperatures for Home, Away, and Sleep conditions. The Presets are selectable from the Home Screen.
Network Setup
Select your wireless network and enter your password. If your wireless network is available but not shown in the list, select Hidden Network, and manually enter your network’s name (SSID).
NOTE: Wireless Setup is not required when the Gold 824 is hard-wired to your home network. Home networking troubleshooting tips can be found at www.nexiahome.com/as.
Nexia™ Home Intelligence Registration (requires Internet connection)
- Your Gold 824 Control comes equipped with remote access and other features from Nexia™ Home Intelligence.
NOTE: If you are having difficulty enrolling the Gold 824 to your account, visit the troubleshooting section on www.nexiahome. com/as for help
Weather (requires Nexia registration)
- Input the Zip Code of the Location for appropriate weather information including five-day forecasts, radar displays,s and weather alerts. That’s it! You can now begin enjoying the benefits of your new American Standard Gold 824 Smart Control!
Home Screen

Temperature Control Panel Screen

The Temperature Control Panel is where target temperatures are manually set and adjusted. Press in the INDOOR TEMPERATURE area to reveal the Temperature Control Panel. Use the UP and DOWN arrows to manually adjust the target temperature. Press in the IND TEMPERATURE area again to commit the changes and hide the Temperature Control Panel. With Scheduling Disabled, the new target temperature is permanently set and will remain in effect until it is changed again or a 1-Touch Preset is activated. See “Configuring 1-Touch Presets” on page 13 for more information. With Scheduling Enabled, the new target temperature is set and, by default, will hold until the next scheduled period occurs. The Hold Until the time is displayed on the Home Screen. To make the new temperature permanent when Scheduling is Enabled, press HOLD PERM after setting the new temperature. See “Overriding Schedules” on page 12 for more information.
To display and edit the current schedule, press SHOW SCHEDULE when Scheduling is enabled.

Settings Screen

Allow at least 1 hour for the Control to acclimate to the ambient room conditions. Temperature display may be inaccurate during the acclimation period.
Scheduling

Changing Periods
Changing Period Start or End Times
- Press anywhere in the Period to make it active. Other Periods will dim and the Start and End times for this Period will be in a black box.
- Press the TIME START or TIME END and adjust the time using the UP and DOWN arrows. Note: The Gold 824 uses intelligent technology and will not allow setting an illogical start or end time. Periods must be at least 30 minutes in duration.
Changing Period Set Points
- Press the active Period’s Cooling or Heating Set Point.
- Adjust the Set Point using the UP or DOWN arrows.
Changing the Period Name
- Press the PERIOD NAME (Wake, Away, etc.).
- Select a predefined name or press NEW and select NEXT.
- If selecting a new name, enter the name using the on-screen keyboard.
- Press NEXT.
When all changes have been made, press APPLY to save and exit, or press CANCEL to discard all changes that were made to this Schedule.
Adding Periods
The Gold 824 Smart Control is capable of adjusting the temperature settings throughout the day according to a user-programmable schedule.
Each day of the week can have its own unique schedule, and each day can have a maximum of six Periods.
Important: Scheduling must be enabled before a schedule can be defined. To verify that Scheduling is enabled, navigate to MENU > SETTINGS > SCHEDULES and verify that ENABLED is highlighted. To set or modify schedules, navigate to MENU > SCHEDULES or select SHOW SCHEDULES from the Temperature Control Panel. Periods define the time of day when the target temperature is adjusted. Each day can have from 1-6 Periods, and each day can have a different number of periods. The Scheduling Screen shows the start time for each Period highlighted across the top row.
Adding Periods
- Press ADD PERIOD and the Add Period Screen is displayed.
- Press the green circle where you would like to insert a Period.
- Choose a name for the new Period or select New to define a custom name and press NEXT.
- If selecting a new name, enter the name using the on-screen keyboard.
- Press NEXT.
- Add additional periods, the maximum per day is 6.
- Press APPLY to save your changes and return to the Schedule Screen. The new period should be displayed.

Deleting Periods

- From the Schedule Screen press DELETE PERIOD, the Delete Periods Screen is displayed.
- Press the TRASH CAN icon in the Period(s) you wish to delete. Note that each day must have at least one Period.
- Press APPLY to save your changes and return to the Schedule Screen. The changes should be reflected in the display.
Overriding Schedules
Note: These functions require Scheduling to be enabled. To enable Scheduling, go to MENU>SETTINGS>SCHEDULES and select ENABLE.
Hold Until
Follow these steps to override a schedule until a specified time.
- 1. Press in the INDOOR TEMPERATURE area to reveal the Temperature Control Panel.
2. To change the Cooling Set Point, press the blue COOLING SET POINT. The Mode Indicator will display blue wavy lines.
Use the UP and DOWN Arrows to adjust the Set Point to the desired temperature.
3. To change the Heating Set Point, press the red HEATING SET POINT. The Mode indicator will display red wavy lines.
Use the UP and DOWN Arrows to adjust the Set Point to the desired temperature.
4. To change the duration of the Hold, press in the STATUS AREA. The day will appear in bold type.
5. Use the UP and DOWN arrows to select the day when the hold will cancel. - 6. Press in the STATUS AREA again to toggle to the Time setting. The Time will appear in bold type.
7. Use the UP and DOWN arrows to select the time when the hold will cancel.
8. Press in the INDOOR TEMPERATURE area to return to the Home Screen.
9. The words Holding Until will appear under the Indoor Temperature.
Hold Permanently
Follow these steps to permanently override a schedule. The changes you make will be held until you cancel the hold.
- Press in the INDOOR TEMPERATURE area to reveal the Temperature Control Panel.
- To change the Cooling Set Point, press the blue COOLING SET POINT. The Mode Indicator will display blue wavy lines.
- Use the UP and DOWN Arrows to adjust the Set Point to the desired temperature.
- To change the Heating Set Point, press the red HEATING SET POINT.
- The Mode Indicator will display red wavy lines. Use the UP and
- DOWN Arrows to adjust the Set Point to the desired temperature.
- Press HOLD PERM. The words Hold Perm will appear in bold type.
- Press in the INDOOR TEMPERATURE area to return to the Home Screen.
- The display will indicate Hold Permanently below the Indoor Temperature.
Canceling an Override
To cancel Permanent Hold or Hold Until following these steps.
- Press in the INDOOR TEMPERATURE area to reveal the Temperature Control Panel.
- To cancel Hold Until, press HOLD UNTIL and the words Hold Until will dim. To cancel Permanent Hold, press HOLD PERM. The words Hold Perm will dim.
- Press in the INDOOR TEMPERATURE area to return to the Home Screen. The words Following Schedule will appear below the Indoor Temperature.
Configuring 1-Touch Presets

Note that when Scheduling is enabled, only the Away preset is available and can be used for energy savings. Use the UP and DOWN Arrows to adjust the Set Point to the desired temperature.
- Touch Presets provide predetermined Heating and Cooling Set Points for Home, Away, and Sleep time periods.
Note: 1-Touch Presets requires Scheduling to be disabled. To disable Scheduling, go to MENU>SETTINGS>SCHEDULES and select DISABLE. When scheduling is disabled, heating and cooling set points are maintained indefinitely. When a temperature change is desired, the user must manually adjust the Gold 824 Control to the new setting.
Configuring 1-Touch Presets
- Press the MENU button and select
- TOUCH PRESETS and press AWAY.
- To change the Cooling Set Point, press the blue COOLING SET POINT to activate the setting. The current System Mode indicator will display blue wavy lines.
- Use the UP and DOWN Arrows to adjust the Set Point to the desired temperature.
- To change the Heating Set Point, press the red HEATING SET POINT area to activate the setting. The current System Mode indicator will display red wavy lines.
Nexia™ Home Intelligence

When enrolled to a Nexia™ Home Intelligence account, the Gold 824 is a Z-Wave security-enabled device that can serve as a central hub for an entire network of home automation devices and can display local weather conditions, five-day forecasts, and National Weather Service warnings and alerts. See the section on Including Z-Wave Devices for more information on taking advantage of this functionality. A basic Nexia™ Home Intelligence account subscription is included with the Gold 824 Control at no additional charge.
Note: Adding additional devices may add charges to your Nexia™ Home Intelligence account. To create your Nexia™ Home Intelligence account go to www.NexiaHome.com/trane.
Including/Excluding Z-Wave Devices
Your Gold 824 is designed to integrate seamlessly with Nexia™ Home Intelligence as part of a complete Z-Wave home automation system. If you do not have a Z-Wave bridge on your account, the Gold 824 will automatically configure itself as your Z-Wave bridge. If you already have a Z-Wave bridge on your account, the Gold 824 will automatically function as a Z-Wave repeater, improving your system’s communication quality. See the section titled Z-Wave Repeater for additional information.

Including Z-Wave Devices
- From the HOME>MENU Screen on the Gold 824 Control, press NEXIA.
- Press INCLUDE DEVICE and follow the device manufacturer’s instructions for setting the Z-Wave device into include mode. You will have four minutes to set the device into include mode after pressing the INCLUDE DEVICE button.
Excluding Z-Wave Devices
- From the HOME>MENU Screen on the Gold 824 Control, touch NEXIA.
- Press EXCLUDE DEVICE and follow the manufacturer’s instructions for setting the Z- Wave the device into exclude mode. You will have four minutes to set the device into exclude mode after pressing the EXCLUDE DEVICE button.
Advanced Z-Wave Functions
Press ADVANCED for advanced Z-Wave functions including unregistering your bridge.
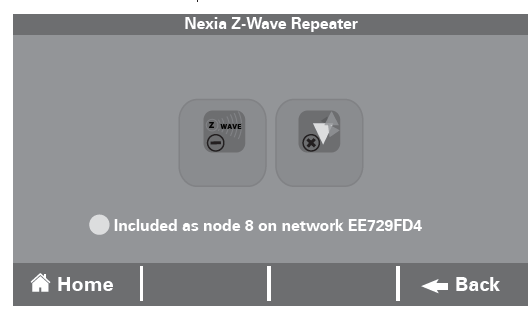
Z-Wave Repeater Screen
In existing Z-Wave networks already configured with a Z-Wave bridge, the Gold 824 Control will automatically configure itself as a Z-Wave repeater. See the section titled Including/Excluding Z-Wave Devices for additional information on using the Gold 824 Control as a Z-Wave bridge. When the Gold 824 Control is functioning as a Z-Wave repeater, the Z-Wave Repeater Screen allows you to exclude the Gold 824 Control from the network and to unregister the device from your account.
Exclude from a Network
Press this button to remove the Z-Wave repeater from your Z-Wave network. This button is used in conjunction with the exclude button on the standalone Z-Wave bridge
- From the HOME>MENU Screen on the Gold 824 Control, touch NEXIA.
- Press EXCLUDE FROM NETWORK to remove the Z-Wave repeater.
- Press the EXCLUDE on the standalone Z- Wave network bridge to complete exclusion.
Unregister
Press UNREGISTER to unregister this Gold 824 Control from your account. This will disconnect the Gold 824 from your account and remove the repeater from your Z-Wave network.
- From the HOME>MENU Screen on the Gold 824 Control, touch NEXIA.
- Press UNREGISTER to remove from your Nexia account.
Security Settings

Security setting options on the 824 Control are Off, On and Guest Access. To access the Security Settings, press MENU>SCREEN LOCK.
Screen Lock Off
The Control and all settings are accessible.
Screen Lock On
After applying Screen Lock and after one minute of inactivity, the Control and all settings are locked. To temporarily access settings, press and hold HOME>MENU for five seconds.
Guest Access
When Screen Lock is ON, Guest Access options are available. This mode allows target temperature changes of up to 5° in either direction from the setpoint and access to the weather. All other settings are locked. To activate Guest Access, press ON and APPLY.
Other Features
Automatic Software Upgrades
When the Gold 824 is connected to a Nexia™ Home Intelligence account, software upgrades will occur automatically and do not require user intervention.
Manual Software Upgrades
The software may also be manually upgraded. This procedure requires a computer with an Internet connection, a USB Flash Drive and the included USB connector. From your computer, go to www .AmericanStandardAir.com. From the Products tab, select Thermostat Controls and click on the Gold 824. Scroll down the page and click on Get Software Updates and follow the on-screen prompts.
Smart Optimization
The 850 Control is equipped with Smart Optimization. By executing a series of the blower and active call on/off tests, Smart Optimization will customize the 850 Control to each unique environment and increase the accuracy of the sensed indoor temperature and overall system performance. Smart Optimization is enabled by default and will automatically execute approximately 18 hours after initial power-up.
Smart Optimization takes
90 minutes to complete and during the process, heating and cooling operations are disabled. The screen will indicate that the 850 Control is in Smart Optimization mode. To delay Smart Optimization for an additional 18 hours, touch the 850 Control Screen and hold for five seconds. To disable Smart Optimization altogether, navigate to Home>Smart Optimization and select Disable and press Apply. To enable Smart Optimization, navigate to Home>Smart Optimization and select Enable and press Apply. Smart Optimization will execute in approximately 18 hours To manually trigger Smart Optimization, first disable, then re-enable the feature.
FCC Notice
INFORMATION TO USER
This device complies with Part 15 of the FCC Rules. Operation is subject to two conditions This device may not cause harmful interference and This device must accept any interference received, including interference that may cause undesired operation. The antenna(s) used for this transmitter must be installed to provide a separation distance of at least 20 cm from all persons and must not be co-located or operating in conjunction with any other antenna or transmitter.
This equipment has been tested and found to comply with the limits for Class B Digital Devices, pursuant to Part 15 of the FCC Rules. These limits are designed to provide reasonable protection against harmful interference in a residential installation. This equipment generates and can radiate radio frequency energy and, if not installed and used in accordance with the instructions, may cause harmful interference to radio communications. However, there is no guarantee that interference will not occur in a particular installation. If this equipment does cause harmful interference to radio or television reception, which can be determined by turning the equipment off and on, the user is encouraged to try to correct the interference by one or more of the following measures.
- Reorient or relocate the receiving antenna
- Increase the separation between the equipment and the receiver
- Connect the equipment to an outlet on a circuit different from that to which the receiver is connected
- Consult the dealer or an experienced radio/TV technician for help
Any changes or modifications not expressly approved by the party responsible for compliance could void the user’s authority to operate the equipment.
ICC NOTICE
This device complies with Industry Canada license-exempt RSS standard(s). Operation is subject to the following two conditions: (1) this device may not cause interference, and (2) this device must accept any interference, including interference that may cause undesired operation of the device.
Reference:
Download Manual: American Standard Gold 824 Smart Thermostat User Manual
https://device.report/energystar/2337840
American Standard Gold 824 Smart Thermostat – Energy Star Certification
Leave a Reply