
WATTS MILUX Chrono-Thermostat

OVERVIEW
The MILUX Chrono-thermostat is a programmable digital thermostat able to control and regulate directly your central heating (Electric, Gas, Oil) or cooling system.
It’s weekly programmable function enables power savings according to your everyday life
FEATURES
- 7 days program ( except for the daily version)
- 9 Built-in programs
- 4 User programs
- Program graphic display
- Room temperature and Time display
- Comfort / Reduced / Anti-freeze temperatures
- Temporary temperature override
- Automatic or Manual operation
- Holiday function
- Select HOT or COLD operation
- Easy wiring (2 conductor wire)
- Keypad lock function (child safety)
- Battery powered to prevent loss of program and time during power cuts
- Battery weakness monitoring
- Battery replacement without loss of program
- Reset function
TECHNICAL CHARACTERISTICS
| Measured temperature precision | 0.1°C (or 0.1°F) |
| Set temperature precision | 0.5°C (or 0.5°F) |
| Set temperature range | 5°C – 35°C for comfort and reduced, 0,5°C – 10°C for anti-freeze |
| Regulation characteristics | – regulation speed: 7.5 cycle per hour (8 minutes cycle)
– regulation band: 2°K of proportional band (adjusted power) |
| Driving element | 5A RELAY (with heater and cooling devices contacts) |
| Connection | 3 points screw connector on the rear part of the box |
| Batteries | 3x LR6 AA 1.5V Alkaline batteries |
DIMENSIONS

INSTALLATION & WIRING

- Place the MILUX thermostat on a plain wall away from windows and doors and not to close to the heater. Put the connection wires thru the back hole of the rear part Use the screws to mount the rear part on the wall.
- Connect the wires to the connector.
Follow the connection diagram - Remove the plastic isolator on the batteries to power up the MILUX. Then close the MILUX as explained in step 3 of the batteries replacement (last page)
- Adjust the time and follow the QUICK START instructions
INSTRUCTIONS
How to use your MILUX thermostat

QUICK START
Short and intuitive instructions
- With ? ? keys Slide the frame
 inside the top MENU to change operating mode (see Modes description).
 - With the + / – keys change set temperature or adjust what is blinking on the screen.
- With OK/
 key switch between actual room temperature and set temperature or validate an adjustment.
 - First go to
 set the clock and adjust the time (use +/ – to adjust minutes, press OK, adjust hours, OK, adjust days, OK )
 - Go to the
 program menu and select built-in week program P1 TO P9 to (or edit user program U1 TO U4 to, see below)
 - Go to
 comfort mode and adjust comfort temperature required with +/ – keys (Default comfort temp. is 21°C)
 - Go to
 reduced mode and adjust reduced temperature required with +/ – keys (Default reduced temp. is 17°C).
 - Finally
 go to automatic mode. Your MILUX Chrono-thermostat is now working and follows the program.
MODES DESCRIPTION
Instruction details for each mode
 Manual COMFORT operating mode :
Force comfort temperature operation indefinitely or for a few hours or days (see Holiday function). By pressing + or – key the comfort temperature start to blink and can be adjusted. If you wait a few seconds theactual room temperature reappears. MILUX regulation will now follow comfort temp.- AUTOMATIC operating mode : MILUX Chrono-thermostat will follow automatically the program according to the actual time. By pressing + or – key you can override the current set temperature until the next change in the program.
 The segment will lit up. Use + / – keys to adjust the temporary required temperature. At the next program change the will disappear and the program continues without any alteration.
 - Manual REDUCED operating mode :
Force reduced temperature operation indefinitely or for a few hours or days (see Holiday function). By pressing + or – key the reduced temperature start to blink and can be adjusted. If you wait a few seconds theactual room temperature reappears. MILUX regulation will now follow reduced temp. - Manual ANTI-FREEZE operating mode : (only for Heating systems, HOT operation selected) Force anti-freeze operation indefinitely or for a few hours or days (see Holiday function). By pressing + or – key the anti-freeze temperature starts to blink and can be adjusted. If you wait a few seconds the actual room temperature reappears. MILUX will keep temperature above freezing.
 OFF mode: Use this mode if your Heating or cooling installation needs to be turned OFF. MILUX Chrono-thermostat will switch off the installation and then switch itself OFF (blank screen). User programs are saved, time is kept running and battery consumption becomes very low. Any key will wake up the MILUX. The OK / key displays the actual room temperature.
DANGER: IN THIS MODE YOUR INSTALLATION CAN FREEZE because the MILUX is stopped.- Set CLOCK menu :
Use this menu to adjust the MILUX clock to the actual time.
- PROGRAM menu : By pressing + or – key the Program number start to blink
 Shows the daily program
If you select a built-in program p1 to p9 to and press OK this program will be followed in If you select an user program U1 to U9 to and press OK you will enter the USER PROGRAM EDITION. - USER PROGRAM EDITION:
 Current blinking cursor position hour The + key sets temperature at the current blinking program hour The – key sets temperature at the current blinking program hour Use ? ? keys to slide the blinking cursor position in the day and modify or correct easily the program When the displayed day is correct press OK to jump to the following day. When you press OK on the last the day you will exit the User program edition and return to the top menu.
Now your user program will be followed if you put the MILUX in automatic operating mode.
SPECIAL FUNCTIONS
 HOLIDAY Function: only for comfort mode, reduced mode or anti-freeze mode. With ? ? keys go to function. Then you can select with + or – keys the number of hours
  or the number of days
 before the MILUX automatically returns to mode and continues to follow the program.
- KEYPAD LOCK Function: function to prevent children from playing and changing the MILUX parameters In
 and operating modes you can maintain the OK key pressed and press simultaneously on the + or – key to lock (
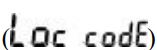 ) or un-lock (
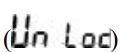 ) the keypad.
 - HOT/COLD operation selection: Go to , maintain the OK key pressed and press simultaneously on ? key
Then press + to choose Hot operation (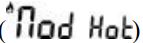 ) or press – to choose Cold operation (
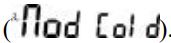 ).
). - RESET Function: Erases all user programs and sets the MILUX factory parameters by default
Go to OFF mode, maintain + and – keys pressed and press simultaneously on the OK key. All the segments will lit up during a few seconds showing that the MILUX has been erased and restarted with factory defaults parameters. - Factory parameters are :
 all comfort HOT operation
Then re-adjust the time and follow the QUICK START instructions.
BATTERIES REPLACEMENT
How to change the batteries
- Press on then left side button and pull the front panel to remove it. You now have access to the batteries.

- Replace the three LR6 AA 1.5V batteries with new ones (Alkaline cells recommended)
IMPORTANT: You have 1 minute to change the batteries - To close the MILUX, Place the front panel in front of the rear part. Insert the three contacts in the connector holes. Then push the front panel while keeping it parallel to the rear part.
You can help the button to click by pressing slightly on it.
Reference:
Download manuals:
WATTS MILUX Chrono-Thermostat User Manual
![]()
Leave a Reply