
Stelpro ET180 Electronic Thermostat

IMPORTANT INSTRUCTIONS
Mounting location: The thermostat must be installed indoor only. It should be mounted on a wall, at about 1.5 m above the floor, where it can detect the temperature variations and where the air is circulating freely. Avoid to mount it near hot surfaces (e.g. TV, heater, refrigerator), or to expose it directly to sunlight, drought or equipment radiation, or in a laundry room. Do not expose this unit to dripping or splashing
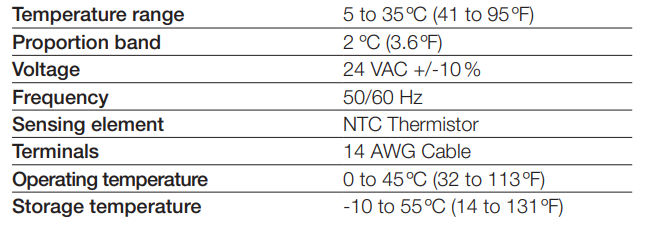
SPECIFICATIONS
INSTALLATION
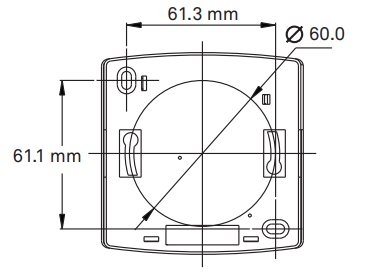
THERMOSTAT INSTALLATION
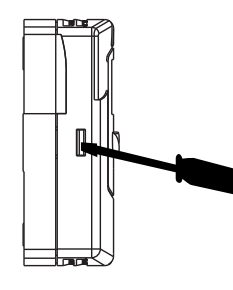
- With a screwdriver, pull one side of the cover and gently pull the lock hook towards the inside of the thermostat on each side, and then remove the front cover.
- Ensure the surface is levelled.
- Route the wires in the terminal block.
- Insert the two wall anchors into the wall.
- Secure the thermostat to the wall with the two screws provided.
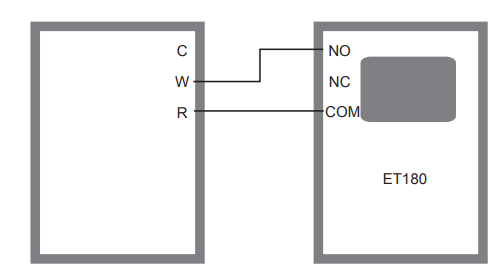
ELECTRICAL CONNECTIONS
- Make the proper electrical connections according to the circuit diagram.
- Afterward, push all the wires back into the wall.
- To close the cover, align the openings on each side of the cover with the lock hooks, and push.
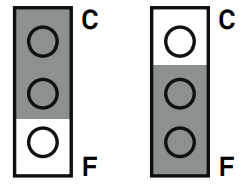
JUMPER SELECTION AND TEMPERATURE SETTING UP
- Select C for Degree Celsius or F for Degree Fahrenheit as illustrated.
- Select the temperature by pressing down the thermostat buttons.
- The display returns to the room temperature after 8 seconds.
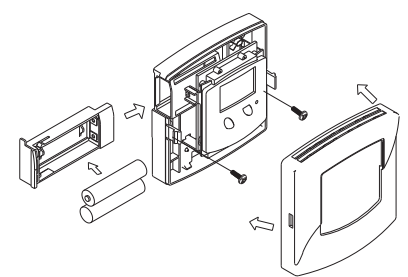
INSTALL THE BATTERIES
- Open the battery compartment.
- Install the batteries, respecting the polarity.
- Close the battery compartment.
WARRANTY
°STELPRO LIMITED WARRANTY
Limited one-year warranty. See details on www.stelpro.com.
Reference
Download Manual
Stelpro ET180 Electronic Thermostat Owner’s Manual
![]()
Leave a Reply