 Pro1 Technologies RZ251W Thermostat
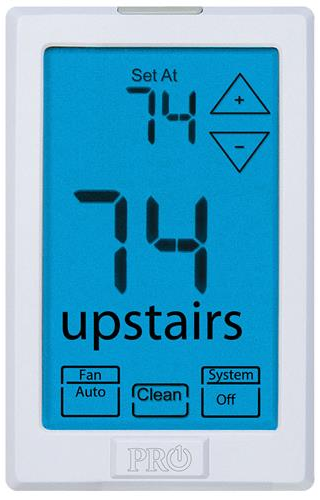
Pro1 Technologies
P.O. Box 3377
Springfield, MO 65808-3377
Toll-Free: 888-776-1427
Web: www.pro1iaq.com
Hours of Operation: M-F 9 AM – 6 PM Eastern
This manual covers the following models:
- RZ251W (For use with 955WH Remote Sensing Thermostat and the Z955W Zoning System.)Congratulations on purchasing our Wireless System. This remote sensor was designed to the highest reliability and ease of use standards. Thank you for choosing our quality products
Caution:
Equipment damage hazard Do not operate the cooling system if the outdoor temperature is below 50 ˚F (10 ˚C) to prevent possible compressor damage
Quick Reference
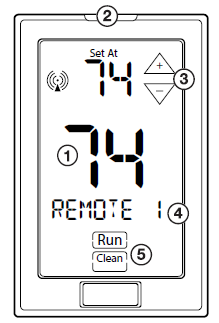
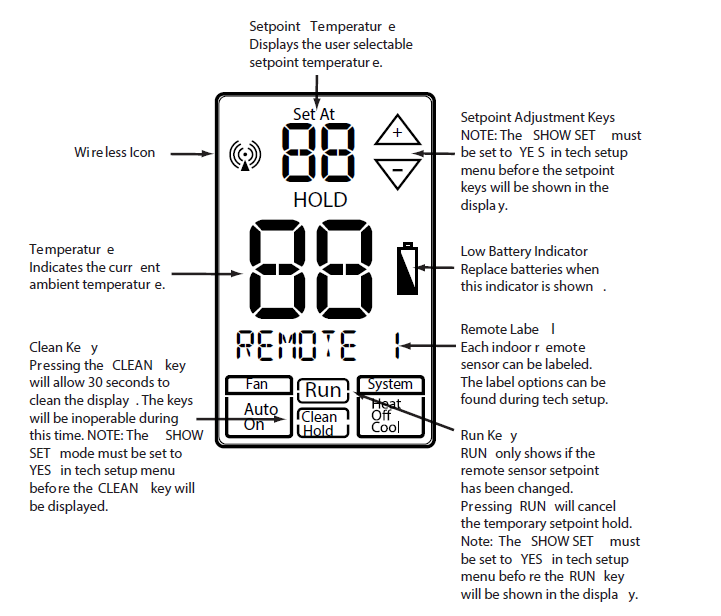
- LCD
- Glow in the Dark Light Button*
- Temperature Setpoint Keys**
- Remote Name
- Run and Clean Keys
Wireless Range
The range between the remote and the master thermostat is approximately 100 feet with no obstructions and approximately 50 feet in standard residential metal, brick, and concrete construction.
NOTE ABOUT THE LIGHT BUTTON:
This button is used to light up the display. DO NOT hold the light button down for longer than 3 seconds or you will enter the technician setup screens. If inadvertently enter the tech setup press and release the light button a second time to exit the tech screens. NOTE ABOUT SETPOINT, RUN, AND
CLEAN KEYS:
These keys will only be shown if they have been turned on in the Technician Setup menu.
Mercury Notice: All of our products are mercury-free. However, if the product you are replacing contains mercury, dispose of it properly. Your local waste management authority can give you instructions on recycling and proper disposal.
Zoning Quick Reference

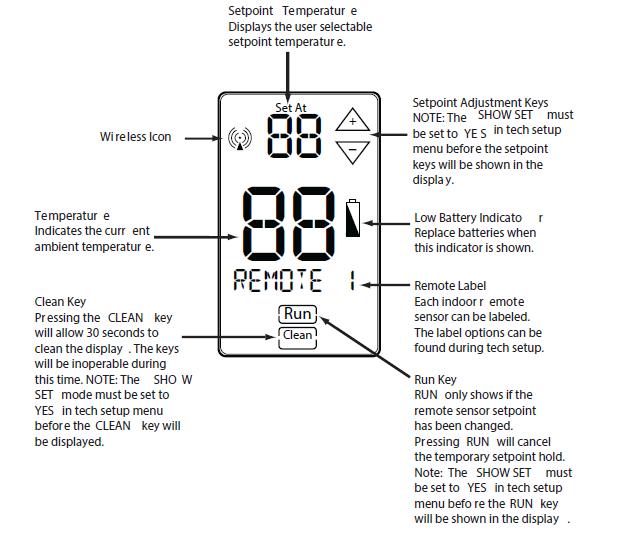
- LCD
- Glow in the Dark Light Button*
- Temperature Setpoint Keys**
- Remote Name
- Run and Clean Keys**
*NOTE ABOUT THE LIGHT BUTTON:
This button is used to light up the display. DO NOT hold the light button down for longer than 3 seconds or you will enter the technician setup screens. If inadvertently entering the tech setup press and release the light button a second time to exit the tech screens. NOTE ABOUT SETPOINT, RUN, AND
CLEAN KEYS:
These keys will only be shown if they have been turned on in the Technician Setup menu.
Wireless Range
The range between the Zone Thermostat and the Master Thermostat is approximately 100 feet with no obstructions and approximately 50 feet in standard residential metal, brick, and concrete construction.
Mercury Notice: All of our products are mercury-free. However, if the product you are replacing contains mercury, dispose of it properly. Your local waste management authority can give you instructions on recycling and proper disposal.
Mounting Locations
The remote sensor should be mounted or placed approximately 4 to 5 feet above the floor. Select an area with average temperature and good air circulation.
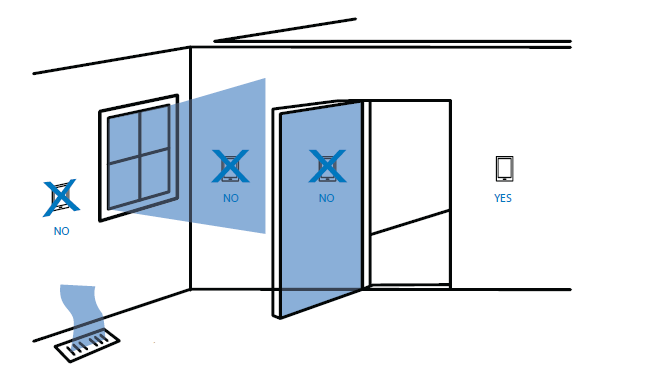
Do not mount or place Remote Sensors in locations:
- Close to hot or cold air ducts
- That are in direct sunlight
- With an outside wall behind the thermostat
- In areas that do not require conditioning
- Where there are dead spots or drafts (in corners or behind doors)
- Where appliances could radiate heat
- Do not set it next to or on hot appliances
- Do not put it in your pocket or hold in your hands for a long period of time.
- Body heat will distort the temperature reading.
Wall Mount – Removable
- Mount T-bracket on the wall.
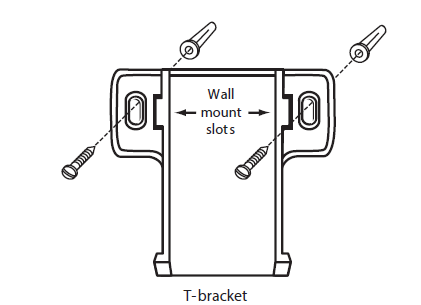
- Slide the Remote Sensor over the mounted T-bracket.
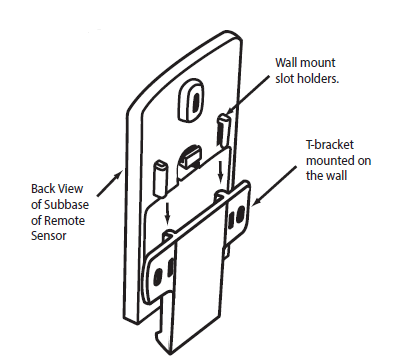
Mounting Options
- Slide the T-bracket up into the slot holders.
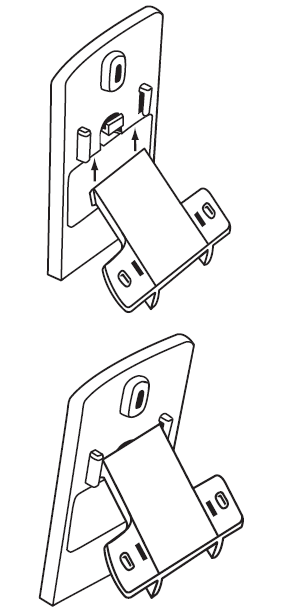
- The t-bracket will stop on the top of the slot holders.
- Remove the remote from the subbase.
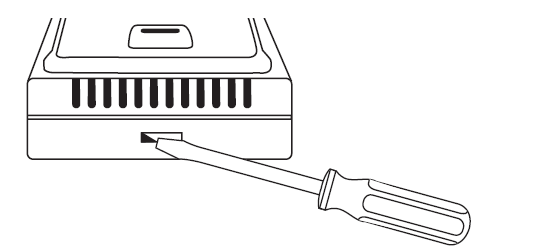
- Mount sub base to the wall
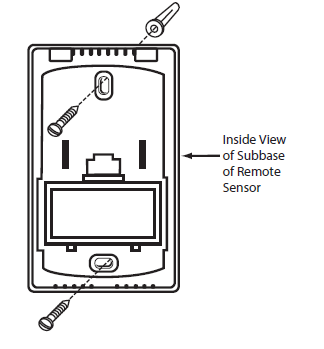
- Remove the remote from the subbase.
Installing Batteries
- Use the finger tab on the back of the remote to remove the battery door.
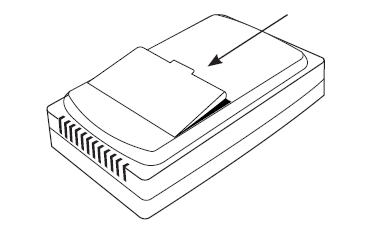
- Once you have removed the door from the back of the remote, insert 2 AA Alkaline batteries and replace the battery door.
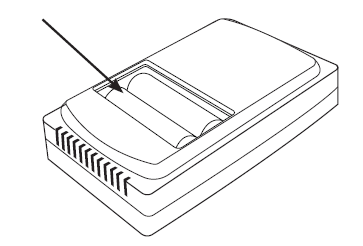
Inserting Batteries for Permanent Wall Mount
- Remove the remote from the subbase. It is held on the subbase by a plastic tab on the bottom of the remote sensor. head screwdriver to remove it from the subbase.
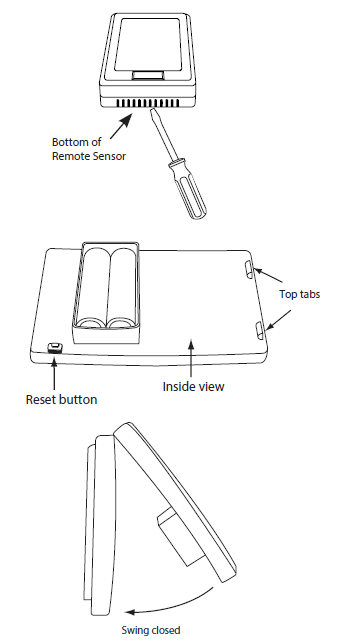
- Once you have removed the remote from the sub-base, insert 2 AA Alkaline batteries.
- Attach the remote to the subbase by aligning the two top tabs and then close as shown.
Remote Sensing New Features
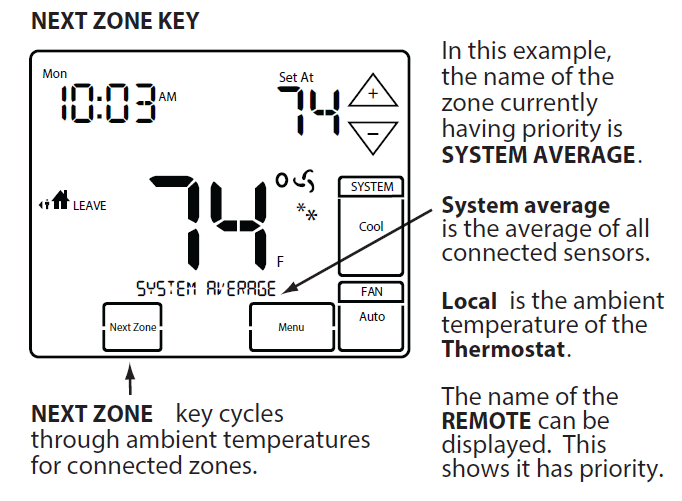
Example of programming a priority for the SLEEP time period: the program should remain on the system average. When on the SLEEP time period during programming, press NEXT ZONE until Bedroom 1 shows. During the SLEEP time period, the other remotes in the house will be ignored and the system will be controlled only by the ambient temperature of the remote in the master bedroom. The WAKE, LEAVE, and RETURN temperatures will be controlled by the system average.
New Features on the Thermostat After a remote is Connected
THERMOSTAT HOLD (PERMANENT)
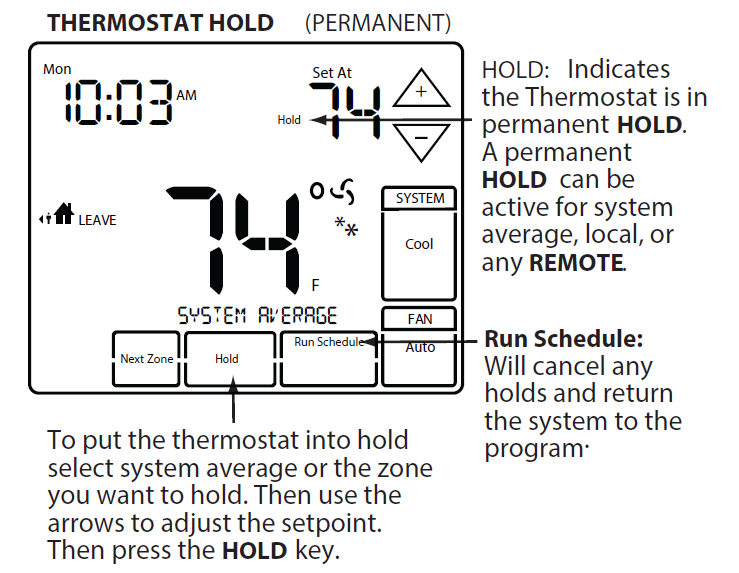
Remote Sensing New Features
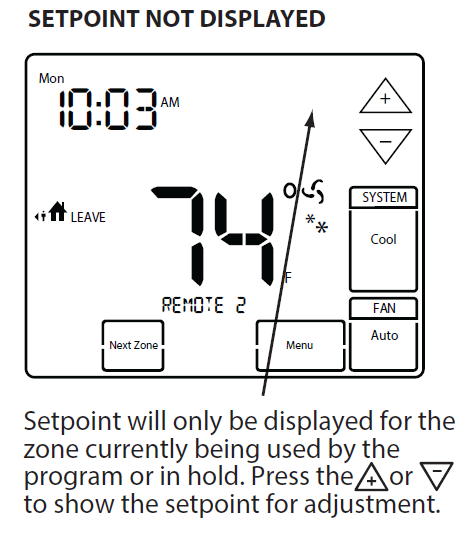
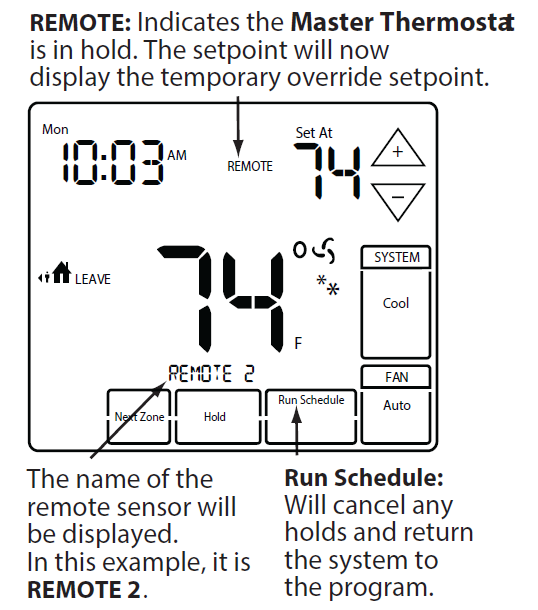
TEMPORARY HOLD (4 HOURS)
REMOTE: Indicates the Master Thermostat is in hold. The setpoint will now display the temporary override setpoint.
Warranty
Warranty Registration:
Your new thermostat has a 5-year limited warranty. You must register your warranty within 60 days of installation. You can register your new thermostat in 2 ways.
- Go to our company website, select warranty registration, and fill out a short registration.
-or- - Complete the form below and mail it to the address shown.
Warranty Registration
Thermostat Model:
Date Installed:
Complete the form and mail it to Thermostat Warranty Registration P.O. Box 3377
Springfield, MO 6580 Cut Out For Warranty Registration www.pro1iaq.com
Reference:
Download Manual :
Pro1 Technologies RZ251W Thermostat Operational Manual


Leave a Reply