
PNI ACRF8508 WIRELESS PROGRAMMABLE ROOM THERMOSTAT
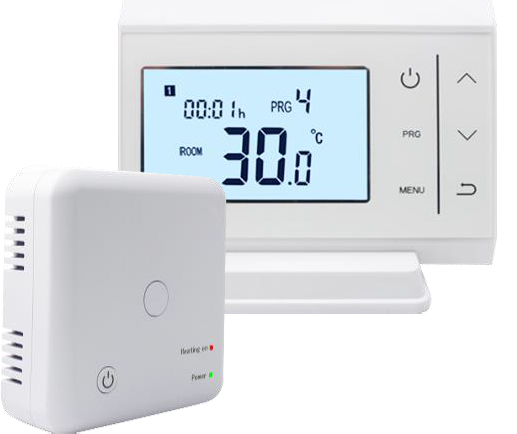
The surface-mounted radio thermostat has been developed to be able to switch and conventional heating system on and off using a set temperature and time.
Key Features
- Large display can be clearly read with the background lighting
- 2xAAA battery backup
- 4 periods of each day programmable (5+1+1 )
- Surface mounting with Easy to fit thermostat and receiver.
- Six buttons make it easy to use.
- Set temperature, measured temperature, time displayed
- Temperature display in degrees Celsius.
- RF frequency: 868Mhz
- CE, ROHS approved
Technical Data
- Power Supply – 2*AAA battery
- Backlight – White
- Load current – Max 10A
- Sensor – NTC 10K,
- Set Point Range – 5~30℃
- Accuracy – ± 0.5℃ (step control by +0.5℃)
- Ambient – 0~50℃
- Protection Class – IP20
- Relative Humidity – 85%
- Housing – ABS to UL94-5 fire retardant plastic
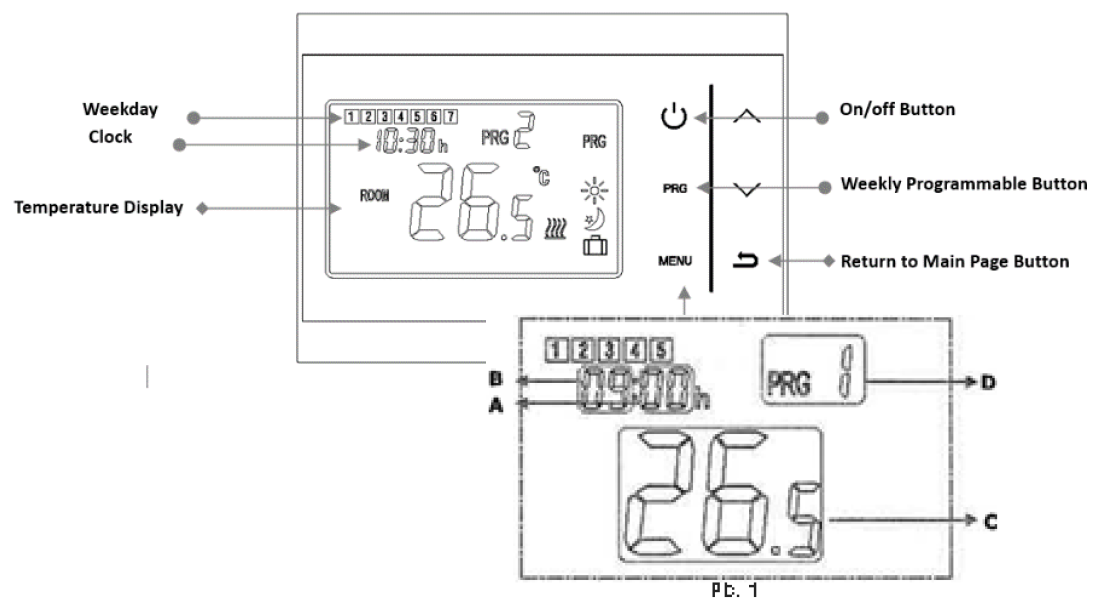
- The weekday is fixed from Monday to Sunday(l -7), each schedule have 4 periods(1-4). Each press of PRG button PRG button can into next item setting.
- Press PRG and hold for 3 seconds, the minutes flash(A), change the values by up and down button.
- Press PRG,the temp. Digital flash(C),change the values by up and down button.
- Press PRG the PRG. Digital(D) to change to PRG 2 automatically. The minutes of PRG2 flash.Repeat the same method to set the time and temp. Of each period.
- After schedule done, press Return Button to main display.
Example:
| Monday to Friday | Saturday | Sunday | ||||||||||
| Period | 1 | 2 | 3 | 4 | 1 | 2 | 3 | 4 | 1 | 2 | 3 | 4 |
| Time | 6:30 | 8:00 | 18:00 | 22:30 | 8:00 | 10:00 | 18:00 | 23:00 | 9:00 | 12:00 | 19:00 | 23:45 |
| Temp. | 21°C | 18°C | 21°C | 16°C | 21°C | 21°C | 21°C | 16°C | 23°C | 21°C | 16°C | 21°C |
Advance Setting
Turn off the sender, long press “MENU” button until the screen is lit, press + or – to set value.
Press “PRG” button to enter to next step.
Time Adjust and Mode Temp. Setting
| Menu | Description | Range | Default value |
| 01 | Temp. Calibration | -8 ~ +8 ℃ (in 0.5 ℃ increments) | 0℃ |
| 02 | Switching Sensitivity | 0.5 ~ 5℃ | 0.5℃ |
| 03 | Frost Protection Temp. | 3~10 ℃/ – -(Function OFF) | – – |
| 04 | Open window detect function (OWD) | 00(Function OFF) / 01(Function ON) | 00 |
| 05 | OWD Detect Time | 2~30 min | 15 min |
| 06 | OWD Drop temp.(within detect time) | 2-4 ℃ | 2℃ |
| 07 | OWD Delay time select (Return to previous working status) | 10-60 min | 30 min |
| Address code | Pairing Code | / | 4 digits |
| Software | Software version | / | / |
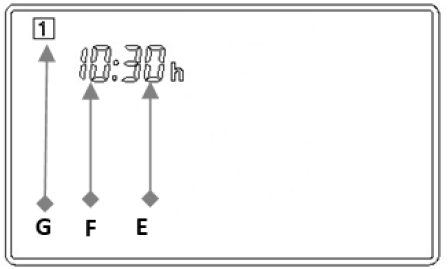
To set the time and day with following steps(Pic.2)
- Press Menu button and hold 3 seconds, the minutes display flash(E), change the values by up and down button.(Each press is one minutes)
- Press Menu, the hour display will flash(F),change the hour by up and down button.(Each press is one hour)
- Press Menu button, the day display flash (G)as a number, change this value by up and down button. User1 for Monday;2 for Tuesday;3 for Wednesday;4 for Thursday;5 for Friday;6 for Saturday;7 for Sunday.
After time and day adjust, you can continue following steps to pre-set the mode temp.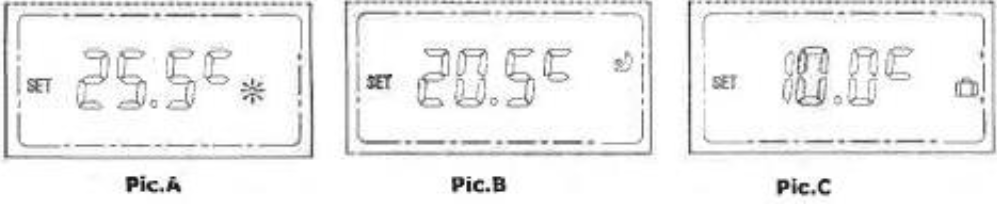
- Press Menu button, the comfort mode temp. Display flash(Pic.A),change the values by up and down.
- Press Menu button, the Energy saving mode temp. Display flash(Pic.B), change the values by up and down.
- Press Menu button, the holiday mode temp. Display flash(Pic.C),change the values by up and down.
The comfort function is display as symbol(e.g.25.5℃)
The energy saving function is display as a Symbol(e.g.20.5℃)
The holiday function is display as a (e.g.10℃)
Temperature Calibration
The measured temperature is easy to calibrate. Only use this measured if the temperature deviates(This happens if you place the thermostat in a drawer or similar).
- Turn Thermostat off, press and hold the Menu button for 3 seconds; the code 0007(ID code) will be shown in the top left.
- Use the up and down buttons to set the temperature value. This value can be adjust by -8 to +8℃.
- Press the menu button on the thermostat to save this function and leave the menu.
Code Pairing

- Long press the code pairing button on the receiver until LED 1 is flickering quickly.
- Turn off sender, and long press Menu button until lcd illuminated, then press Menu button again, till address code display.
- Wait for a while, LED 1 stop flickering. Code pairing done.
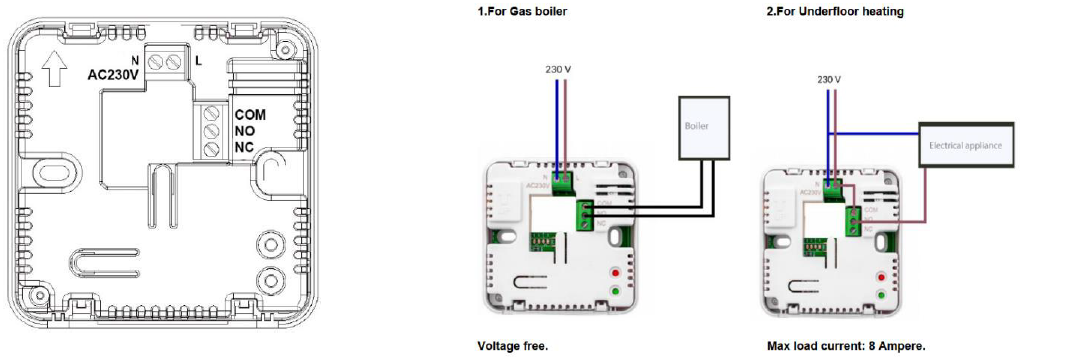
Wiring Diagram
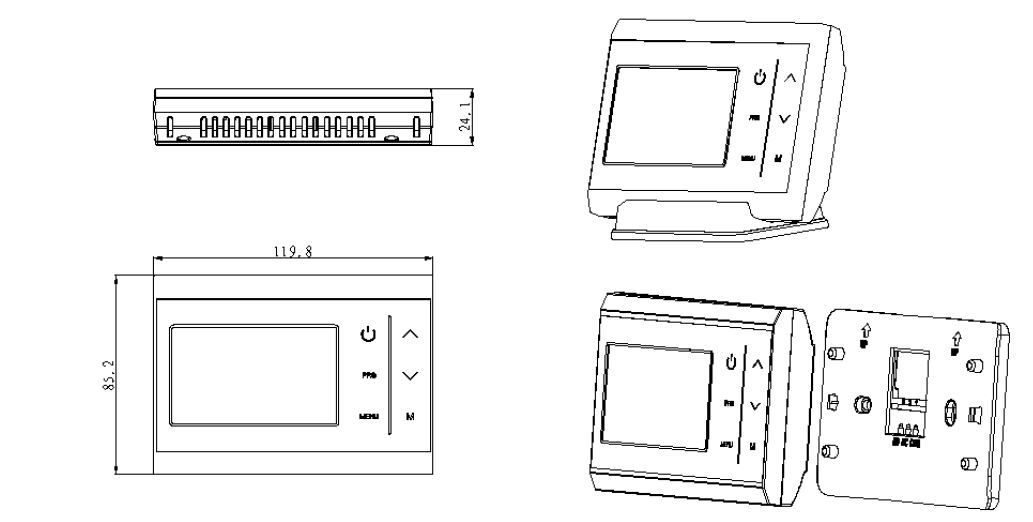
Installation and dimension
Reference:
DOWNLOAD MANUALS:
PNI ACRF8508 WIRELESS PROGRAMMABLE ROOM THERMOSTAT User Manual
![]()
PNI ACRF8508 WIRELESS PROGRAMMABLE ROOM THERMOSTAT User Manual
Leave a Reply