
MINCO HEAT ME83 Heating Thermostat

Application
The thermostat is recommended for control of electric heating devices or on/off valve actuators used in water-based systems.
User Operation
- Power Key: Press the On / Off key to turn the system on or off.
- Mode Key: You can select “period control mode” or “manual mode” with this key
- Up / Down key: Press the Up and Down keys to set the temperature and adjust system parameters. And press Up and Down simultaneously and hold for 5 seconds to enter lock key function.
- Clock key: You can adjust the time and the week with this key.
- Manual mode: Set the temperature manually with this key.
- Automatic mode: Adjust to the automatic mode, the thermostat will work cyclically by week programming.
Anti-frozen function
In the state of shutdown, the thermostat will turn on the heating device automatically When the room temperature is below 5℃. when the room temperature is above 7℃, the thermostat will turn off the heating device automatically.
Technical data
- Temperature sensor: NTC
- Temperature accuracy: ±1℃
- Power consumption: <170uW
- Voltage:
- Load current: 3A
- Temperature setting: 5~90℃
- Protection Class: IP20
Programming: 6 –event time and temperature
In the shutdown state, long press the mode key ” ” and the clock key ” ” for 5 seconds to enter programming mode. you can switch parameters by mode key. After entering the programming mode, press the mode key to adjust ” hour” , then press the mode key to adjust the “minute”.Press the mode key again to adjust the temperature.
- Wake-up
- Leave
- Return(am)
- Leave(pm)
- Return(pm)
- Sleep

Advanced setting (qualified person preferred)
Press![]() at the same time to enter the mode of advanced setting immediately when the thermostat is turned off. The following seven functions can be chosen by the” M “key.
at the same time to enter the mode of advanced setting immediately when the thermostat is turned off. The following seven functions can be chosen by the” M “key.

Mounting steps
- See figure 1, mounted on the wall with a pitch of 86mm screw expansion sleeve.
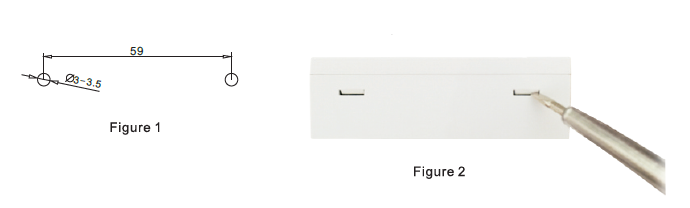
- See figure 2, open the surface shell and the bottom shell according to the alignment direction, route the desired wire through the back of the case to the wire slot, and according to the actual situation to set aside about 20CM length.
- See figure 3, fix the bottom shell on the wall, terminal fixed wire, cover the bottom shell with the surface shell.

Mounting Location Recommended
The heating thermostat should be mounted on the wall with air flowing freely around. Warning: The mounting location should not be influenced by another heat source (e.g. sunlight), air flow through doors& windows or the temperature of outer wall.
Common failure handling
| Failure | Handling |
| No power on | 1.Check whether the battery is reversed. 2.Check if the power button is working. |
| LCD display garbled | 1.The shell is deformed after installation,can be reinstalled. |
| Display normal No output | 1. Check whether the wiring between the MPU and the power board is damaged. 2.Check whether the null line of live line is connected wrong. |
| Remote failure | Check if the remote control battery has enough power , if not replace the battery. |
| Temperature display error | Adjust the panel temperature display by the first option in the Advanced tab. |
Wiring diagram Icon description

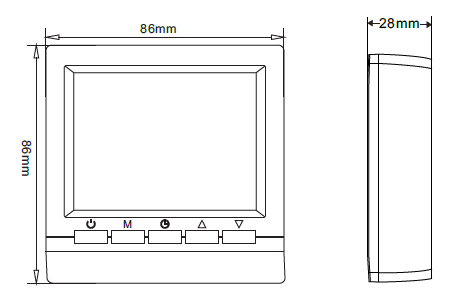
Dimension
References
Download Manual
MINCO HEAT ME83 Heating Thermostat Instruction Manual
![]()
Leave a Reply