
Minco Heat M6.716 Programming Thermostat

M6. Weekly Programming Thermostat with LCD Screen
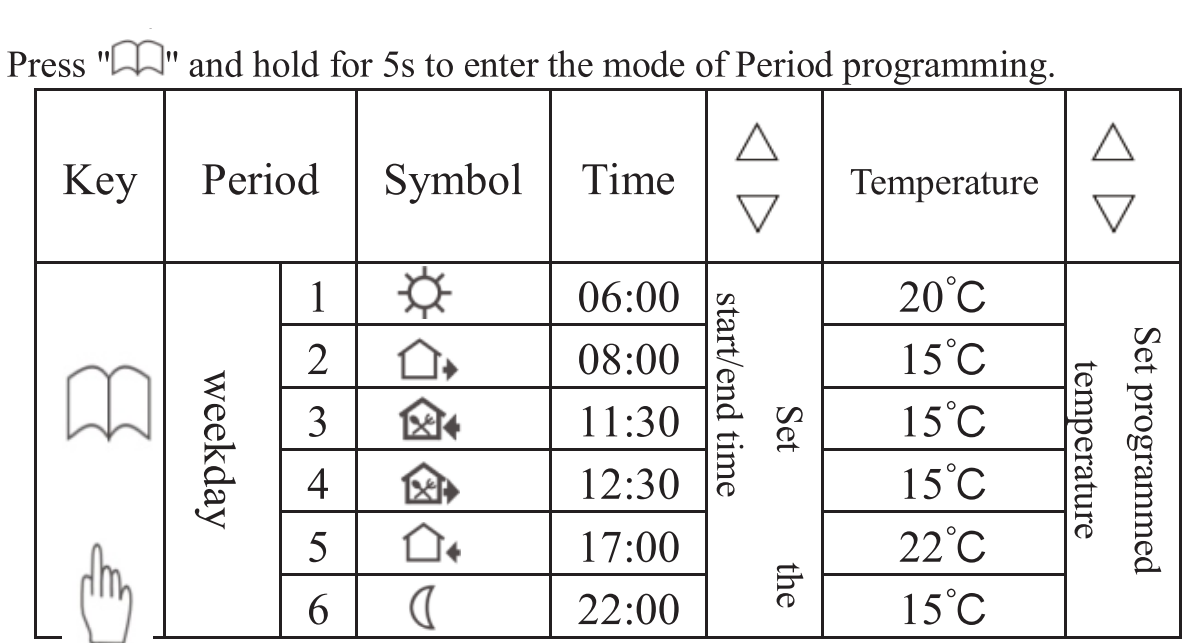
For weekly circulation, it is possible to set 6 periods called events each day with different temperatures, also you can select “manual mode” or “temporary control mode” according to your individual requirements. The thermostat is recommended for the control of electric heating devices or on/off valve actuators used in water-based heating systems.
Selection Table:
Technical data
- VOLTAGE: AC230V (ACI10VIAC24V available)
- Power consumption: 2W
- Setting range 5C-90C
- Limitation range :5C 99C (factory setting: 35’C)
- Switching differential :0.5C 10’C (factory setting: +1C)
- Ambient temperature -5C 50C
- Protective housing: IP20
- Housing material: self-extinguishing PC
Daily use of the thermostat

Display symbols:
 Manual mode
 Period control mode
 Heating
 Getting up, the first period
 Out in the morning, the second period
 Going home at noon, the third period
 Out in the afternoon, the fourth period
 Going home in the evening, the fifth period
 Sleeping at night, the sixth period
Period programming

Advanced setting ( qualified person preferred)
When the thermostat is turned off, You can press”N” and turn on it at the same time then you can enter the mode of advanced setting.
 Sensor failure:
Please select the right sensor mode when operating, it will display the “Err” symbol on screen far sensor failure, thermostat must be checked till the fault is eliminated.
Explanation of symbols

Dimension:
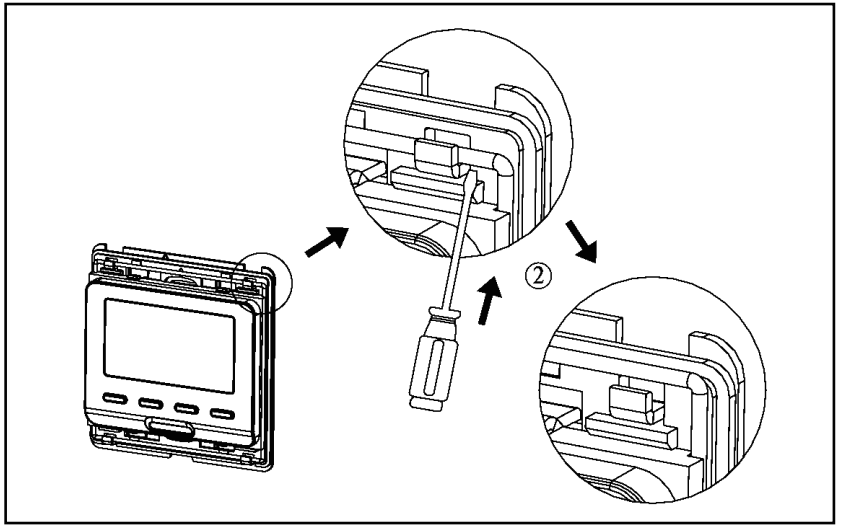
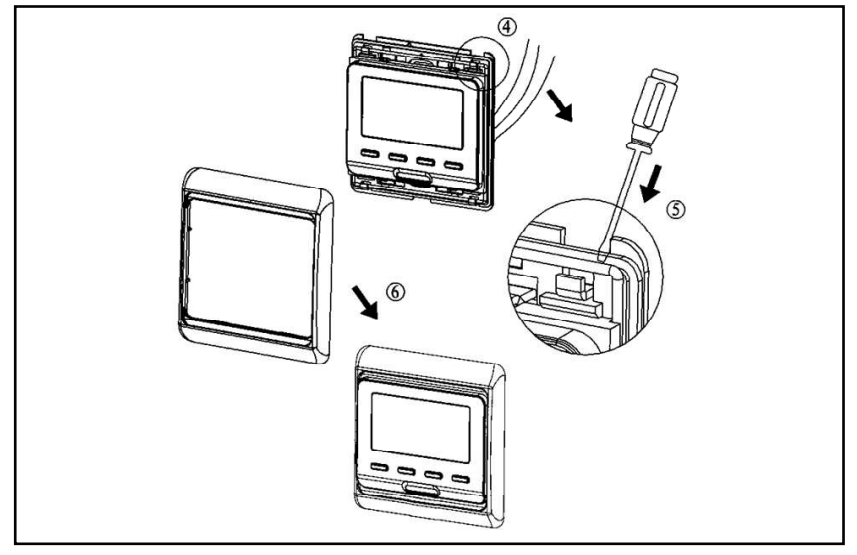
Unit: mm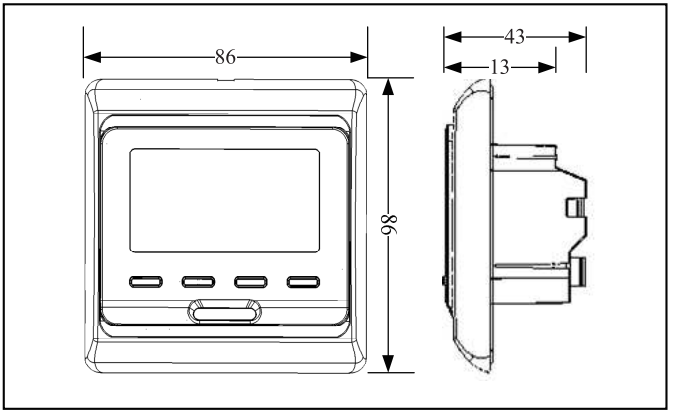 MOUNTING STEP
- Release the front cover by inserting a screwdriver into the bottom crack

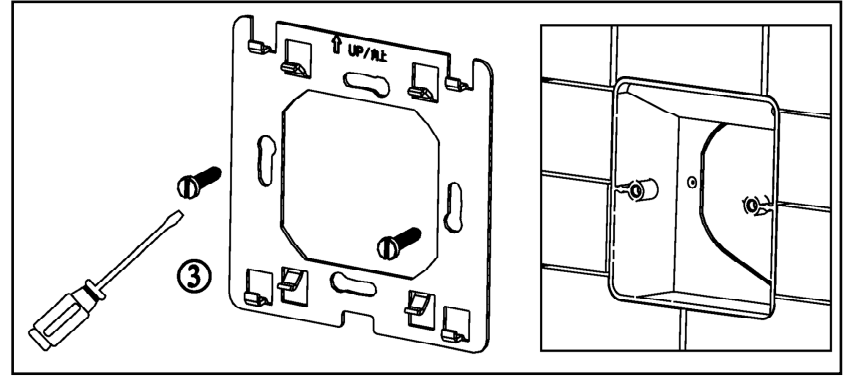
- Taking the backing plate apart according to the following diagram
- Mounted the backing plate in the wall socket by a screwdriver
- After connect wires, the thermostat mounted on the backing plate and remounted the cover and frame
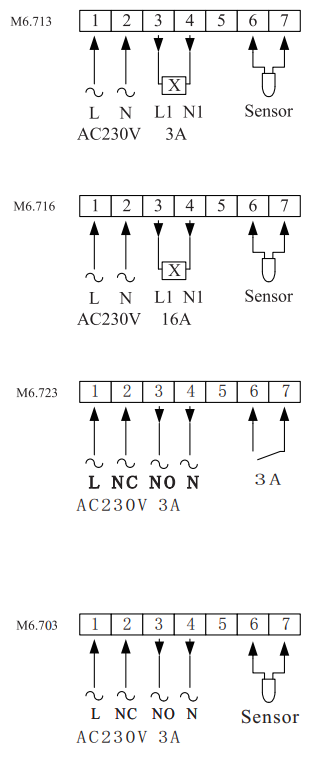
CONNECTION DIAGRAM
Reference
Download Manual:
Minco Heat M6.716 Programming Thermostat
![]()
Minco Heat M6.716 Programming Thermostat Installational Manual
Leave a Reply