
![]()
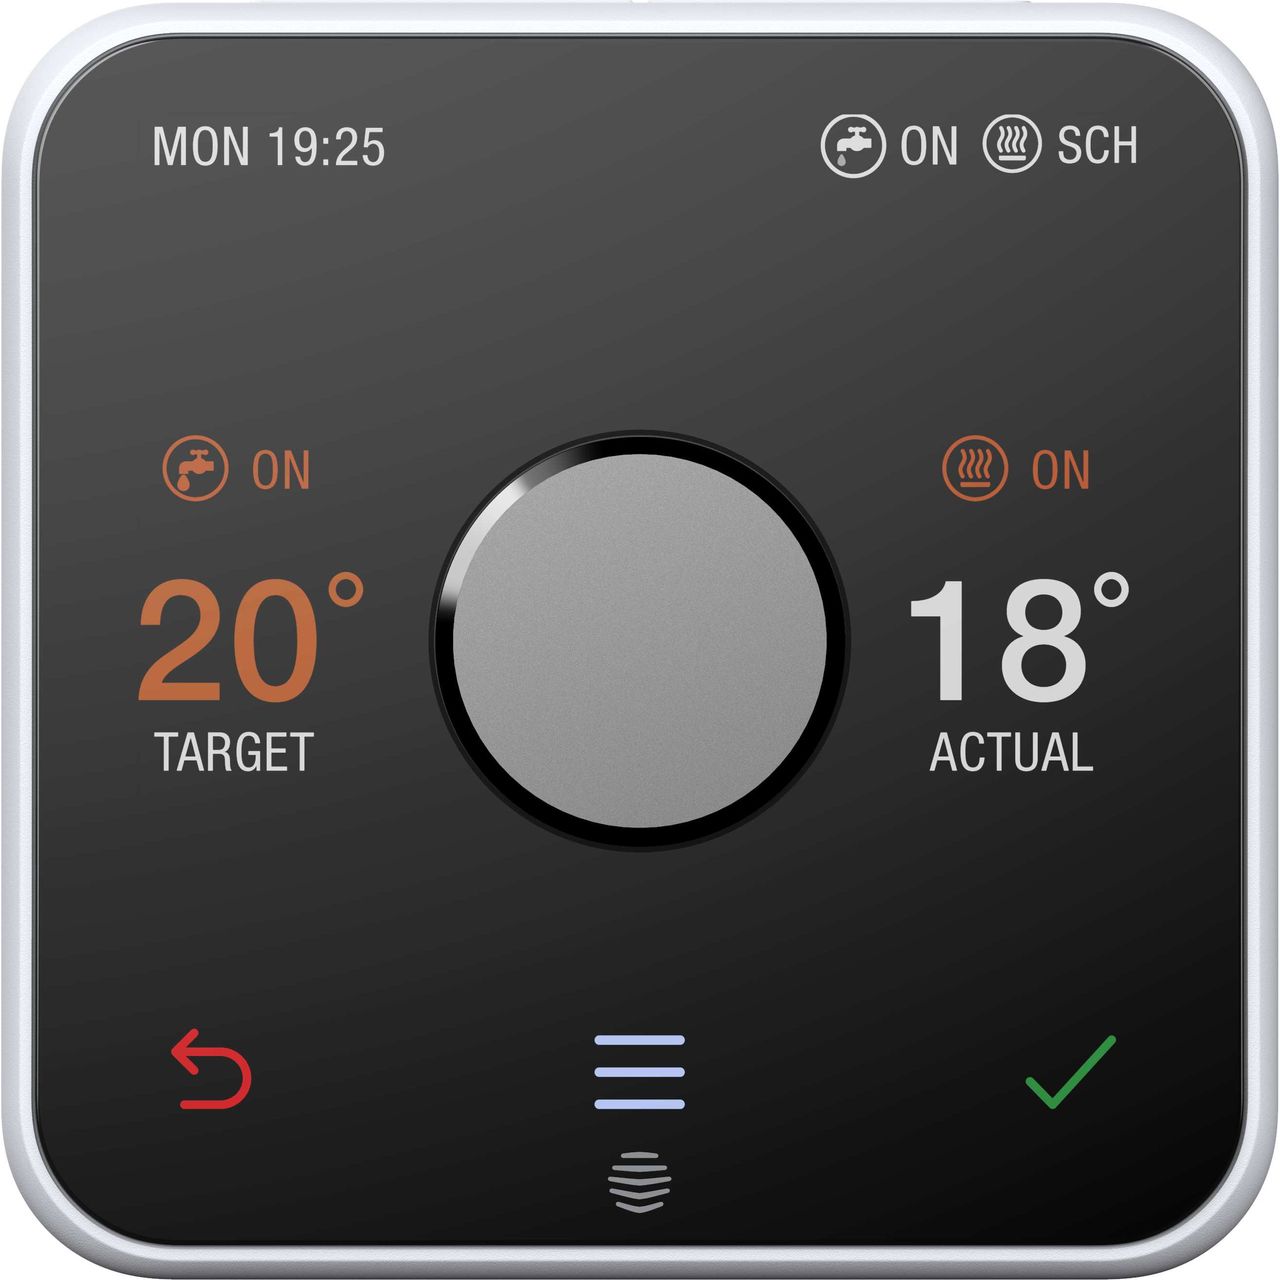
Hive 851816 Electric Thermostat
Hive Active Heating is a clever way to control your heating and if you have a hot water tank, your hot water too. This guide tells you everything you need to know.
PRODUCT OVERVIEW

Hot tip: If you’ve bought Hive Active Heating for help controlling your heating and hot water remotely visit hivehome.com
Getting started
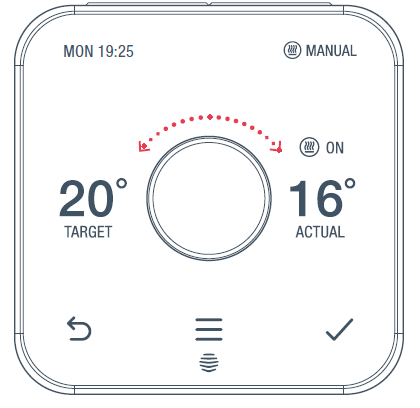
How to change the temperature:
- Turn the dial clockwise to increase the tar et temperature
- Your heating will come on if the tar et temperature is above the actual temperature (you’ll
 see when the heating is on)
 - Turn the dial anti-clockwise to lower the tar et temperature.
Heating
How to change mode:
Your thermostat has 3 different heating modes: Schedule, Manual, and O!
- Push the dial to wake up the thermostat
- Once the screen turns on press the Menu
 button and select Heat
 - Here you’ll see the different modes: Schedule, Manual, and O!
- Select one by turning and pushin’ the dial
Schedule turns your heating on and oFF when you want it to and can be more energy efficient.
The manual makes sure your home maintains a constant temperature.
OFF leaves your heating in Frost Protection – so your heating will only come on if your home drops below 7°C. You’ll see on the screen to remind you that Frost Protection is enabled.
Setting up a heating schedule:
Your thermostat will walk you through setting up your heating schedule step by step.
To do this:
- Wake up your thermostat by pushin’ the dial and then pressing the Menu button
- Turn the dial to select Heat and push the dial to confirm
- Select Schedule and push the dial to confirm
- Scroll to Start Over and push the dial to confirm
- Follow the on-screen instructions to create your new schedule.
How to view your heating schedule:
- Push the dial to wake up the thermostat
- Once the screen turns on press the Menu button
- turn the dial to select Heat, then push the dial
- Choose Schedule then select View/Edit Current
- Turn the dial left or right to browse through the days and select a day
- You’ll now see the schedule for the day you selected.
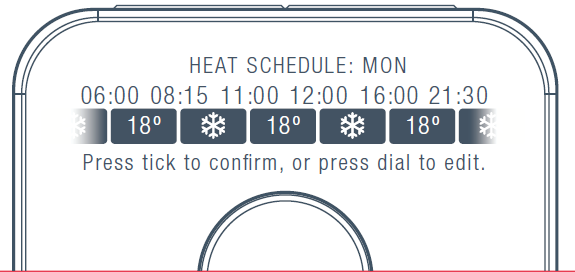
Hot tip: To edit the schedule for that day just push the dial.
How to boost your heating for a short time:

- Press the Heatin Boost
 button on top of the thermostat to turn the heating on
 - Press the Heatin Boostbutton again to increase the length of your boost
- Turn the dial to change the boost temperature (it’s set to 22°C by default)
- when the boost finishes, your heart will o back to its previous mode
- To cancel boost early, press the Back
 button.
Hot water
Hot water features are not shown on combi boilers (boilers without a separate hot water tank) as they automatically heat water when it’s needed.
How to turn your hot water on or off:
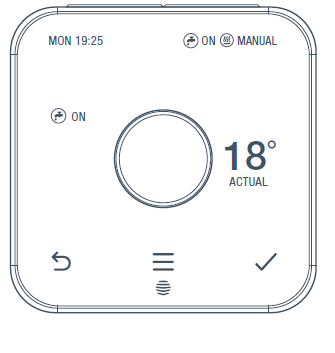
- Wake up your thermostat by pushing the dial
- Once the screen turns on press the Menubutton
- Turn the dial to select Hot Water then push the dial
- Choose either Always On or Always O!
- Press the Confirm
 button.
Hot tip: If you only want hot water at certain times of the day, using Schedule mode could be a more energetic event.
Setting up a new hot water schedule:
Your thermostat will walk you through setting up your hot water schedule step by step.
To do this:
- Wake up your thermostat by pushing the dial and pressing the Menu button
- Turn the dial to select Hot Water and push the dial to confirm
- Select Schedule and push the dial to confirm
- Scroll to Start Over and push the dial to confirm
- Follow the on-screen instructions to create your new schedule.
How to view your hot water schedule:
- Push the dial to wake up the thermostat
- Once the screen turns on press the Menubutton
- Turn the dial to select Hot Water, then push the dial
- Choose Schedule then select View/Edit Current
- Turn the dial left or right to browse through the days and select a day
- You’ll now see the schedule for the day you selected.
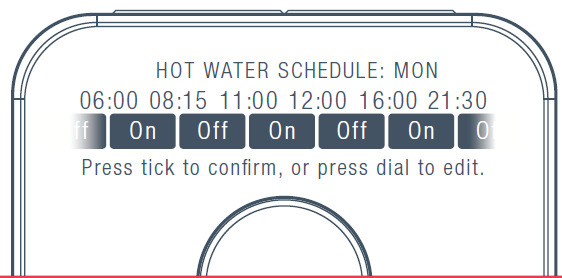
Hot tip: To edit the schedule for that day push the dial to start editing.
How to boost your hot water for a short time:
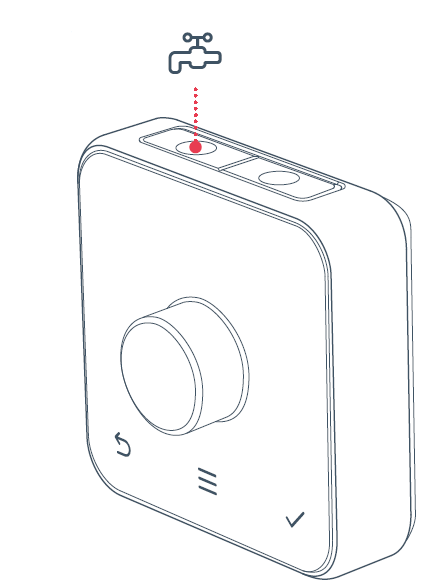
- Press the Hot Water Boost button
 on top of the thermostat to turn the hot water on
 - Press the Hot Water Boost button and aim to increase the length of your boost
- When your boost finishes, your system will go back to your previous mode
- To cancel your boost early, press the Back button.
More things you can do with your thermostat
- Select Holiday mode and set the dates you’ll be away by going to Menu then Holiday
- Set a Child Lock so little hands can’t change the temperature, find it under Menu then Settin!s
- Increase the temperature of your Frost Protection setting. By default, this is set so your home won’t drop below 7°C and will activate whatever mode your heating is in. Find it under Menu then Settin!s.
Hive Multizone
Multizone lets you control up to six existing plumbed heating zones in your home. Each zone needs its own Hive thermostat and receiver.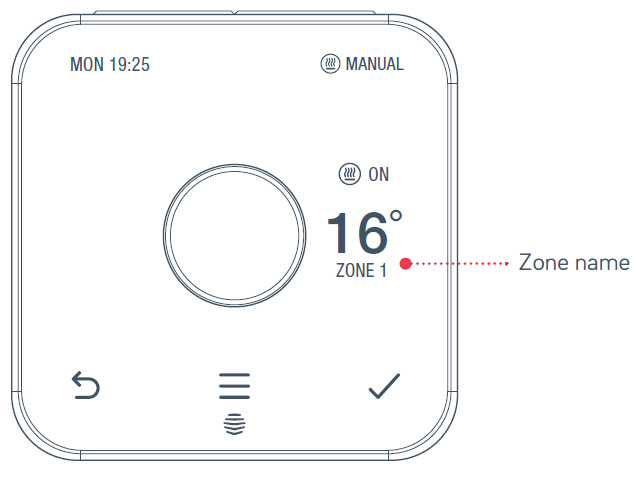
If you are a Hive Multizone customer, change the zone name of each thermostat lo to the Hive app or online dashboard and select Mana e Devices.
Troubleshooting
If you need to identify which of your Hive thermostats belongs to which receiver follow these steps:
- Turn the heating! o” in every zone using! the app or thermostats
- When you look at the receivers the ‘central heating’ light should be switched o” on each receiver
- Turn the heat in one zone only by using the app or thermostat. The ‘central heating’ light on one receiver will turn green showing that this thermostat is paired to this receiver
- Repeat these steps to identify which receivers your other thermostats are paired with.
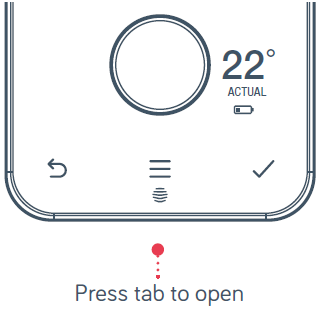
![]() A red battery symbol means your batteries need to be replaced with four new AA batteries.
A red battery symbol means your batteries need to be replaced with four new AA batteries.
How to change the batteries:
- Press the tab on the base of your thermostat
- Lift your thermostat o! the hooks that hold it against the wall (and turn it over to access the batteries)
- Simply pop the batteries out and put the new ones in
- Re-hook the top of your thermostat and then press the bottom until it clicks to secure it to the wall.
No signal
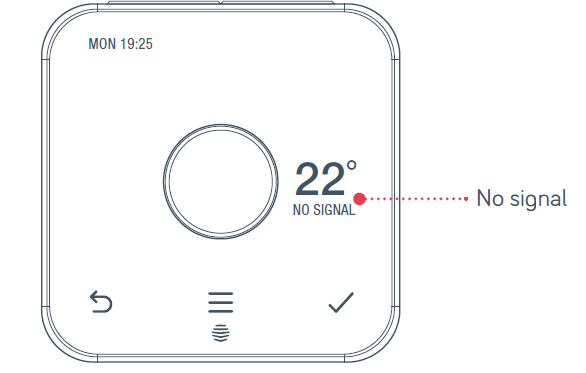
If this message shows on your thermostat – it means your thermostat and the receiver aren’t communicating.
For more information visit hivehome.com/support or et in touch with the Hive team at [email protected]
Hot tip: Even without a signal you can still manually switch your heating and hot water on and o by pressing the buttons on the Hive receiver (usually beside your boiler) when it’s Status li ht is red.
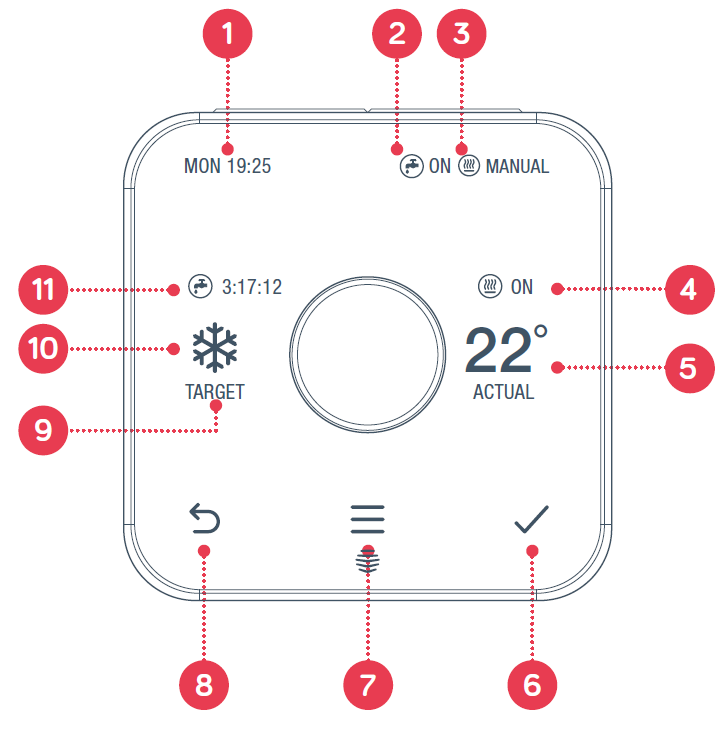
Icons you mi ht see on your thermostat
- Current day and time: MON 19:25
- Hot Water mode:
- Heating mode:
- Heating on: ON
- Actual temperature: ACTUAL
- Confirm button:
- Menu button:
- Back button:
- Target temperature: TARGET
- Frost Protection:
- Boost time remaining: 3:17:12
Can we help?
You can view our handy how-to-use videos along with hints and tips at hivehome.com/support
If for any reason you need to return your Hive Active Heating, simply return your box and its contents to the retailer. Any return is subject to the retailer’s refund policy so please don’t forget to check the retailer’s refund policy too.
Centrica Connected Home Limited declares that the radio equipment types SLT3, SLR1, and SLR2 comply with UK SI 2017 NO.1206 AND EU Directive 201 /53/EU.
Full declaration text available at: hivehome.com/compliance
Max. radiated power: < 0 dBm. Frequency: 240 – 24835 MHz.
To avoid environmental and health problems due to hazardous substances in electrical and electronic goods, appliances marked with a crossed-out wheeled bin should not be placed into your household rubbish bin. Instead, when they are unable to be reused, they should be recycled. Your local authority will be able to advise you on the location of the nearest recycling center that is authorized to accept this type of waste. Please recycle responsibly.
© 2021 Centrica Connected Home Limited.
Registered in England (No.5782908) SL4 5GD, UK. Bord Gáis Energy. Registered in Ireland (No. 463078) DO2 HH27, Ireland. All rights reserved. IG70003650517V1
Reference
Download manual:
Hive 851816 Electric Thermostat User Guide
OTHER MANUALS:
Hive 851816 Electric Thermostat Installational Guide
![]()
Leave a Reply