
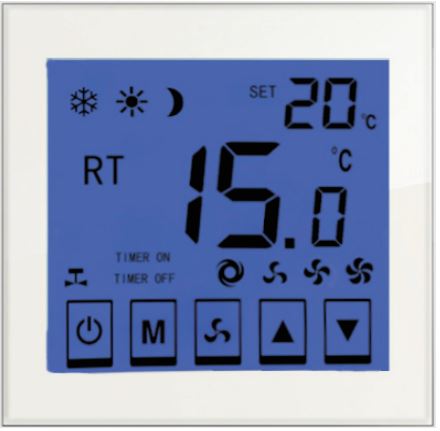
Hexa CONTROL RT226-B22 Digital Thermostat
Product Overview
These kinds of digital thermostats, applying the most advanced and international standardized microcomputer control chip, measure the indoor temperature by the in-built NTC high-precision sensor. It can always compare with the setting temperature, and automatically regulate the heating/cooling air input or switch on/off the motorized valve, so as to keep the room in a certain temperature.
Technical Data
- Working voltage: AC220V=10%, 50/60Hz
- Max resistive current: <3A
- Power self-consumption: <1.5W
- Temperature Accuracy: +1°C
- Timing error: <1%
- Output rated power: <200W
- Temperature setup range: 5°C – 35°C
Alternative Working Modes Table
- A: Control the fan coil and motorized valve synchronously (The fan stops as the motorized stops when the temperature reaches the set value.)
- B: Control the fan coil and motorized valve. Asynchronously (the fan goes on working as the motorized valve stops when the temperature reaches the set value.)
- T: Have clock or timing power ON/OFF function.
- Y: Have remote control function, if it is blank, it means thermostats do not have this function.
- L: Have backlight function, if it is blank, it means thermostats do not= have this function
- “
 ” -Power on/off/;
 - “
 ” – Wind speed adjustment;
 - “
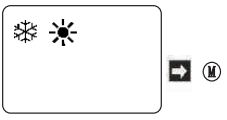
 “- Mode;
 - “
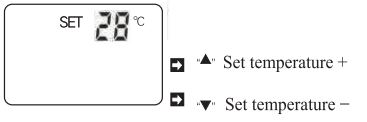
 ” – Set temperature rise or adjust the set value of the work mode
 - “
 ” – Set temperature drop or adjust the set value of the work mode
Operating Process of Tools
- Temperature setting
- Cooling/Heating Setup
- Wind Speed Setup
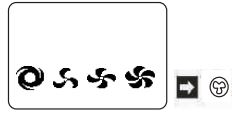
 If you press the button [wind speed], it is respectively automatic wind, high-speed wind, medium-speed wind, and low-speed wind in turn. In the state of automatic wind, thermostats will compare the indoor room temperature with the temperature setting point, and automatically adjust the wind speed of the fan, with no need for manual regulation.
 - Timing power OFF Setup
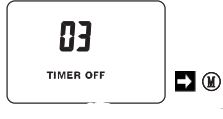
 Turn on the power “•” then press the button “(” for 3 sec till it comes out “Timer Off’ and “XX” then press the button “” and “V” to set up the timer. It will be automatically finished setup 5 sec later. The thermostat will be power off 3 hours later in the left picture
 - Timing power ON Setup
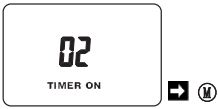
Turn on the power” then press the button ” for 3 sec till it comes out “Timer Off” and “XX”, then press the button “ ” again, it switches to Tlmer On state. then press the button “” and “” to set up the timer. It will be automatically finished setup 5 sec later. The thermostat will be powered on 2 hours later in the left picture.
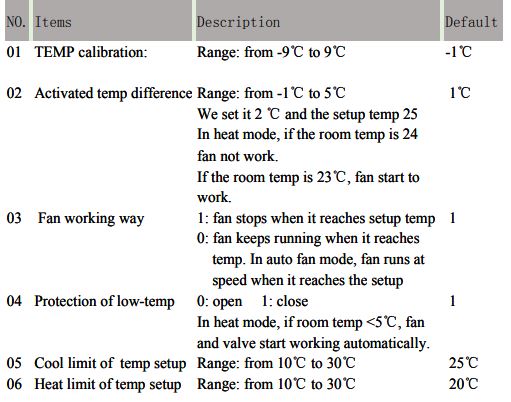
Parameter Setup
- Button lock mode: Turn on the controller, then keep pressing “” until it displaces
 on the screen.
 - Temperature limiting mode: Turn on the controller, then keep pressing “and “A” until it displays “h”.
During the Turn-Off status, press the “” button for 5 seconds to access to Senior Parameter Setup. Then press the button “” again, it switch to the next menu. In the parameter setup state, press the buttons ” ” to set up the value.
Installation Dimension Figure

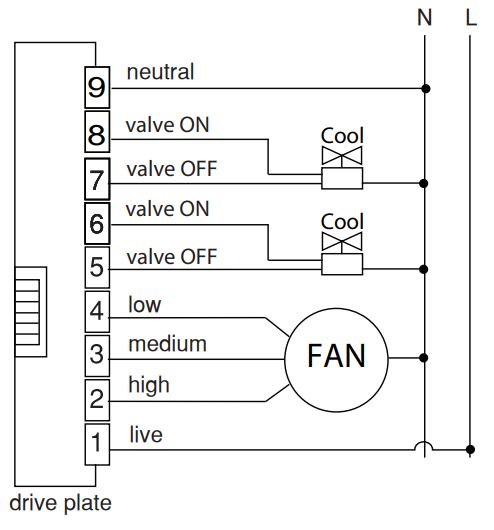
Wiring Diagram
Installation Instructions
Please follow the instructions to make the correct installation.
- Step 1: Open the control board: use a 3.5mm wide screwdriver along the bevel into the slot for 4 mm.
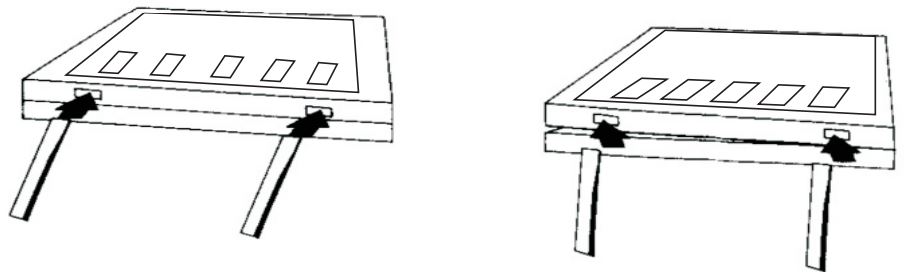
- Step 2: Slightly upwardly prize it to open the hook.
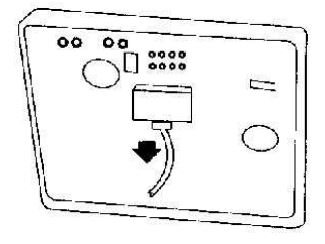
- Step 3: Remove the Cable.
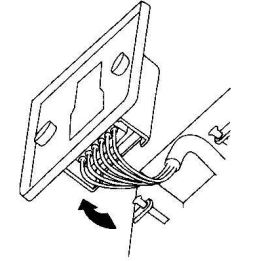
- Step 4: Connect wire.
- Step 5: Fix it with two screws in the packaging box.

- Step 6: Install the control board wire.

- Step 7: Hang the two pothooks at a 30-degree angle, must hang them in place.
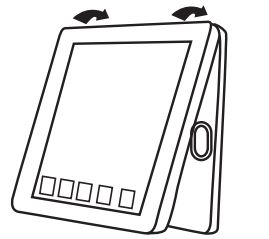
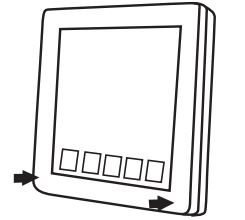
- Step 8: Slightly press the underside corners, block the sheel, and accomplish the installation.
Malfunction disposal
Statement: Only professional technical personnel can maintain the products of our company.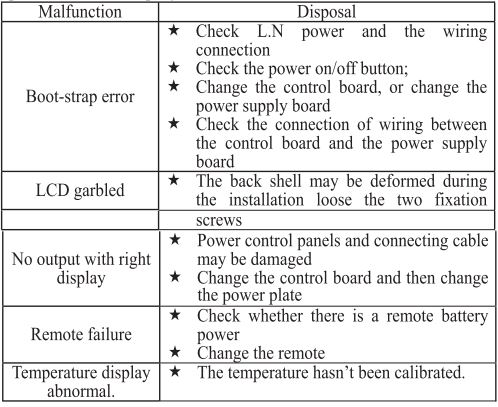
Cautions
- Please connect wires in strict compliance with the installation wiring diagram;
- Please install a thermostat correctly in strict compliance with the installation diagram
- Do not pull the cable forcibly, or it may be damaged;
- Do not squeeze the LCD or scratch the LCD surface during the installation;
- During the installation, do not knock those electronic components on the circuit board, and do not drop or deform the back cover
- If hard plastic lines are used during the installation, do bend it to an appropriate angle firstly
- Do not drop it into construction mud.
Warranty Service & Sale Support
The warranty service is 18 months from the date of purchase. The products of our company may enjoy life-long in accordance with the regulations. Our company will make a certain charge to the service out of the warranty period or product quality.
REFERENCE:
DOWNLOAD MANUALS:
Hexa CONTROL RT226-B22 Digital Thermostat Instruction Manual
![]()
Hexa CONTROL RT226-B22 Digital Thermostat Instruction Manual
Leave a Reply