
HETTA HM01RF Wireless Programmable Thermostat
TIME AND PROGRAMME SETTING
- Time setting
Press enter time setting mode. Each press will switch between Hour, Minute & Day (Days being 1234567), use
  to adjust settings.
 - Time Period & Temperature Programming
Setting the temperature to 00 ºC will make the time period INACTIVE.- Press and hold the
 button until the display shows “LooP” (cycle control); then, press to display either “12345” (Mon to Fri ), “123456 “ (Mon to Sat) or “123456 7 “ (Mon to Sun).
 - Press to enter the 1st time period
 ( icons are displayed for each period) and use to set the desired temperature, then press and set the required time. The settings are saved automatically.
- Press and hold the
- Press to switch to the next time period, then to set the temperature and time.
- Continue with to access the remaining time periods.
- The Auto icon
 displayed when the thermostat is in Auto mode.
Pressing during a time period will switch over to temporary manual control  where the temperature may be set to override the Auto setting. Auto mode is restored at the next time period.
Pressing switches between Auto and Manual modes. - Modify the time period setting
Press first, then press; to switch to the time period option to modify time settings.
DEFAULT TIME PERIODS
| Period | Icon | Default Period Time | Default Period Temperature | |
|
Working Day |
1 | 06:00 | 20℃ | |
| 2 | |
08:00 | 15℃ | |
| 3 | |
11:30 | 15℃ | |
| 4 | |
12:30 | 15℃ | |
| 5 | |
17:30 | 22℃ | |
| 6 | 22:00 | 15℃ | ||
|
Weekend |
1 |  |
08:00 | 22℃ |
| 2 | 23:00 | 15℃ | ||
WIRING DIAGRAM
Please refer to Wireless Wiring Centre User Manual (HWC018RF) for detailed wiring instructions. It is recommended that a qualified Electrician is consulted, or used for the installation of this product, in accordance with the current IEE Wiring and Building Regulations.
ADVANCED SETTINGS
In “power off” state, first press and hold ![]() , then press
, then press ![]() to enter advanced settings, which are saved automatically once the backlight is out. Press
to enter advanced settings, which are saved automatically once the backlight is out. Press ![]() to set next data.
to set next data.
| No. | Symbols | Setting Item | Parameter Setting Function | Factory Default |
|
1 |
SEN |
Sensor control option (NTC) |
0: internal sensor
1: external sensor 2: internal control temperature, external limit temperature |
0: internal sensor
(“Err” is displayed if selected wrongly, or NTC is faulty. Heating stops until corrected) |
| 2 | OSU | Temperature limit of external sensor | 5-99 oC | 42 oC |
| 3 | dlF | Return difference of temperature limit value of the external sensor | 1-9 oC | 2 oC |
| 4 | SUH | Set the upper-temperature limit value | 5-99 oC | 35 oC |
| 5 | SUL | Set lower limit temperature value | 5-99 oC | 5 oC |
| 6 | AdJ | Synchronise display the temperature reading | -5 oC to +5 oC | 0.5 oC |
| 7 |
FrE |
Anti-freezing function (only for water heating) | 00: anti-freezing function closed 01: anti-freezing function open | 00: anti-freezing function shut down |
| 8 | Loc | Keylock | 00: Unlock
01: All keys locked except power key 02: All keys locked |
00: Unlock |
| 9 | SNP | Alternate Parameter | 00
01: Active |
00 |
| 10 | FAC | Factory default | 08: Using current user settings 00: Restore factory default (set to 00 and press |
00 |
Note: The temperature limit of the external sensor is factory set at 42 oC (OSV). The return difference of this temperature is factory set at 2 oC (diF). When the temperature reaches 44 oC , the thermostat will switch the heating output off. When the temperature drops down to 40 oC , the thermostat will switch the heating output back on.
PRODUCT SUMMARY
This new design heating thermostat is designed to be used with the Hetta Wireless Wiring Centre HWC018RF. With a large LCD display it can be positioned within the building, without extra cables.
TECHNICAL DATA
- Power supply: 1.5V*2
- Load current: 3A
- Consumption: <0.3W
- Temperature sensor: NTC
- Accuracy: ±0.5ºC
- Set-point temperature Range: 5ºC – 60ºC
- Limited temperature range: 5-99ºC
| BUTTON DESCRIPTION | ||||||
| KEY | DESCRIPTION | |||||
| On / off | ||||||
| Mode key: Press to switch between auto/manual time interval control. Allows temporary manual operation and time interval pre-set function | ||||||
|
|
Time setting: minutes/hours/weeks | |||||
| Raise temperature setting, programmed parameters |
to increase | |||||
| Lower temperature setting, programmed parameters |
to decrease | |||||
 |
Keylock Press |
|||||
Note: If the backlight is not on when the thermostat is in operation, this means the battery power is low, in which case please replace the batteries.
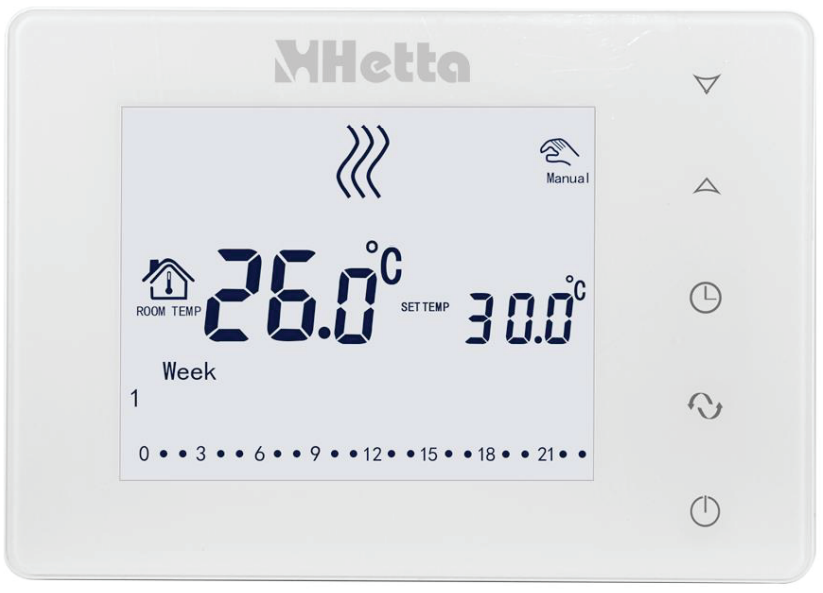
SCREEN DISPLAY

DISPLAY FUNCTIONS
- Manual control
- Temporary manual control
- Auto control
 Water is heating
- Anti-freezing function
- Morning, the first time interval
 Evening, the fifth time interval
- Leaving the house, second-time interval
 Afternoon, fourth-time interval
- Lunchtime, third-time interval
 Night/sleep, sixth-time interval
HM01RF WIRELESS PAIRING INSTRUCTIONS
- Locate the Bar Code within the Wireless Wiring Centre.
- To set SN code use the following steps:
- VAL: control valves 1-8, the factory default is 1.
- Turn the Wireless Wiring Centre ON.
- After inserting the batteries, turn the Thermostat
 OFF.
OFF. - Press and hold the TIME button and then press the POWER button. The Advanced Settings page will now be displayed.
- Press the MODE button until SNP 00 is displayed, change this to read 01 using the UP button. (00 = Inactive 01 = Active)
- Press the MODE button and ensure FAC 08 is shown, then press the POWER OFF button.
- Within 10 seconds, press and hold the DOWN button and then press the POWER button. SN1 and a Flashing Number will now be displayed.
- Using the UP & DOWN buttons enter the first 2 digits of the 14-digit Barcode number, found in the Wireless Wiring Centre, then press MODE to display SN2, and enter the second 2 digits. Repeat this process to SN6.
- After the sixth 2 digits are entered, press MODE again. CHh will now show the last 2 digits of the Barcode number.
- Press MODE again to display VAL and enter the number of the Zone Valve to be controlled, eg, 02.
- Press MODE again to go back to the home screen, and test by increasing the SET TEMP to 2 degrees above the ROOM TEMP. After approx. 3 seconds the selected Zone Valve Relay will operate.
Reference:
DOWNLOAD MANUALS:
HETTA HM01RF Wireless Programmable Thermostat USER MANUALS
![]()
Leave a Reply