
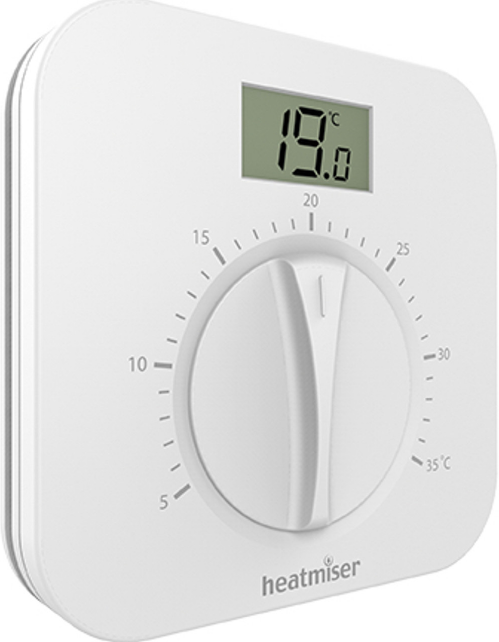
Heatmiser DS1-L v2 Dial Thermostat
Introduction
The Heatmiser DS1-L dial type thermostat is suitable for conventional or combi-boiler systems. This thermostat incorporates the following functions;
- Adjustable Switching Differential
- Digital LCD
- 230v AC, 3A Switching
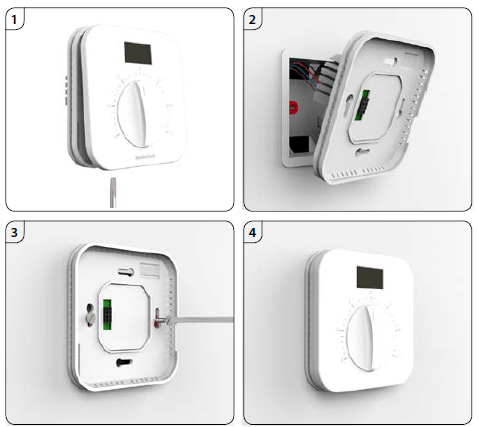
Installation
- This dial thermostat is designed to be flush mounted.
- Separate the front part of the thermostat by unscrewing securing screws on the bottom face of the thermostat.
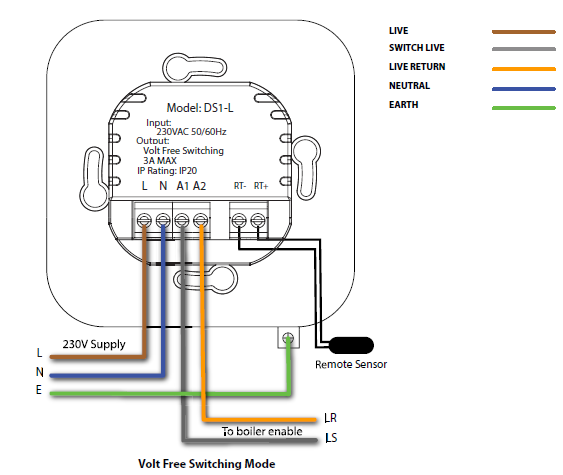
- Terminate the thermostat as per wiring diagram.
- Screw the thermostat back plate securely into the back box.
- Clip the front of the thermostat onto the back plate, securing it in place with the retaining screw
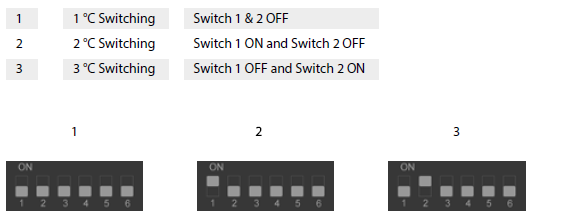
Switching Differential
- The Heatmiser DS1-L offers 1, 2 and 3°C switching differential.
- With a 1°C switching differential the heating will switch on 1°C below the set temperature and will turn off when the set temperature is reached.
- A 2° differential will turn the heating on 2°C below the set temperature.
- 3°C will switch the heating on 3°C below the set temperature.
- To set the differential, you should set the DIP switches according to the table below.
- The DIP switch can be accessed from the back of the thermostat.
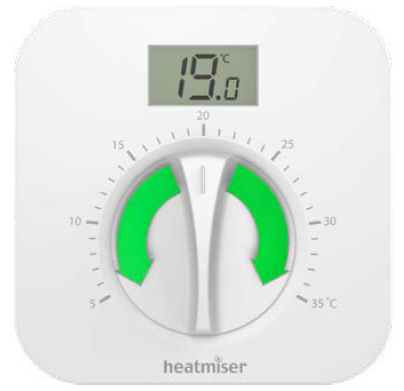
Setting The Temperature
- To change the set point, rotate the dial until it points to the desired temperature.
- The display will continue to show the ambient temperature.
Wiring Diagram
230V Switching Mode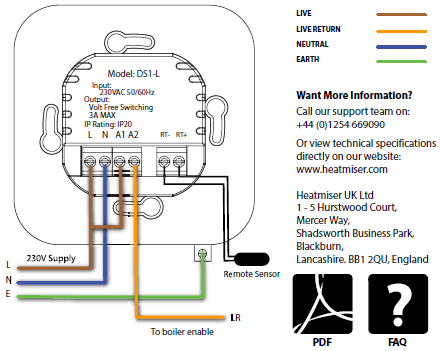 Volt Free Switching Mode
Display Icons
 Heating ON
Shows when the thermostat enables the boiler.
Remote Sensor
The Heatmiser DS1-L provides the option to work with a remote temperature sensor. When a compatible remote sensor is connected, the thermostat will automatically switch from using its internal sensor to use the remote sensor instead. This function is ideal for controlling bathrooms or when the thermostat needs to be installed in a different area of the building to that being measured and controlled.
Heatmiser Thimble Sensor (not included)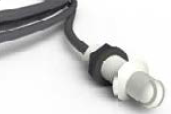
Reference
Download manual:
Heatmiser DS1-L v2 Dial Thermostat Installation Guide
Other Manual:
Heatmiser DS1-L v2 Dial Thermostat Product Specification Guide
![]()
Leave a Reply