
Heatmiser DS-SB v3 Room Thermostat
Introduction
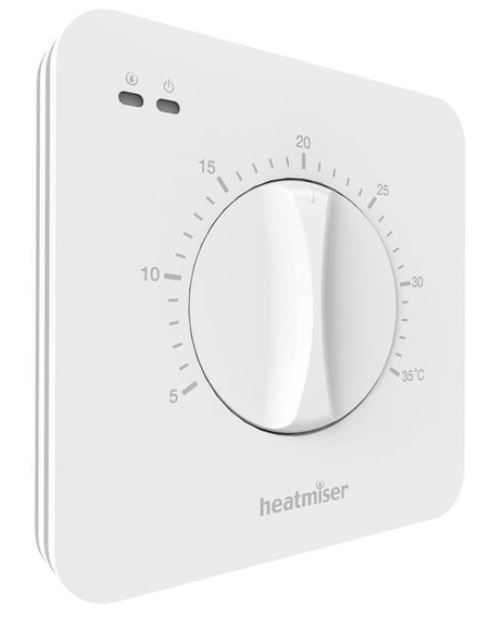
The Heatmiser DS-SB is a flush mounted set-back thermostat and is ideal for those who want a simple but energy efficient temperature control system. The DS-SB features a set-back function. This function automatically reduces the set temperature by 4°C when no time clock signal is detected.
The DS-SB thermostat has been designed to work in conjunction with the Heatmiser UH8 wiring centre and TM4 Programmer, but can also be used as a standalone dial thermostat.
Remote Sensor
The Heatmiser DS-SB provides the option to work with a remote temperature sensor. When a compatible remote sensor is connected, the thermostat will automatically switch from using its internal sensor to use the remote sensor instead. This function is ideal for controlling bathrooms or when the thermostat needs to be installed in a different area of the building to that being measured and controlled.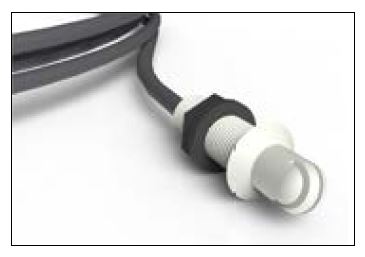
Heatmiser Thimble Sensor (not included)
Switching Differential
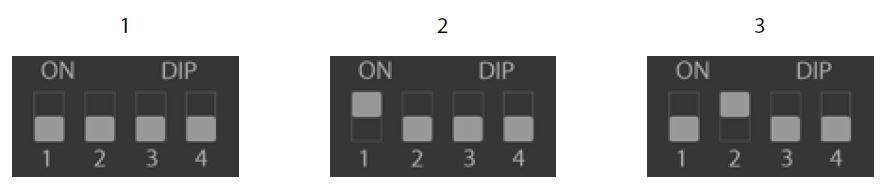
The Heatmiser DS-SB offers 1, 2 and 3°C switching differential.
With a 1°C switching differential the heating will switch on 1°C below the set temperature and will turn on when the set temperature is reached.
A 2° differential will turn the heating on 2°C below the set temperature.
3°C will switch the heating on 3°C below the set temperature.
To set the differential, you should set the DIP switches according to the table below. The DIP switch can be accessed from the back of the thermostat (shown below).
- 1 °C Switching Switch 1 & 2 OFF
- 2 °C Switching Switch 1 ON and Switch 2 OFF
- 3 °C Switching Switch 1 OFF and Switch 2 ON
Installation
IN ORDER TO AVOID ANY RISK OF ELECTRIC SHOCK, TURN OFF THE POWER TO THE HEATING SYSTEM BEFORE COMMENCING INSTALLATION.
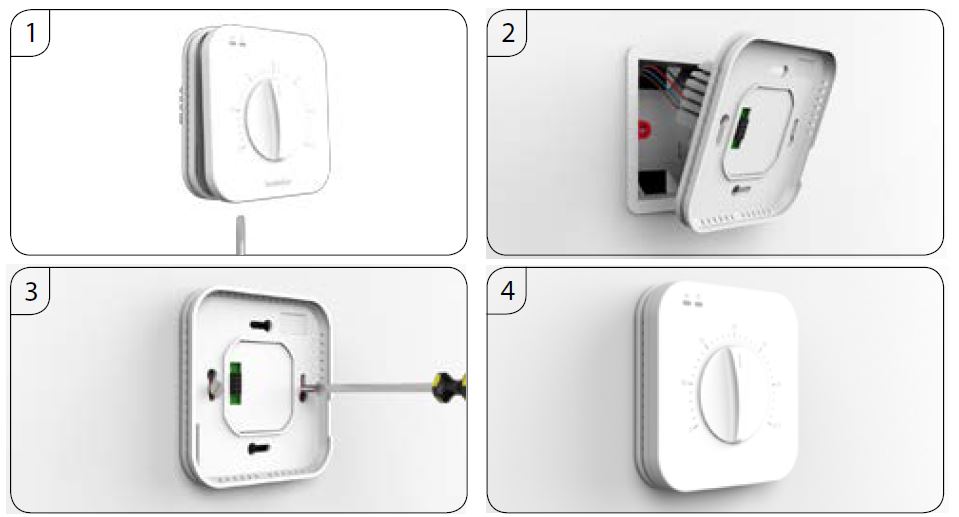
- Using a small screwdriver, slightly loosen the screw from the bottom face of the thermostat. You can then carefully separate the front half from the back plate.
- Terminate the thermostat as shown in the wiring diagram.
- Screw the back plate securely back onto the wall.
- Clip the front of the thermostat onto the back plate, securing it in place with the retaining screw.
Setting The Temperature
To change the set point, rotate the dial until it points to the desired temperature.
Off Mode
Placing the thermostat switch into position 0 will turn OFF the heating completely.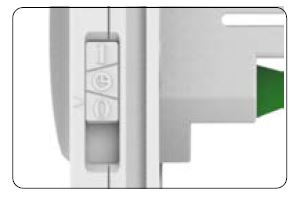
Constant Mode
The time clock can be bypassed by placing the switch into position 1. In this position, the thermostat will ignore the time clock input and will continuously control to the set temperature.
This feature can be used to extend the heating period without the need to adjust the time clock program.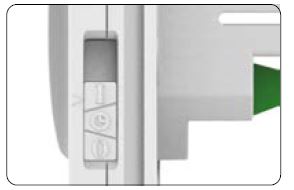
Set-back Operation
The Heatmiser DS-SB offers a set-back function that automatically reduces the set temperature by 4°C.
To make use of the set-back function, a 230v time clock is also required on the system. Place the thermostat slide switch into the time clock position.
When the thermostat receives a 230v signal from the time clock it will control the temperature according to the dial setting.
When no 230v signal is received from the time clock, the thermostat will operate in set back mode and automatically reducing the set temperature by 4°C.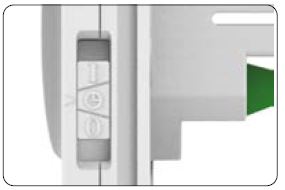
LED Indication
Right LED
The right LED is the power LED. It is a two colour LED and is used to indicate the me clock / set-back status.
Left LED
The left LED indicates the heating status. It illuminates ![]() when the thermostat is calling for heat.
when the thermostat is calling for heat.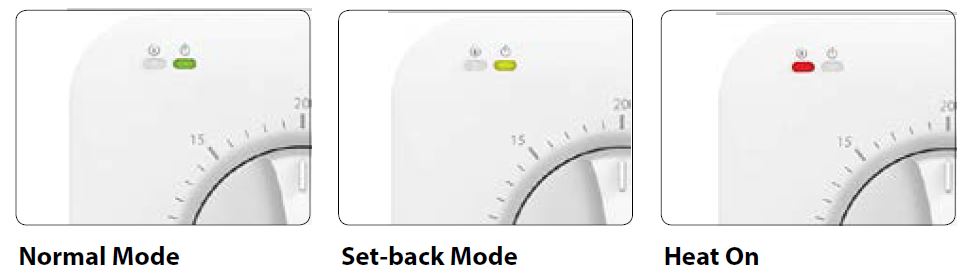
Wiring Diagram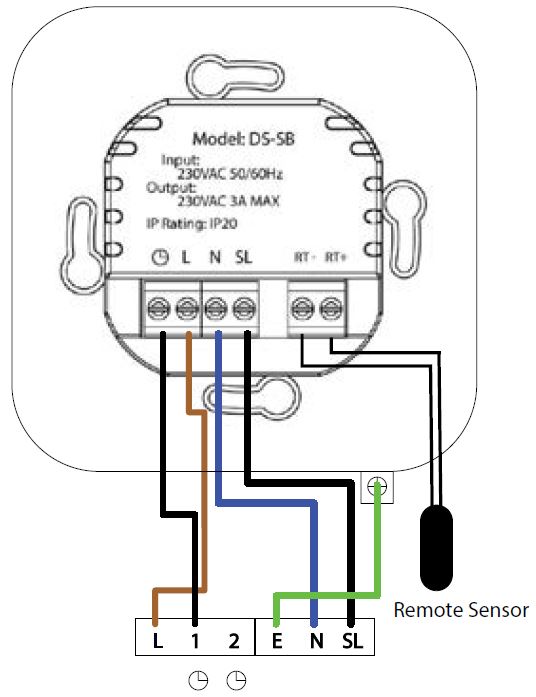

Want More Information?
Call our support team on: +44 (0)1254 669090
Or view technical specifications directly on our website: www.heatmiser.com
Heatmiser UK Ltd
1 – 5 Hurstwood Court, Mercer Way,
Shadsworth Business Park, Blackburn,
Lancashire. BB1 2QU, England
Reference
Download manual:
Heatmiser DS-SB v3 Room Thermostat Installation Guide
Other Manual:
Heatmiser DS-SB v3 Room Thermostat Product Specification Guide
Leave a Reply