
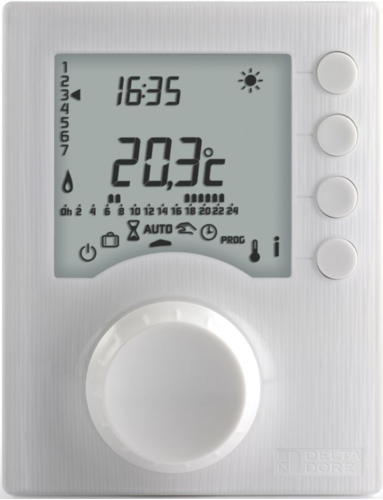
Delta Dore Tybox 1117 Wireless Room Thermostat
Installation
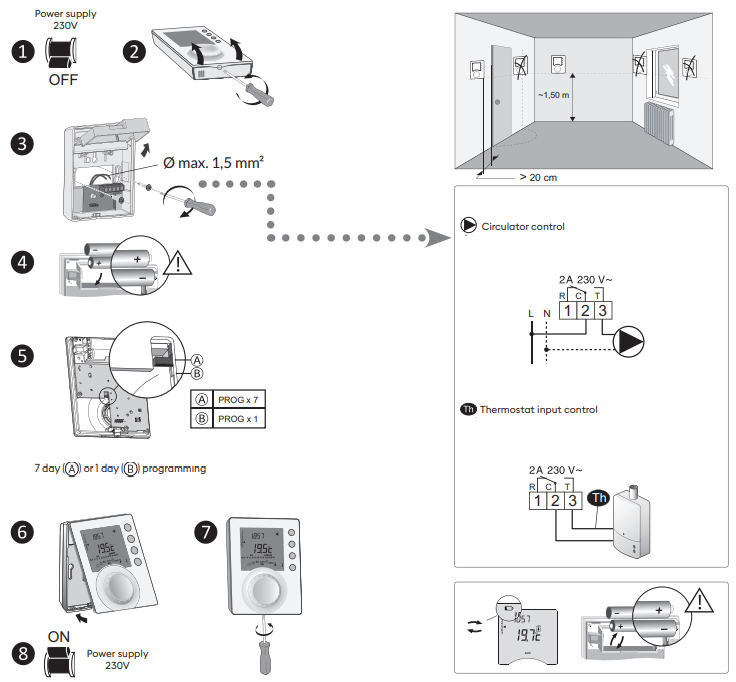
| TYBOX 1117 | |
 |
2 x 1,5V LR03 – AAA Alkaline |
 |
|
| |
2 A max., 230V~ (Type 1.C) |
| °C | -10°C / +40°C |
 |
80 x 104 x 35 mm |
| IP 30 | |
| Ball test temperature: 75°C (Unit), 100°C (Terminal) | |
| Rated impulse withstand voltage: 2500V | |
Description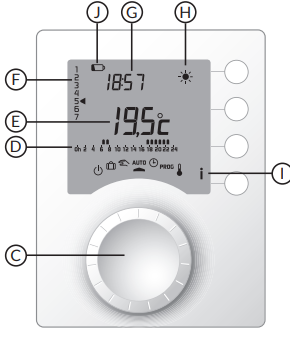
- (C) Selector knob
- (D) Program profile
- (E) Temperature
- (F) Day (1=Mon)
- (G) Time
- (H) Current set-point
- (I) Information
- (J) low batteries
![]()
- Shutdown mode
- Absence mode
- Manual mode
- Segue la programmazione
- Date and time settings
- Programming
 Adjusting temperature settings
 Comfort
 Economy
 Frost Protection
Settings
Date and time
Turn the knob to ![]() . ❷->⓫ Set the date, then the time with + or -, then confirm with OK and move on to the next setting.
. ❷->⓫ Set the date, then the time with + or -, then confirm with OK and move on to the next setting.
⓬ To exit the mode, turn the knob.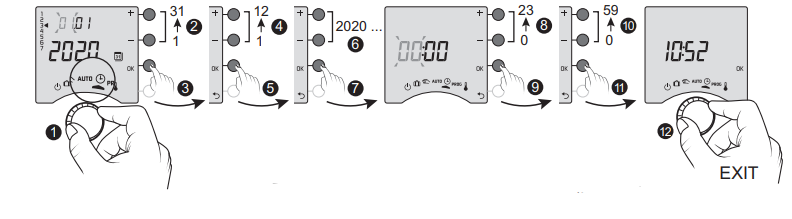
Set point settings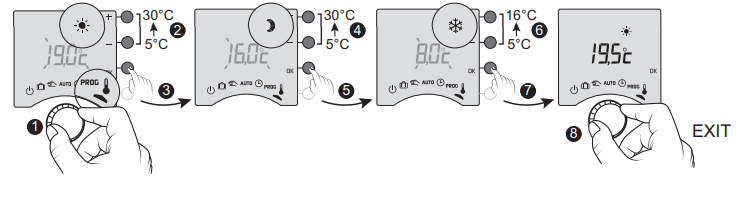
Turn the knob to![]() . ❷->❼ Set the temperature with + or -, then confirm with OK and move on to the next setting (Comfort -> Economy -> Frost Protection). ❽ To exit the mode, turn the knob
. ❷->❼ Set the temperature with + or -, then confirm with OK and move on to the next setting (Comfort -> Economy -> Frost Protection). ❽ To exit the mode, turn the knob
Programming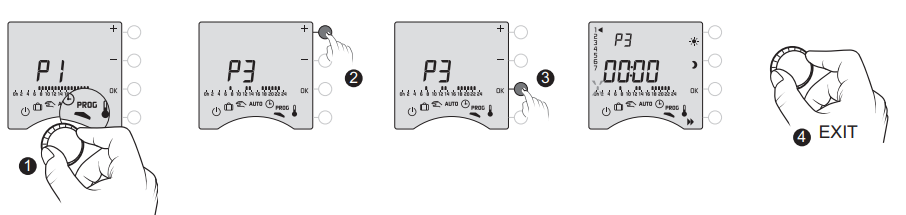
Quick programming
- Turn the knob to PROG.
- Select the pre-programming to apply (see table) by repeatedly pressing + or -.
- Press OK to confi rm.
- To exit the mode, turn the knob.
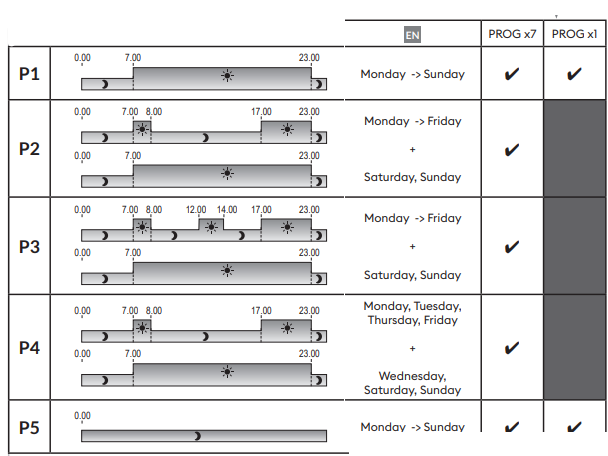
Customising a program
You can change the program profile applied to a day (P1 to P5), depending on your needs.
- Turn the knob to PROG.
- Press + or – to select the program to modify. Press OK to confirm (❸).
- Press OK to select the day to modify.
- Create your program by pressing on for Economy periods, and on for Comfort periods. Press OK to confirm (❻).
- To exit the mode, turn the knob.
More information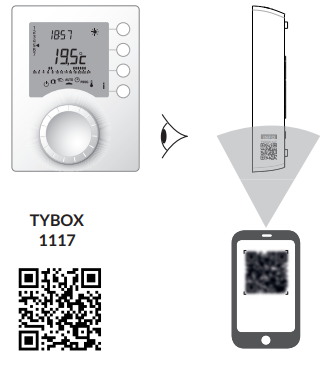
For detailed instructions: scan the QR code.
- Setup menus (e.g. optimisation, temp. correction, sett ings, etc.),
- Advanced sett ings and functions,
- Use (program copying),
- Help…
Access to the setup menus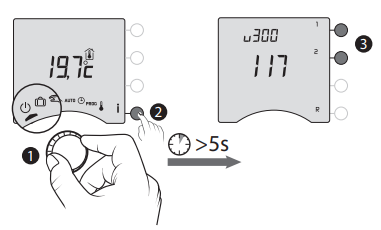
Reference
Download Manual:
Delta Dore Tybox 1117 Wireless Room Thermostat Quick start guide
Other Manual:
Delta Dore Tybox 1117 Wireless Room Thermostat Installational Guide
Delta Dore Tybox 1117 Wireless Room Thermostat Quick start guide
Leave a Reply