
AMATI HY316WE Wi-Fi Wireless Thermostat
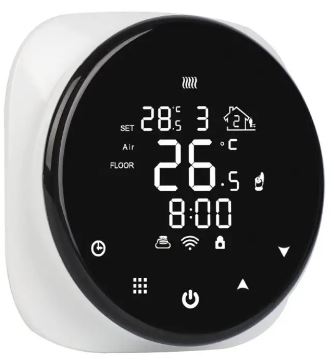
Product Specifications
- Power: 90-240Vac 50/60HZ
- Display accuracy::0.5°C
- Contact capacity: 16A/250V(WE)
- Range of temperature display::0~40°C
- Probe sensor::NTC(10k)1%
Before wiring and installing
- Read these instructions carefully. Failure to follow them could damage the product or cause a hazardous condition.
- Check the ratings given in the instructions and on the product to make sure it is suitable for your application.
- Installer must be a trained and qualified Electrician
- After installation is complete check operation as per these instructions
Startup
Where possible you should set up the Wifi by using the attached manual. If unable to do so please see guide below. When you turn on the thermostat for the first time you will need to set the time and also the number that corresponds to the day of the week (1-7 starting from Monday). This can be done by following the steps below:
- Press the
 button and the time in the top left corner will start flashing.
 - Press
 to get to the desired minute and then press
 - Press to get to the desired hour and then press
- Press to change the day number. 1=Monday 2= Tuesday 3=Wednesday 4=Thursday 5=Friday 6=Saturday 7=Sunday – Once you have selected the day press to confirm
You will now be ready to set the temperature. This can be done by pressing or . The set temperature is displayed in the top right corner. It is recommended to start out at a low temperature and increase the temperature 1 or 2 degrees a day until you reach a comfortable heat. This only needs to be done once. Please see the operation key list which shows all the additional functions per button. These can all be controlled via the mobile app if you have paired your device (see attached pairing instructions)
Displays
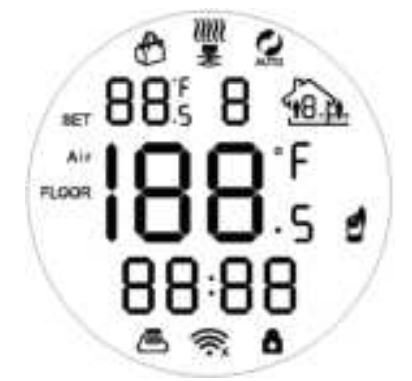
Description of icon
 Auto mode; run preset program
 Temporary manual mode
 Holiday mode
 Heating, icon disappears to stop heating
 WIFI connection, flashing = EZ distribution mode
 Cloud icon: flashing = AP distribution network mode
 Manual mode
 Clock
Clock Wifi status: Disconnection
 External NTC sensor
 Child lock
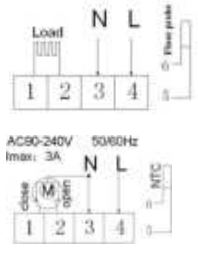
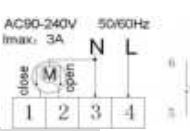
Wiring Diagram
HY316WE Electric heating wiring diagram Connect the heater load to 1 & 2, connect the power supply to 3 & 4 and connect the floor probe to 5 & 6. If you connect it wrongly, there will be a short circuit and the thermostat may become damaged and the warranty will be invalid
Operation key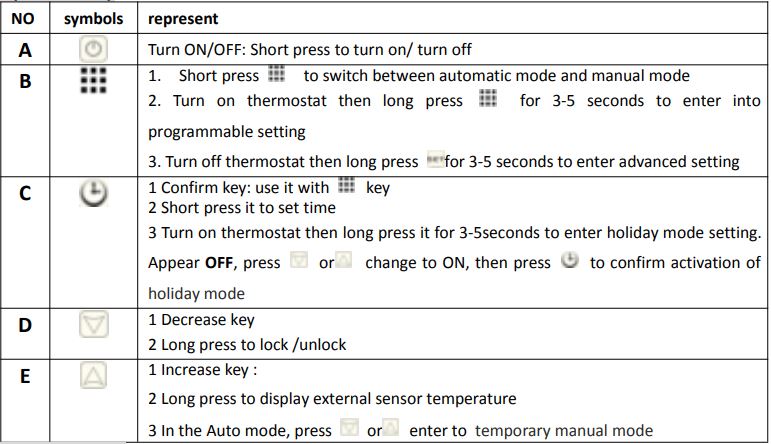
Programmable
5+2 (factory default), 6+1 and 7 day models contain 6 time periods to automate. In the advanced options choose number of days required, when power is on then long press for 3-5 seconds to enter into programming mode. Short press
![]() to choose: hour, minute, time period, and press
to choose: hour, minute, time period, and press ![]() to adjust data. Please note after about 10 seconds it will automatically save and exit. See example below.
to adjust data. Please note after about 10 seconds it will automatically save and exit. See example below.
Advanced options
When the thermostat is off long press for 3-5 seconds to access the advanced setting. From A1 to AD, short pressto choose the option, and adjust data by , short press to switch next option.
| NO | Setting Options | Data Setting Function | Factory Default |
| A1 | Measure Temperature Calibration | -9-+9℃ | 0.5℃ Accuracy Calibration |
|
A2 |
Temperature control return difference setting | 0.5-2.5℃ |
1℃ |
|||
|
A3 |
External sensors limit temperature control return difference | 1-9℃ |
2℃ |
|||
|
A4 |
Options of sensor control |
N1:Built-in sensor (high temperature protection close)
N2:External sensor (high temperature protection close) N3:Built-in sensor control temperature ,external sensor limit temperature (if the external sensor detects the temperature is higher than the limited temperature of external sensor the thermostat will disconnect relay and turn off load) |
N1 |
|||
| A5 | Children lock setting | 0: | half lock | 1: | full lock | 0 |
|
A6 |
Limit value of high temperature for external sensor | 1. 35℃-70℃
2. Under35℃, screen display【—】, high temperature protection was cancelled |
35℃ |
|||
|
A7 |
Limit value of low temperature for external sensor(anti-freeze protection) | 1. 1-10℃
2. Exceed 10℃, screen display【—】, Low temperature protection was cancelled. |
5℃ |
|||
| A8 | Setting temperature
lowest limit |
1-10℃ | 5℃ | |||
| A9 | Setting temperature highest Limit | 20-70℃ | 35℃ | |||
|
AA |
Descaling function |
0: Close descaling function
1: Open descaling function(if valve is continuously closed for over 100 hours,it will be opened for 3 minutes automatically) |
0:Close descaling function | |||
|
AB |
Power with memory function | 0: Power with memory function
1: Shutdown power after power off 2: Shutdown power after power on |
0:Power with memory
function |
|||
|
AC |
Weekly programming selection | 0:
1: 2: |
5+2
6+1 7 |
0: 5+2 |
||
| AD | Restore factory defaults | Restore to factory settings | ||||
Sensor fault display: Please choose the correct setting of built-in and external sensor (option A4), if chosen wrongly or if there is a sensor fault (breakdown) then error “E1” or “E2” will be displayed on the screen. The thermostat will stop heating until the fault is eliminated.
Warranty
We offer a warranty of 24 months, from the day of purchase. Beyond the warranty period we will charge for the after-sale service.
REFERENCE
DOWNLOAD MANUAL
AMATI HY316WE Wi-Fi Wireless Thermostat User Guide
![]()
Leave a Reply