Hotwire HWSMWiFi Programmable THERMOSTAT
CONGRATULATIONS on the purchase of your new WiFi Thermostat from HOTWIRE. The HWSMWiFi model is an intuitive unit that can even be connected to Google Home or Amazon Alexa.
Installation Instructions
- Step 1:
Put your fingers either side of the front panel and pull towards you.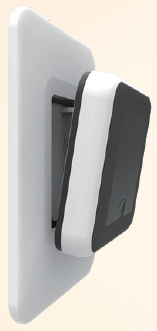
- Step 2:
Connect the Thermostat according to the Wiring Instructions.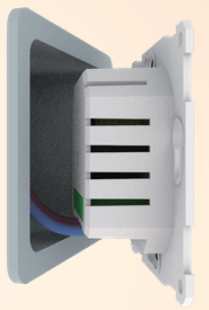
- Step 3:
Mount and reassemble the Thermostat: Screw the thermostat to the fixing plate in the holes provided.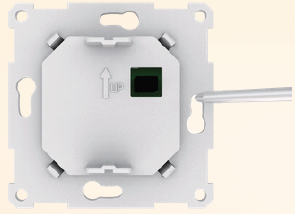
- Step 4:
Return the face plate to its original position by pressing firmly.
Wiring Instructions

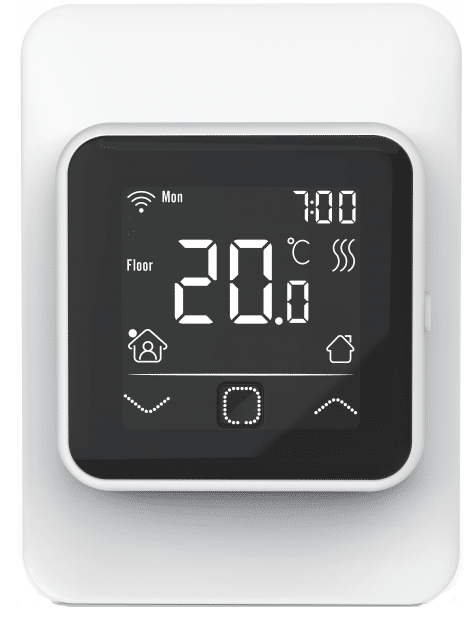
Thermostat Symbols
When the thermostat has been installed and connected scroll down on the On/Off switch to turn on the thermostat and scroll up to turn Off the thermostat.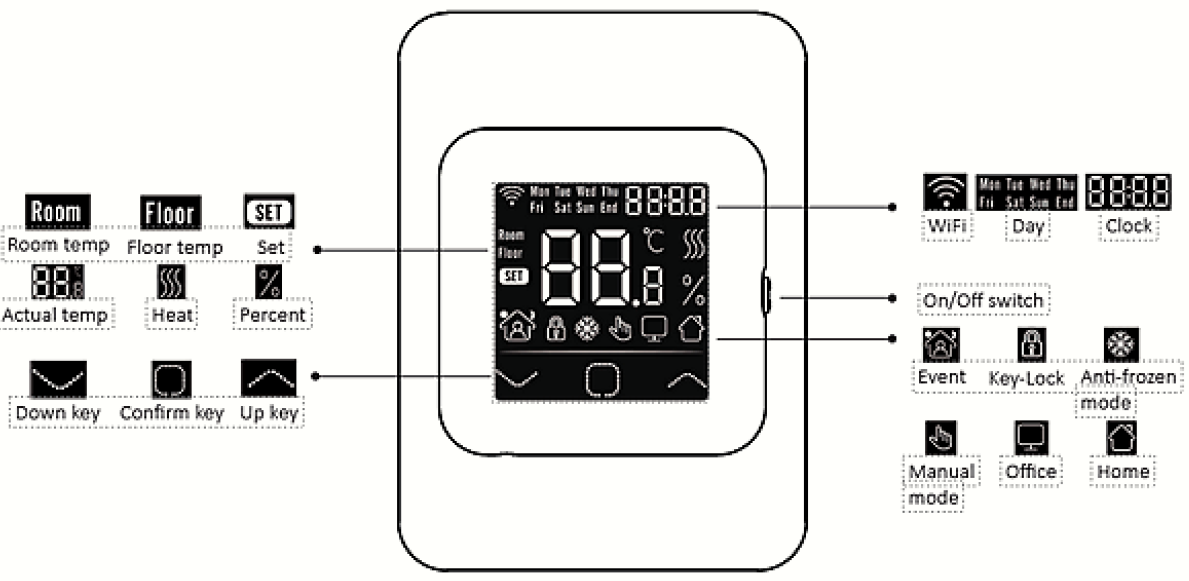
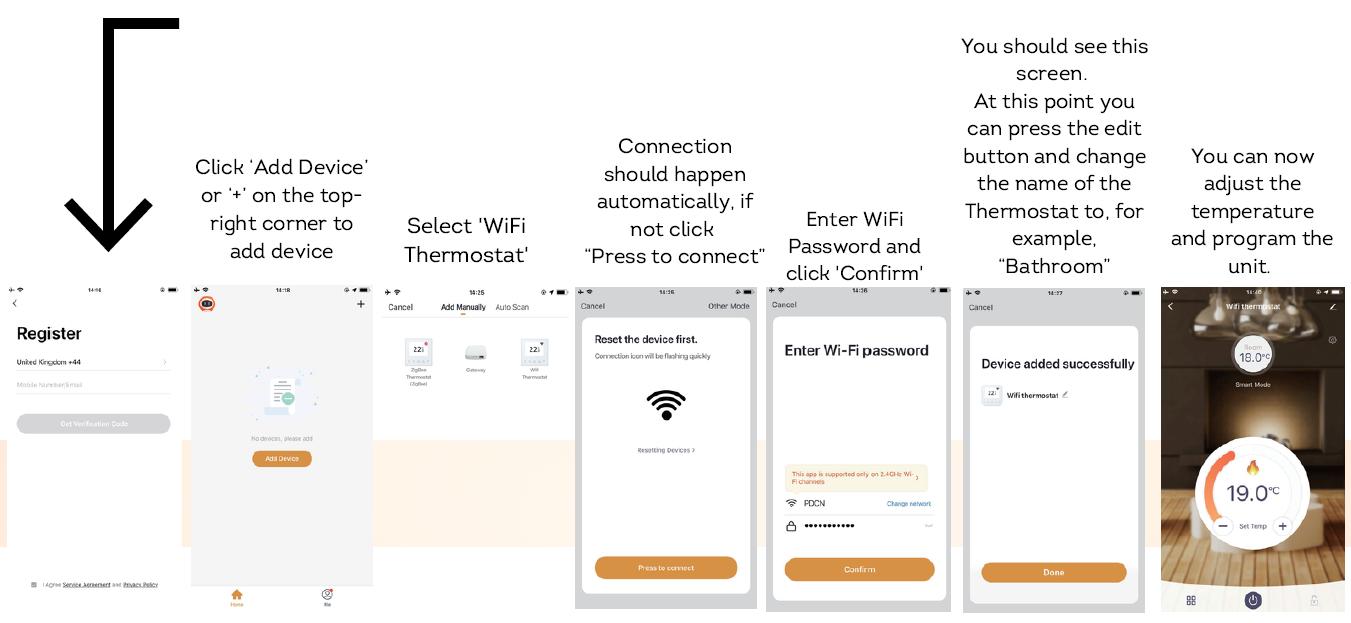
WIFI CONNECTION
Download the “Warmme App” and register and login as prompted.
Function and Operation Settings
Mode

- To select the mode press
There are 3 modes you can select from. - Auto Mode (house icon):
The system will run according to your preset settings. - Manual Mode (hand icon):
You can simply turn the system on or off. - Anti Freeze (snowflake icon):
This is not used often in Australia but you are able to simply ensure the floor never gets below a certain temperature. It is useful if you are in the Snow Fields. The maximum temperature for this is 15C
Temporary override Temperature
To override the current settings and turn the unit on Manually simply increase or decrease the Temperature by pressing the up or down arrows. This temperature is a ‘once off’ event will not be saved.
Lock
To ‘lock’ the system and its current settings so that visitors or the small people in your life don’t change the settings simply press and hold![]() the and UP arrow at the same time and hold for 3 seconds. Repeat this process to Unlock
the and UP arrow at the same time and hold for 3 seconds. Repeat this process to Unlock
The default programming is as follows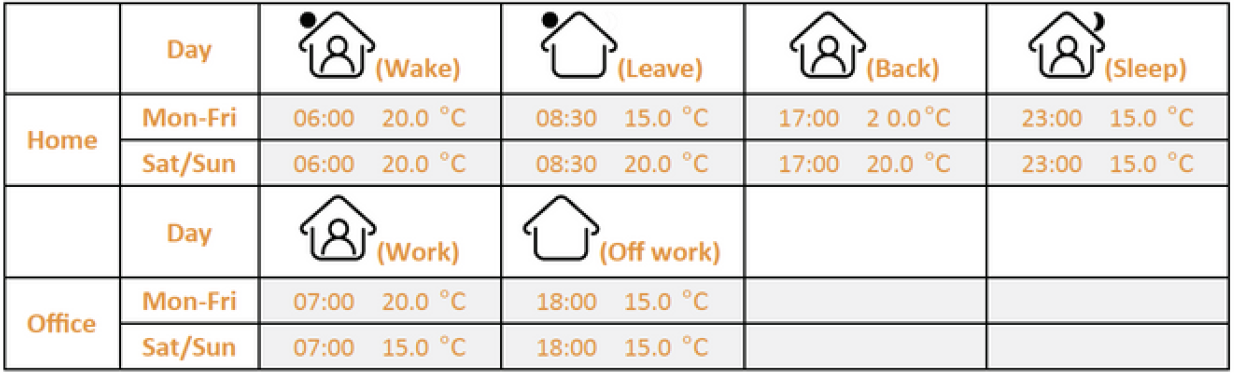
If you wish to change the default programming to suit your needs.
Programming the system
MENU KEY
- Instructions to change and personalise the programming are.
- We suggest programming via the app as it is much simpler.
CHANGE AND PERSONALISE THE PROGRAMMING
Press and hold![]() for 3 seconds to enter the menu.
for 3 seconds to enter the menu.
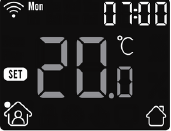
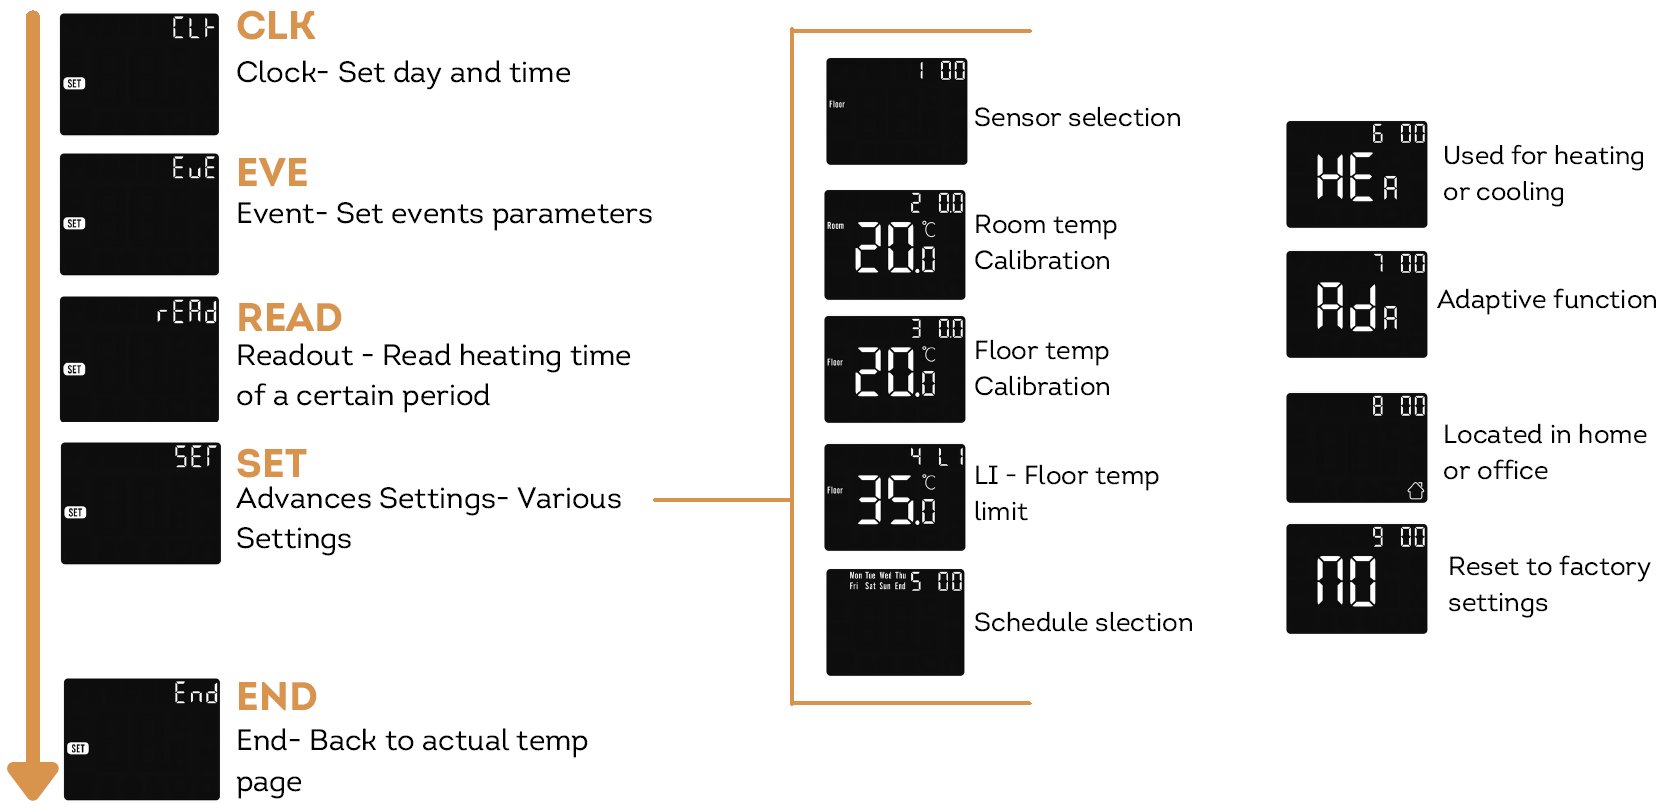
CLOCK
The first screen shown is:
- Here you can set the day and clock.
- Press the
 to enter the day setting.
 - Press the
 or
or to set day.
 - Press the to enter the hour setting.
- Press the or to set hour.
- Press the to enter the minute setting.
- Press the or to set minute.
- Press the to go back to the main screen.
* If the thermostat is WiFi version, it will update time automatically after connecting to WiFi.
EVENT

The next screen shown is:
- Press the to enter event setting.
- Press the or to select a day or end then click.
- Press the or to select an event symbol. i.e Wake, Leave, Back.
- Press the to select events start time.
- Press the or to set hour of starting time.
- Press the to enter the minute setting.
- Press the or to set the minute of starting time.
- Press the to enter the temp setting.
- Press the or to set the temp to the minimum of 5 degrees.
- Press the to back to the day selection, and repeat for each day.
If you want to back to the main screen, go back to the ‘day’ selection and select end.
Event settings can set and change the programming. In Auto Mode, the thermostat runs according to the programming of the events. On the Clock interface, Press the up or down arrow to select EVE.
READOUT
- READOUT counts the heating time (in percent) within a certain period.
- On the Clock screen, press the up or down arrows to select read.
- Press the to enter the day setting.
- Press the up or down arrows to select read.
- Press the to enter readout, the thermostat will show the heating time of the previous day.
- Press the up or down arrows to select 1 day, 30days, 365 days, it will show the heating time within the certain period.
- Press the to go back to the main screen.
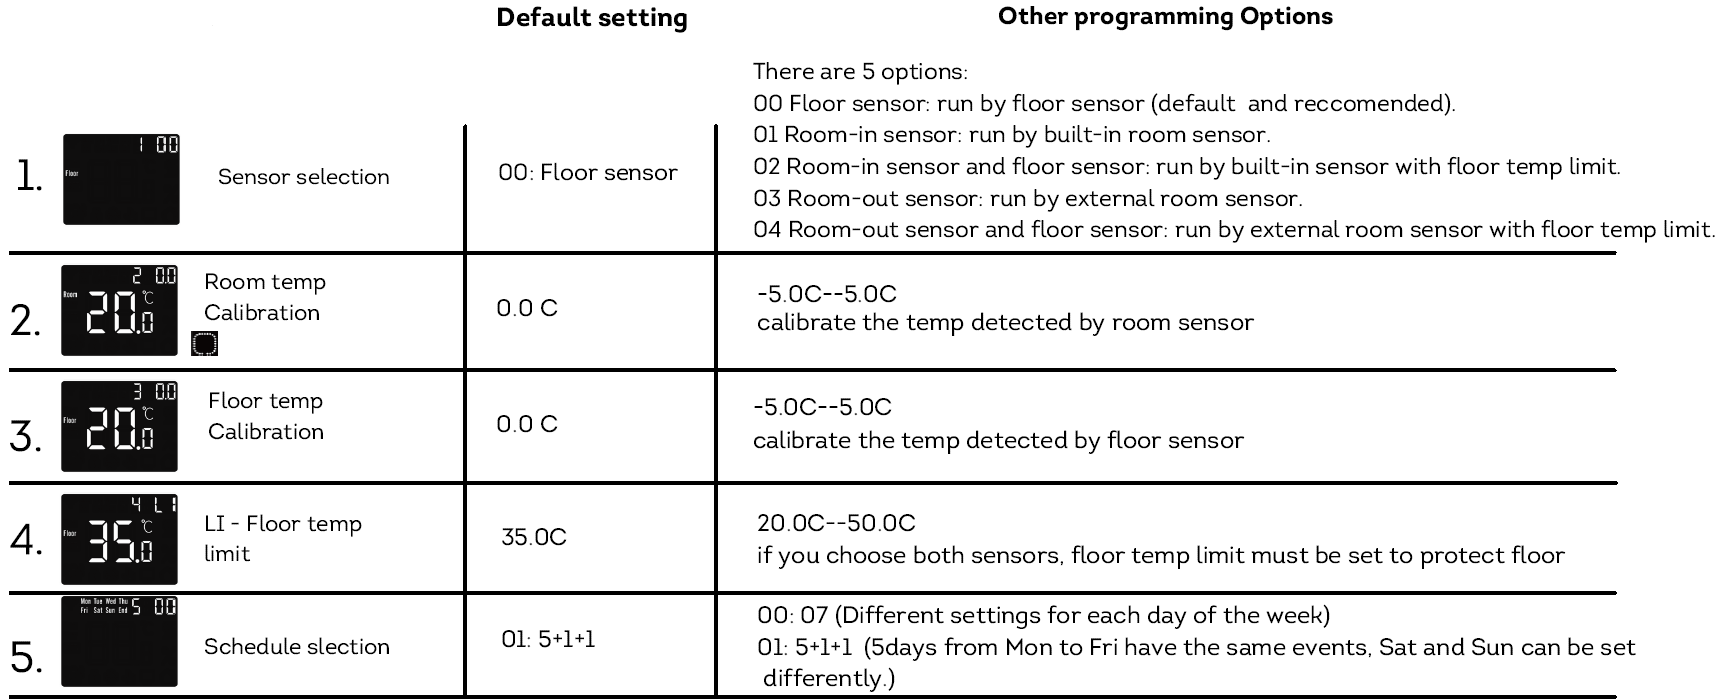
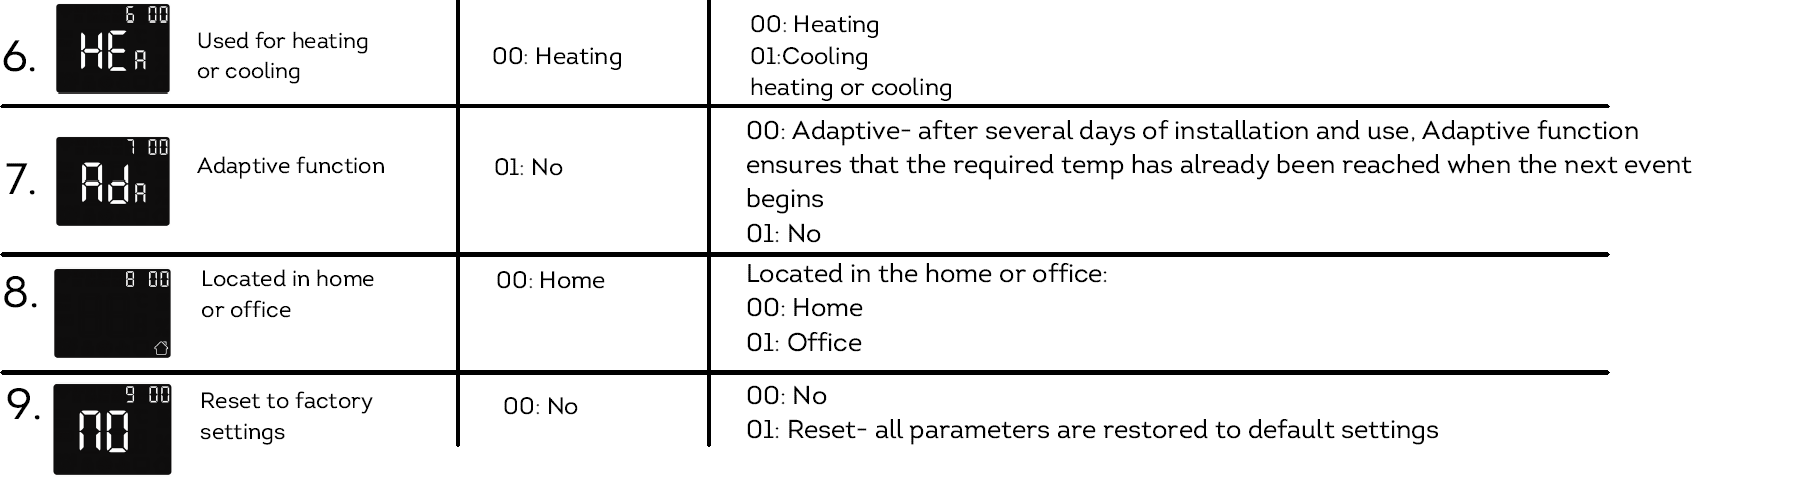
ADVANCED SETTINGS
- The thermostat provides advanced settings to suit various special situations.
- These are normally set by technicians during initial installation.
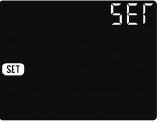
- On the clock Screen, Press the up or down arrows to select SET.
- Press the to enter advanced settings.
- Each setting can be accessed by pressing and parameters adjusted by pressing the up or down arrows. More details on these settings are on the following page.
OPEN WINDOW DETECTION
This function only works when room sensor or both sensor is selected (refer to page 7). The thermostat with this function will shut off automatically for 15 min when the window opens, as it can detect that the room temp plummets.
ERRORS
- E1: Room-in sensor error.
- E2: Floor sensor error.
- E4: Room-out sensor error
PROGRAMMING
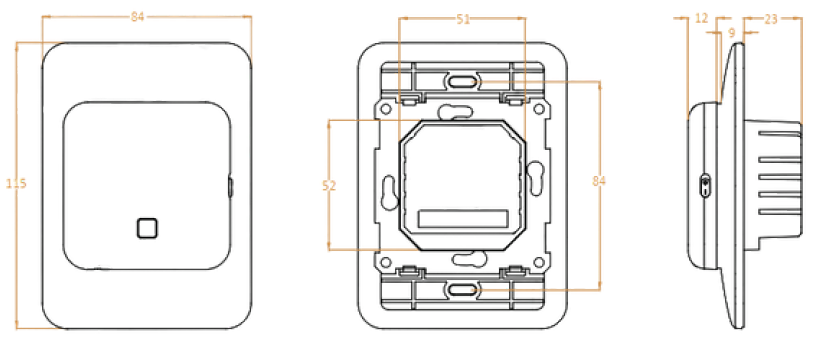
DIMENSIONS (MM)
Reference
Download Manual:
Hotwire HWSMWiFi Programmable THERMOSTAT INSTRUCTION MANUAL