Brother T-370 Non-Programmable Thermostat

Removal & Installation
Before removing wires from the old thermostat’s switching subbase, label each wire with the terminal designation it was removed from.
- Shut off the electricity at the main fuse box until installation is complete. Ensure that the electrical power is disconnected.
- Remove Old Thermostat: A Standard heaUcool thermostat consists of three parts:
- The Cover may be either a snap-on or hinge type.
- The Base is removed by loosening all captive screws.
- The switching subbase is removed by unscrewing the mounting screws that hold it on the wall or adaptor plate.
- Remove the front cover of the old thermostat. With the wires still attached, remove the wall plate from the wall.
- If the old thermostat has a wall mounting plate, remove the thermostat and the wall mounting plate as an entire assembly.
- Identify each wire attached to the old thermostat.
- Disconnect the wires from the old thermostat one at a time. Do not let the wires fall back inside the wall.
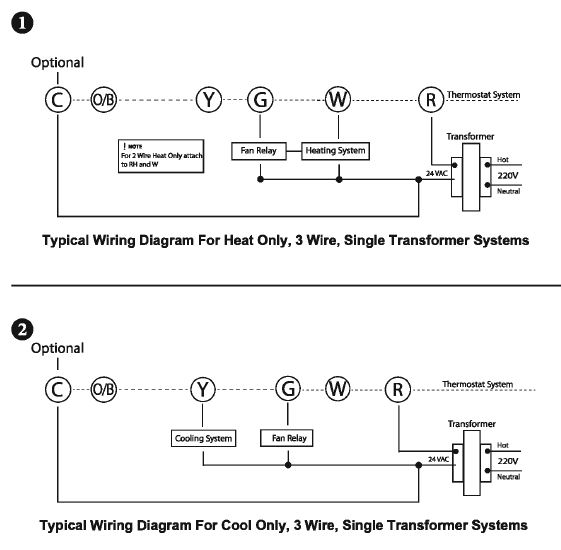
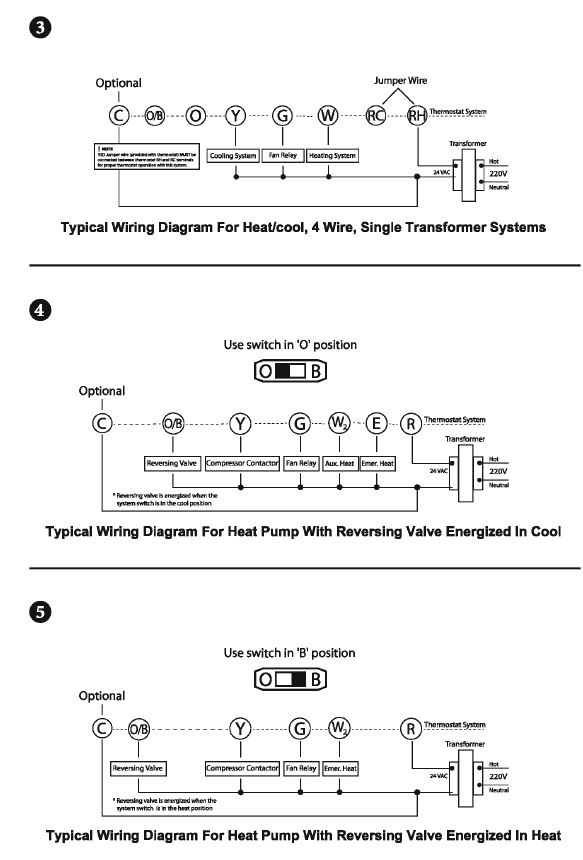
- Install the new thermostat and use the following wiring diagrams.
Battery Location
The thermostat can function on 2 x “AA” alkaline batteries as an alternative source of power. If ![]() change is displayed, the batteries are low and should be replaced. For best results, replace batteries once a year. To replace batteries, install the batteries along the top of the base. The batteries must be installed with the positive ( +) ends to the right
change is displayed, the batteries are low and should be replaced. For best results, replace batteries once a year. To replace batteries, install the batteries along the top of the base. The batteries must be installed with the positive ( +) ends to the right
Wiring Diagrams
Reference
Download Manual:
Brother T-370 Non-Programmable Thermostat Installation Instructions
![]()
Brother T-370 Non-Programmable Thermostat Installation Instructions