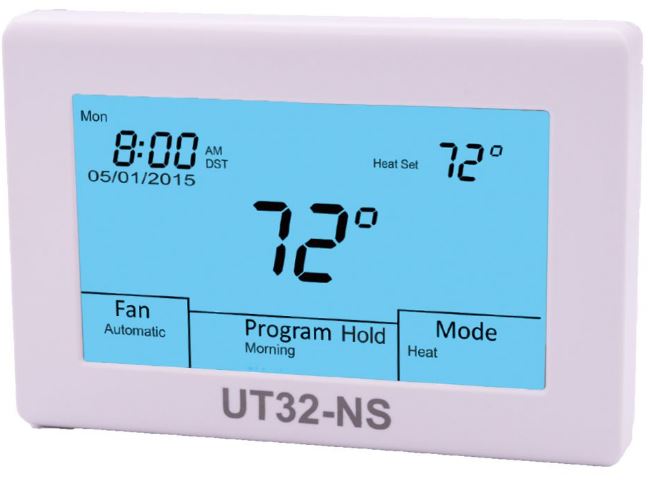
Io-hvac-controls UT32-NS Programmable Touchscreen Thermostat

OVERVIEW
The UT32-NS programmable touchscreen thermostat can be used for occupied and unoccupied scheduling of the ZP4-ESP-FAV and the ZP6-ESP zone control panels. When wired and configured properly, the thermostat takes the place of a separate 7-day clock, night stat, and override timer. The UT32-NS Programmable Fan option is used to trigger the ‘G’ fan relay to open or close the Night Stat terminals on the ZP4-ESP-FAV or ZP6-ESP panels that place the systems in the occupied or unoccupied mode of operation. The thermostat can also be used with a -S1 Indoor Remote Sensor. 24-volt power to the thermostat T is supplied by the zoning panels through Night Stat terminals. The thermostat also has a battery backup to maintain the real-time clock in the event of a power failure. The thermostat can be configured to provide 7-day scheduling with 2 or 4 events per day. For commercial schedules, 2 events per day are typical. Refer to wiring diagrams in appropriate zone control manuals.
HOW IT WORKS
The UT32-NS does not control the HVAC equipment and only uses the ‘G’ fan relay to put the zone control panel in either the occupied or unoccupied mode. This is accomplished by using the Programmable Fan option so that the fan relay is energized during occupied mode (Always On) and de-energized during unoccupied mode (Automatic). When in Automatic mode, the fan relay will only energize when the temperature rises above or falls below the programmed unoccupied heating and cooling setpoints
RECOMMENDED SETUP
Refer to the Installation Instructions to configure the thermostat. Leave all other setup menu items not shown below in the factory default
SYSTEM SWITCH SETTINGS
The UT32-NS contains a set of four system switches located on the thermostat printed circuit board. Make sure the system switches are set as follows:
- Sw 1 = OFF
- Sw 2 = ON
- Sw 3 = OFF
- Sw 4 = OFF
INSTALLER SETUP MENU CHANGES:
After the thermostat is powered up, touch and hold both the Clock and Mode section for 5 seconds to enter the Installer Menu. Touch Mode to advance forward through the menu or touch Fan to backup
MENU CHANGES: (LEAVE ALL OTHER OPTIONS AT FACTORY DEFAULTS)
- 02 = 2 (2 schedules per day)
- 04 = 1 (Programmable Fan)
SETTING THE CLOCK AND DAY OF THE WEEK
- It is important that the time of day and day of the week is set properly so that occupied and unoccupied programs start on time.
- Touch the Clock until the day of the week flashes. Tap the UP or DOWN arrow to select the day of the week.
- Touch the Clock again and the hour will flash. Tap the UP or DOWN arrow to select the correct hour. Note: PM hours are indicated by PM on the LCD.
- Touch the Clock again and the minutes will flash. Tap the UP or Down arrow to select the correct minutes.
- To exit the menu, touch Clock again
DAYLIGHT SAVING TIME:
Refer to the User Manual and DST Chart for the Daylight Saving Time option.
PROGRAMMING EVENTS:
When the thermostat is configured to provide 2 schedules per day (Occupied/Unoccupied), 7 days per week, each event is displayed on the LCD as DAY (Occupied) and NIGHT (Unoccupied).
INSTRUCTIONS
- Touch Program until Mon (Monday) flashes.
- Tap Program again until the hour flashes and Day is displayed on the LCD. Use the UP or DOWN arrow to set the hour start time. Note: PM hours are indicated by PM on the LCD.
- Tap Program again until the minutes flash. Use the UP or DOWN arrow to set the minutes.
- Tap Program again and the heating setpoint will flash. Leave the setpoint at the factory default of 70 degrees.
- Tap Program again and the cooling setpoint will flash. Leave the setpoint at the factory default of 75 degrees.
- Tap Program again and the fan option Always On will flash. This is the correct setting for the Day mode. If not, use the UP or DOWN arrow to set the fan option from Automatic to Always On.
- Tap Program again until the hour flashes and Night is displayed on the LCD. Use the UP or DOWN arrow to set the hour start time. Note: PM hours are indicated by PM on the LCD.
- Tap Program again until the minutes flash. Use the UP or DOWN arrow to set the minutes.
- Tap Program again and the heating setpoint will flash. You can use the UP or DOWN arrow to change the heating setpoint or use the factory default of 62 degrees.
- Tap Program again and the cooling setpoint will flash. You can use the UP or DOWN arrow to change the cooling setpoint or use the factory default of 83 degrees.
- Tap Program again and the fan option Automatic will flash. This is the correct setting for the Night mode. If not, use the UP or DOWN arrow to set the fan option from Always On to Automatic.
- Tap Program again and CPY (Copy) will appear on the LCD. If you wish to copy the Monday program to additional days of the week, use the UP or DOWN arrow to add additional days.
Example: Mon Tue Wed Thu Fri
- Once you have selected the days to be copied, touch Program. CPY will begin to flash and then the next programming day will flash.
Example: If you copy the Monday schedule through Friday, Sat (Saturday) will flash. Simply repeat the programming steps for any day when the building will be unoccupied. The only required change is that both the Day and Night fan option should be set to Automatic and the heating and cooling setpoints for Day should reflect the unoccupied setpoints for Night.
- Once programming is completed, make sure the thermostat is set in the Auto mode of operation.
TYPICAL 7-DAY SCHEDULE HAVING 2 EVENTS PER DAY WITH SATURDAY/SUNDAY UNOCCUPIED
- DAY MON 7:00 AM 70 75 Always On|
- NIGHT 5:00 PM 62 83 Automatic
COPY MONDAY PROGRAM TO TUESDAY, WEDNESDAY, THURSDAY, AND FRIDAY
- DAY SAT 7:00 PM 62 83 Automatic
- NIGHT 5:00 PM 62 83 Automatic
COPY SATURDAY PROGRAM TO SUNDAY
Io-HVAC-Controls
- www.iohvaccontrols.com
- For Technical Support Call Toll-Free: 866-225-5032
- iO-06-1353-110122
Reference
Download Manual:
Io-HVAC-controls UT32-NS Programmable Touchscreen Thermostat Instruction Manual

Io-HVAC-controls UT32-NS Programmable Touchscreen Thermostat Instruction Manual

Leave a Reply