AZEL D-508F Non-Programmable Digital Thermostat
Description
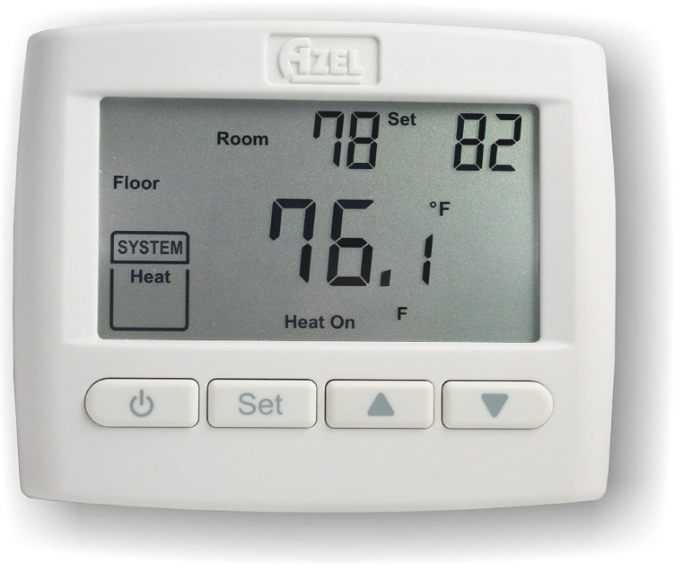
D-508F digital non-programmable thermostat is designed to control either ambient(air) temperature (A Mode) or floor temperature (F Mode) or a combination of ambient temperature with floor temperature limits(AF Mode). An auxiliary remote sensor is provided to measure slab temperature in order to control the floor temperature(within maximum and minimum limits in AF Mode). It can also be used for sensing the outdoor temperature
LCD Description
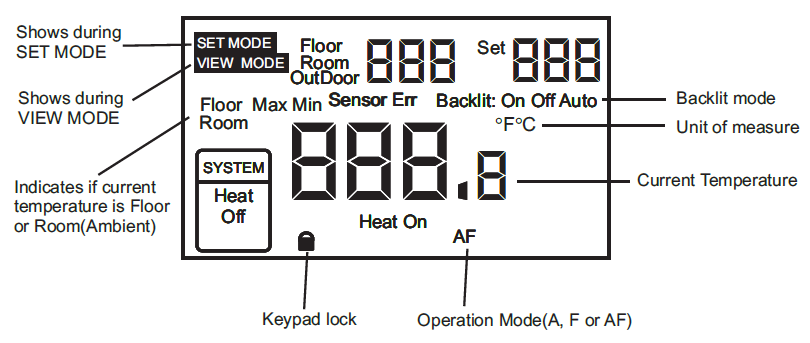
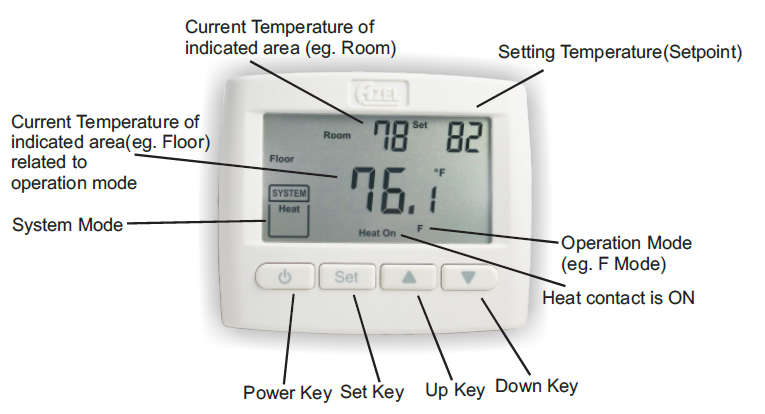
Home Screen Display During Operation
Slide Switch Configuration
The Slide Switches are located at the back of the control module(see Figure 1).
- Temperature Display Switch(S1): to switch between° C and F° .
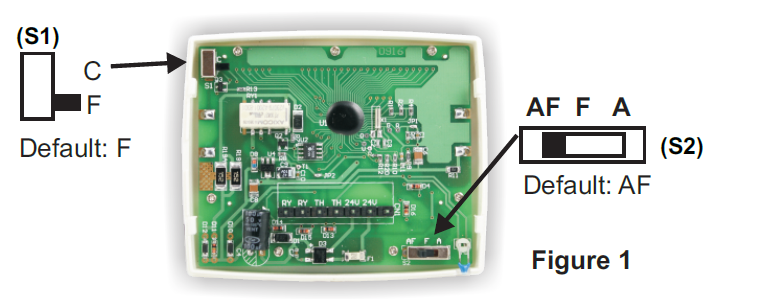
- Mode of Operation Switch(S2):
- A: controls and displays the ambient temperature. Optional: connect external sensor(P-01) for the display of outdoor temperature in the upper LCD – also set Outdoor Sensor to ON in the setting mode.
- F: controls and displays the floor temperature. Connect external slab sensor(P-01). Also displays current ambient temperature in the upper LCD.
- AF: controls and displays the ambient temperature. Maintains the floor temperature within desired maximum and minimum limits. Connect external slab sensor(P-01). Also displays current floor temperature in the upper LCD.
Installation
- Look for a location which has a constant temperature in the house and it is no near the door entry of heater or air conditioning outlet. The mounting height should be about five feet above the floor.
- Insert a screw driver into the slot located on the right side of the thermostat to open the front cover.
- Set the slide switches on the back of the control module if necessary. Default: AF mode, °F display.
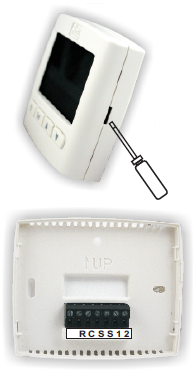
- Place base over hole in wall and mark mounting hole locations on wall using base as a template.
- Move base out of the way. Drill mounting holes and use the screws provided to secure the base. Use plastic anchors if necessary.
- Through the base opening, connect wires to the terminal blocks on the base according to Figure 2 below.
- Carefully line the thermostat up with the base and snap into place.
Wiring Diagram
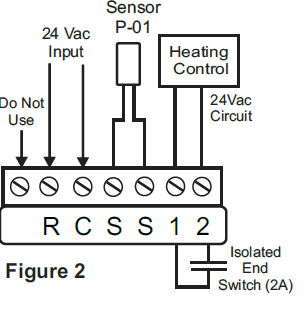
- R: 24VAC Hot
- C: 24 VAC Common
- S, S: auxiliary remote sensor(P-01) 1, 2: relay switch output
Note:
The sensor wires can be extended by conventional wires.
Power-up
As soon as the thermostat is powered, all the LCD segments are displayed. Then it undergoes a series of tests before displaying the actual temperature.
Floor Minimum and Maximum limits(AF Mode only)
The thermostat generally turns On or Off to control the ambient temperature. However, if the floor temperature drops below the set minimum floor temperature limit, the thermostat will turn heating On regardless of the ambient temperature. If the floor temperature rises above the maximum limit, the thermostat will turn heating Off regardless of the ambient temperature to maintain the floor within the desire limit. This setting ensures a minimum floor temperature at all times. The maximum limit is to avoid damage to your floor and for added safety.
Note: The floor minimum limit cannot be set to a higher value than the maximum limit.
SETTING THE THERMOSTAT
QuickSet Feature:
Quickset allows the user to change the setpoint temperature instantly without entering the setting mode. Simply press UP (increase) or Down (decrease) key during the normal operating mode. When the Up/Down key is pressed, the setpoint is flashing on the upper right hand corner of the LCD display to indicate that the setpoint value can be changed. Press the UP/Down key again to adjust the setpoint (press and hold for auto repeat function). Just walk away when finish and it will return to normal operating mode after 30 seconds.
Setting Mode
- Press and hold the Up Key or Down Key to change the value continuously (auto repeat function).
- To return to normal operating mode from the setting mode, press and hold the SET key for 3 seconds. However, the system also returns to normal operating mode if no key is pressed for 30 seconds.
- During the setting mode, symbol “SET MODE” is displayed on the upper left corner of the LCD. Each time SET key is pressed, the data will be saved into the EEPROM and advance to the next setting(parameter). If no change of value is required, just press SET key once to go to the next step (parameter).
| Steps | Procedures | Description | LCD Display | |||||
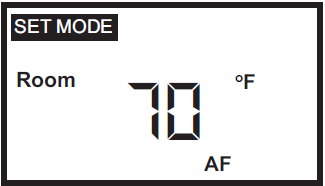
| Step 1 | To start setting, press the SET key for 3 seconds to access the setpoint mode. The LCD will display the current setpoint (flashing). Then press either the Up key to increase or the Down key to decrease the setpoint to the desired setting. An example of LCD display in AF mode is shown. | Setpoint Temperature
Default setting: 70°F(21°C) for A or AF mode, 82°F(28°C) for F mode. |
|
|||||
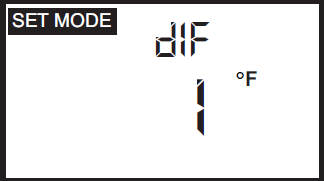
| Step 2 | Press SET key again to access the differential mode. The LCD will display the current differential (blinking). Then press either the Up key to increase or the Down key to decrease the differential to the desired setting. Selection value: 0.5, 1.0, 1.5, 2.0 | Differential Temperature
Default setting: 1°F(1°C) |
||||||
 |
||||||||
| Step 3 | Press SET key again to access the Outdoor sensor. LCD will display the current | Outdoor sensor: On or Off | 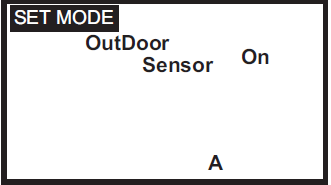 |
|||||
| (A mode only,
otherwise, skip this step) |
setting: Off (blinking) Then press either the Up key or Down key to toggle between On and Off. | Default setting: Off | ||||||
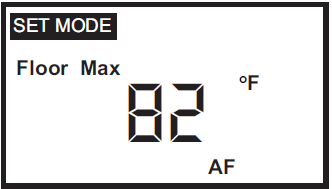
| Step 4 | Press SET key again to access the Maximum Floor limit. The LCD will display the | Floor maximum limit | ||||||
 |
||||||||
| (AF mode only,
otherwise skip this step) |
current setting (blinking). Then press either the Up key to increase or the Down key to decrease the limit to the desired setting. | Default setting: 82°F(28°C) | ||||||
| Step 5
(AF mode only, otherwise skip this step) |
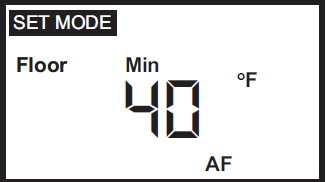
Press SET key again to access the Minimum Floor limit. The LCD will display the current setting (blinking). Then press either the Up key to increase or the Down key to decrease the limit to the desired setting. | Floor minimum limit
Default setting: 40°F(5°C) |
Floor |
|
||||
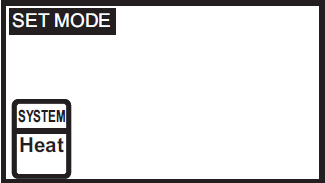
| Step 6 | Press SET key again to access the System Mode. LCD will display the current mode: Heat (blinking) Then press either the Up key or Down key to toggle between Heat and Off. | System Mode: Heat or Off
Default setting: Heat |
 |
|||||
|
SYSTEM |
||||||||
| Heat | ||||||||
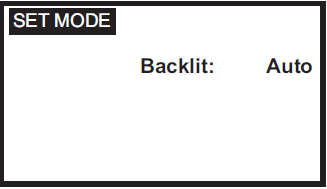
| Step 7 | Press SET key again to access the backlit mode. LCD will display the current mode, Auto (blinking). Then press either the Up key or the Down key to toggle between the Auto, On, Off designation. Press SET key again to go back to normal operating mode. Note: In Auto Mode, backlit is turned on for 60 seconds when any key is pressed. | Backlit mode: Auto, On or Off
Default setting: Auto |
|
|||||
View Setting Mode
Press both Up and Down keys at the same time to review the current control settings. “VIEW MODE” appears on the upper left corner of the LCD. Then Press (or Up) key to scroll through the settings in the same order as Setting Mode (Setpoint, Differential, Heat/Off, Backlit etc.). To exit to normal mode, press one more time from the last setting (e.g. Backlit) or press both Up and at the same time. In this mode, the settings
cannot be changed.
Turning On and Off the Heating System
In the heat mode, the relay is operated to maintain the temperature of the zone. The control output will turn on when the sensor temperature falls to the setpoint temperature minus half the differential amount. The control output will turn off as the temperature rises to the setpoint plus half the differential amount.
During the normal operating mode
! To disable or enable the relay output, press the power button once(eg. 1 second). LCD indicates a flashing “Heat” or “Off” under the “System” heading. Press the power button again to toggle between “Heat” to enable and “Off” to disable the relay output. After 30 seconds, the system returns to normal operating mode. ! To completely power off the thermostat, press the power button for three seconds. Press the power button again to turn back on the thermostat.
Keypad Lock
Keypad can be locked to prevent tempering by unauthorized personnel. This is done by pressing SET , Up and Down keys at the same time for three seconds. A lock symbol appears on the lower LCD screen which indicates that the keypad is locked. Then input from the keypad is disabled. Press SET, Up and Down keys at the same time again for another three seconds to unlock the keypad. The lock symbol disappears from the screen. Factory setting: unlock
| Error Messages | |
| Sensor Error
Er1 |
Internal sensor is open or short circuit. Replace the thermostat |
| Sensor Error
Er2 |
External sensor is open or short circuit. Replace the external sensor.
In A mode, if outdoor sensor is set to ON and no sensor is connected. |
| Sensor Error
Er3 |
EEPROM (memory) data has been corrupted. Replace the thermostat. |
| HHH | The measured temperature is above the upper display range. |
| LLL | The measured temperature is below the lower display range. |
SPECIFICATIONS
- Display Format: Liquid Crystal Display(LCD) with backlit
- Power Input : 24VAC , 50/60Hz, 0.5VA
- Selectable display in °F or °C
- Floor Temperature Control Range: 34-122°F(1-50°C)
- Default setting: Maximum Floor Temperature Limit(AF Mode): 35-122°F(2-50°C)
- Default: 82°F(28°C)
- Minimum Floor Temperature Limit(AF Mode): 34-121°F(1-49°C)
- Default: 40°F(5°C).
- Switching Differential: A/F/AF Mode: 0.5/1.0/1.5/2°F( , Default: 1°F/1°C.
- Sensor Probe: P-01 10k thermistors, 10″ lead, 3/8″(9.5mm) OD x
- 13/16″(20.6mm) length ±10%
- Contact Rating: 2A 24VAC 34-100°F(1-38°C)
- Temperature Display Range: -22 to 131°F(-30 to 55°C)
- Operating Temperature: 32 – 122°F (0 – 50°C)
- Dimension: 3.62″W x 2.99″H x 0.91″D(92 x 76 x 23mm)
- Weight: 0.32 lb. (145 g)
- Storage: -4 to 120°F (-20 to 50°C)
- Material: Flame retardant plastic
- Lockout mode to prevent tempering by unauthorized personnel
- EEPROM memory retains control settings in the event of a power failure
For more product information, please visit: www.azeltec.com
P.O. Box 53138, 10 Royal Orchard Blvd.
Thornhill, Ontario, Canada L3T 7R9
Ph: 905-223-5567 Fax: 905-223-3778
Email: [email protected]
Reference
Download Manual:
AZEL D-508F Non-Programmable Digital Thermostat INSTRUCTION MANUAL

AZEL D-508F Non-Programmable Digital Thermostat INSTRUCTION MANUAL