Comfortheat MCC2 Programmable Thermostat

Product program
This user manual covers the following electronic thermostats
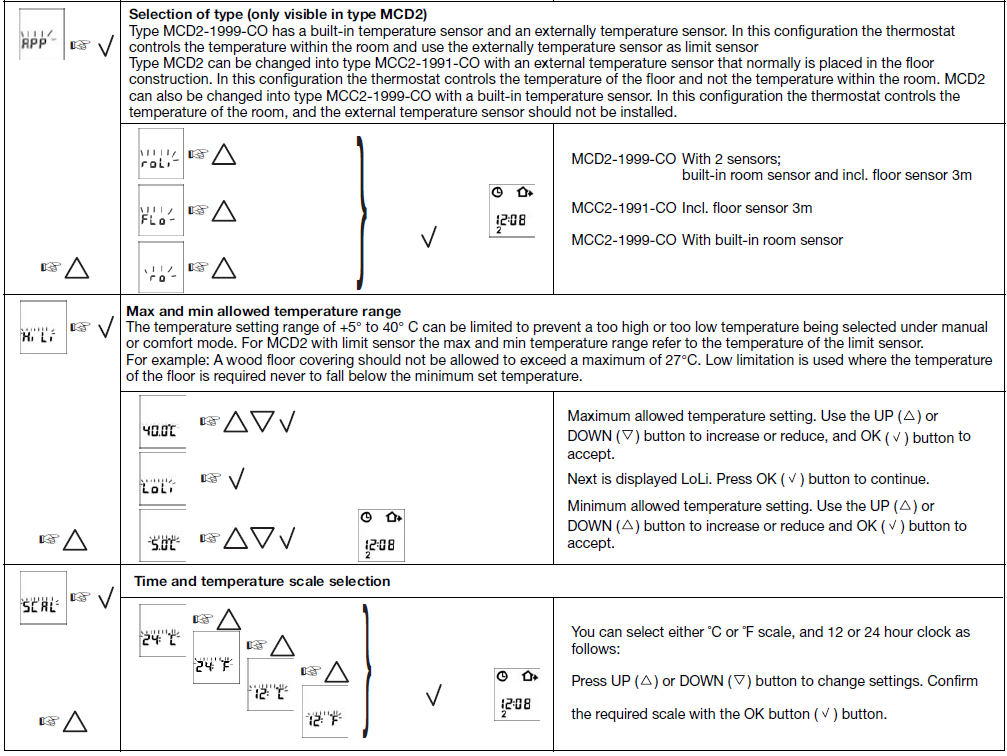
MCC2-1991-CO. Incl. floor sensor 3m
MCC2-1999-CO. With built-in room sensor
MCD2-1999-CO. With 2 sensors; built-in room sensor and incl. floor sensor 3m
Introduction
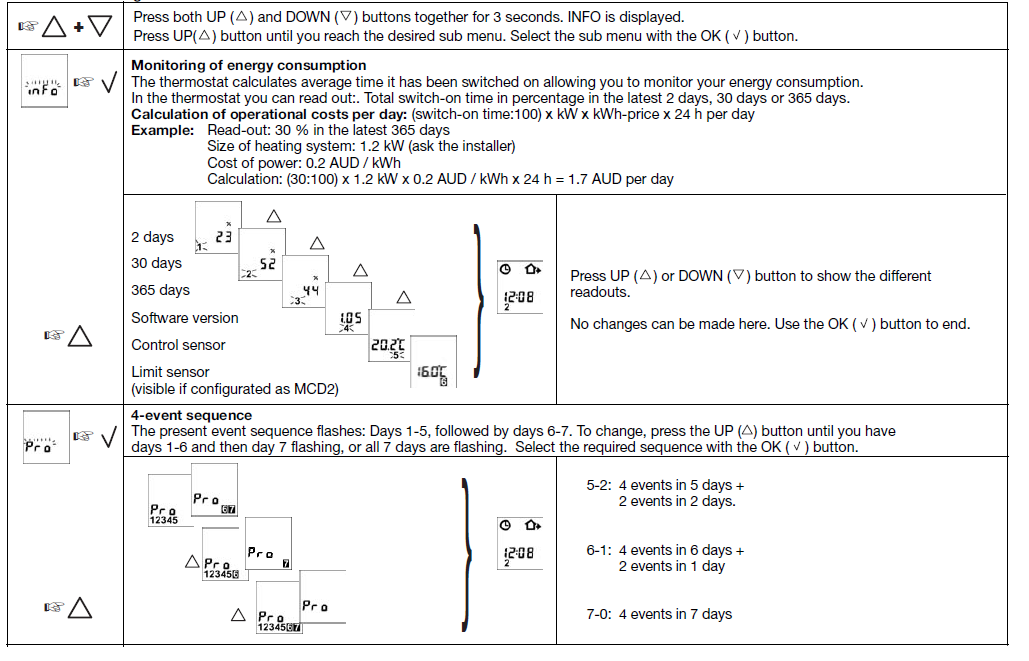
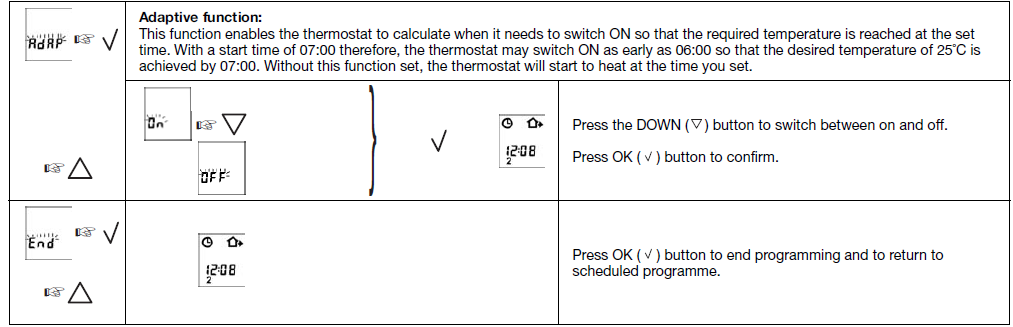
The thermostat is capable of switching on your heating system at pre-determined times on different days of the week. It is possible to set 4 periods called events each day with different temperatures. From the factory, a default schedule is programmed suitable for most installations. Unless you change these settings the thermostat will operate to this default program. Working with lower temperatures during times when the room is unoccupied will lower your energy costs without reducing comfort. The thermostat has an adaptive function that automatically changes the start time of a heating period so that the desired temperature is reached at the time that you set. After 3 days the adaptive function has learned when the heating must be switched on. Type MCC2-1991-CO has an external temperature sensor that is normally placed in the floor construction. In this configuration, the thermostat controls the temperature of the floor and not the temperature within the room. Type MCC2-1999-CO has a built-in temperature sensor. In this configuration, the thermostat controls the temperature of the room. Type MCD2-1999-CO has a built-in temperature sensor and an external temperature sensor. In this configuration, the thermostat controls the temperature within the room and uses the external temperature sensor as a limit sensor avoiding high or low temperatures in the floor construction. The thermostat has a pin button marked R, allowing you to reset the thermostat to factory settings. These are listed at the end of this manual with space for you to record your own weekly schedule. The display is backlit when operating the buttons. The heating element is switched off when the light is on in the display The heating system can be switched off on the built-in interrupter. The Microprocessor taking care of the time will still be supplied with a power whereby time and day will be maintained. When the heating is required and the thermostat is switched on, it will continue the 4-event program based on the present time and day.
Getting started
Setting the thermostat into operation
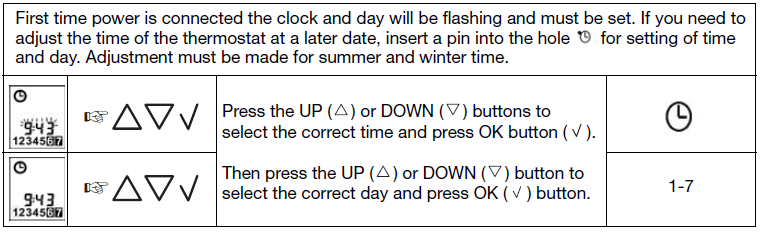
The first time power is connected the clock and day will be flashing and must be set. If you need to adjust the time of the thermostat at a later date, insert a pin into the hole for the setting of time and day. The adjustment must be made for summer and winter time.
Daily use of the thermostat
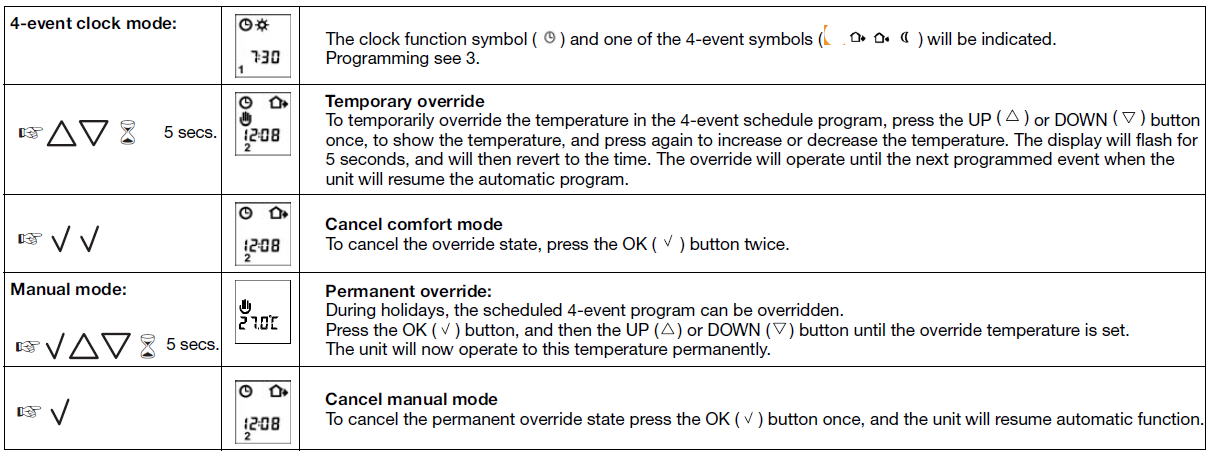
4-event clock mode
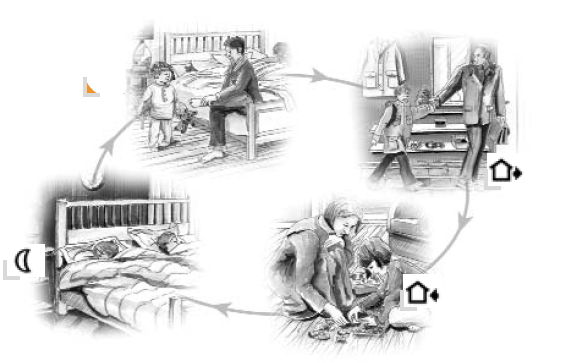
The day has been split into 4 events describing a typical day. When the thermostat is in the 4-event mode it will automatically adjust the temperature according to the required temperature to the required time. As standard, the thermostat has 5 days with 4 events and 2 days with 2 events. Programming see 3.
Programming
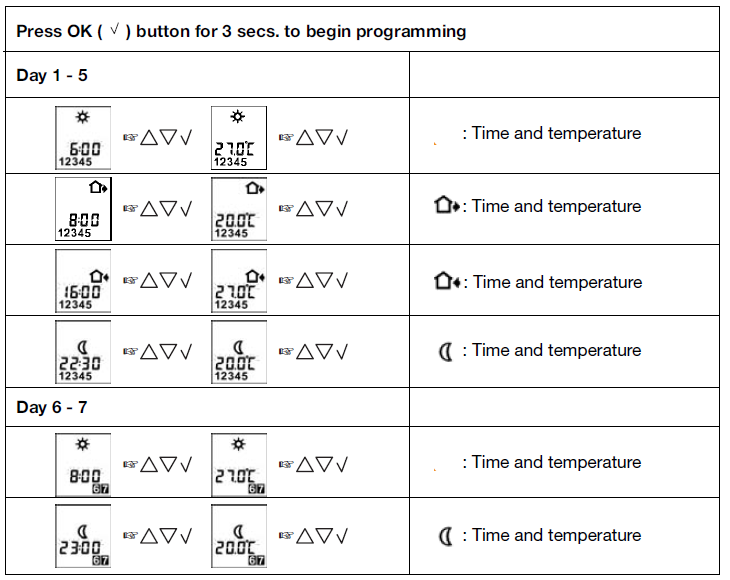
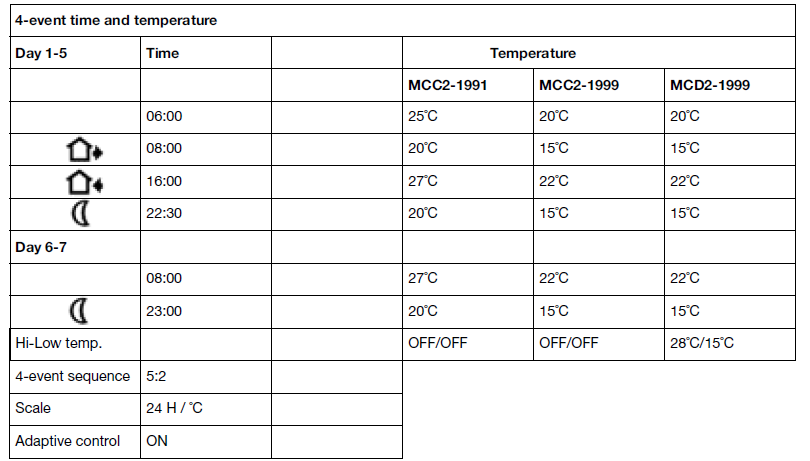
4-event time and temperature
For each event, the start time and required temperature must be set. For example, in the morning you wish the heating to start at 07:00 and the temperature to rise to 25˚C. Press the OK ![]() button for 3 seconds and the start time is displayed. Change this to 07:00 with the UP (
button for 3 seconds and the start time is displayed. Change this to 07:00 with the UP (![]() ) or DOWN (
) or DOWN ( ![]() ) button. Press OK (
) button. Press OK (  ) to confirm. The temperature is now displayed. Change this to 25˚C with the UP (
  ) or DOWN (
  ) button. Press the OK ( ) button to confirm. This action can now be repeated for the second event. These settings will be valid with days 1-5 showing on the display. To program days 6 and 7, repeat the above. Days 6 and 7 are usually Saturday and Sunday and only have two events. The temperature can be set within the range of +5 to+40˚C. It is also possible to select the heating OFF at that event by reducing the setting to 5˚C and then pressing the ( ) once more.
Advanced settings and read-out
Reset to factory setting

Factory settings
4-event time and temperature
Failure codes
- E0 = Internal failure, replace the thermostat
- E1 = Built-in sensor short-circuit or disconnected, replace the thermostat
- E2 = External sensor short-circuit or disconnected
Comfort Heat Australia Pty Ltd
Unit 8,11 Ponderosa Pde
WARRIEWOOD NSW 2102
Phone: (02) 99798600 · Fax: (02) 99797706
E-mail: [email protected]
REFERENCE:
DOWNLOAD MANUALS:
Comfortheat MCC2 Hydronic Programmable Thermostat Operating Manual
OTHER MANUALS:
Comfortheat MCC2 Electric Programmable Thermostat Setup Manual
Comfortheat MCC2 Hydronic Programmable Thermostat Operating Manual
Comfortheat MCC2 THERMOSTAT Wiring Diagram
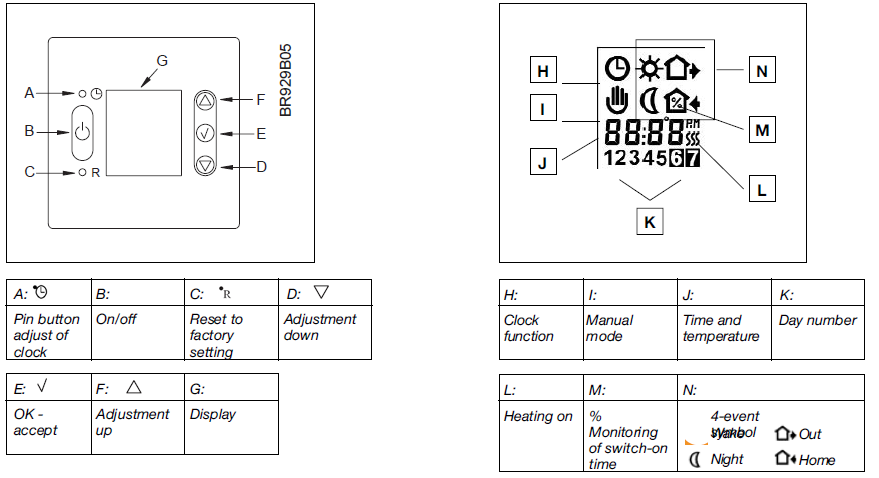
![]()