Lux DMH110B Lighted Non-Programmable Thermostat
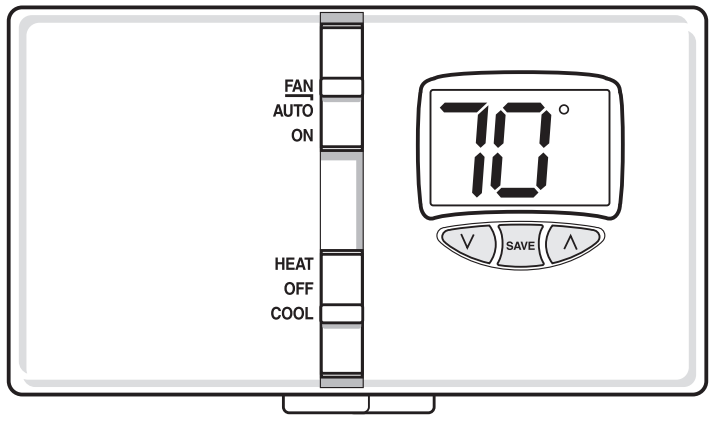
Thank you for your confidence in our product. To obtain the best results from your investment, please read these instructions and acquaint yourself with your purchase. Follow the installation procedures carefully, and save these instructions for future reference. This will save you time and minimize the chance of damaging either the thermostat or the systems that it controls.
SYSTEM COMPATIBILITY
This thermostat can be used with most single-stage 24-volt: gas, oil or electric heating and cooling systems, single-stage heat pumps, or gas Millivolt heating systems.
It cannot be used with: 3-wire zone valves, 120/240-volt heating elements, or multi-stage heat pumps. Ask your dealer for other LUX thermostats to control those systems.
THERMOSTAT FEATURES
- 1-Stage Heat / 1-Stage Cool
- Electronic Accuracy
- Innovative SAVE Feature
- Gas / Elec Fan Option
- Battery Powered Only
- Set Temperature Range 45°F (7°C) degrees to 90°F (32°C) degrees
- Clean, Attractive Design
- LuxLight® Illuminated Display Screen
- Easy to Install
- Large, Easy to Read Display
- F/C Selectable Temperature Display
- Adjustable Temperature Differential / Cycle Rate
- User Temperature Display Calibration
- 5/2 Minute Selectable Minimum Run/Off Time
- On-Screen Low Battery Indicator
- 3-Year Warranty
- No Leveling Required
TOOLS YOU MAY NEED
Screwdrivers, wire stripper / cutter, and possibly a drill with assorted bits (new installations only).
REMOVAL OF OLD THERMOSTAT
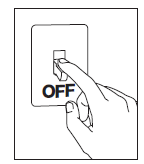
- Turn OFF the electricity to all heating and cooling components. Do not turn the electricity back on until all work is completed.
- Remove the front portion of your old thermostat to expose the wiring connections.
- write down the letters printed near each wire terminal that is used, and also the color of each wire that is connected to it. Self-adhesive wire labels are also enclosed.
- Carefully remove the wires one at a time, and bend them in a manner so that they do not fall back inside the wall. Do not allow bare wire ends to touch each other.
- Loosen the mounting screws for the old thermostat and carefully remove it from the wall
THERMOSTAT MOUNTING LOCATION:
On replacement installations, mount the new thermostat in place of the old one unless the conditions listed below
suggest otherwise. On new installations, please follow these general guidelines:
- Mount the thermostat on an inside wall, about 5 ft. (1.5m) above the floor.
- Do not locate the thermostat where air circulation is poor such as in a corner, alcove, or behind a door that is normally left open.
- Do not locate the thermostat where unusual heating or cooling conditions may be present, such as: direct sunlight, above a lamp, television, or radiator, or on a wall next to an exterior door or window.
- Do not locate in a damp environment, as this can lead to corrosion that may shorten thermostat life.
- If painting or construction work is still ongoing, cover the thermostat completely or wait until this work is complete before installation.
INSTALLATION OF NEW THERMOSTAT
- strip wire insulation leaving only 3/8 in. (9.5mm) bare wire ends, and clean off any corrosion present.
- Fill the wall opening with non-combustible insulation to prevent drafts from affecting the thermostat’s normal operation.
- Route the wires through the opening in the new thermostat base plate, and hold the base against the wall. Try to line up the screw holes from the prior thermostat, and install the mounting screws.
- If the previous holes cannot be used, hold the thermostat base against the wall so that it appears straight and level (position the base for best appearance) and mark for the new screw holes. Attach the base to the wall using the screws provided (use the supplied plastic anchors if needed when mounting to a soft material such as drywall).
WIRING TERMINAL CONNECTIONS
- When attaching the wires to the thermostat, please ensure that the bare wire ends are held ALL the way into the terminal block while the screw is being tightened.
- Securely tighten all of the electrical terminal screws, including any unused ones. Be careful not to over-tighten the screws, they only need to be snug.
** Complete heating and/or cooling system wiring can be found in the WIRE IDENTIFICATION AND WIRING SCHEMATICS section of this instruction sheet. The schematics shown provide component information for brand new installations or for unreferenced wires.
WIRING DIAGRAM NOTES
- The BOLD lines are what you should be connecting to the terminals on this new thermostat.
- The DASHED lines are optional depending on your system type.
- In many cases, the thin lines shown as “SYSTEM COMMON” will not be visible at the thermostat location, they are located with your heating and cooling equipment.
- For Heat Pumps, use the “B” or “O” wire, NOT BOTH. Typically neither are used in a conventional system.
- If “Y” and “C” wires are both present, then “C” is a common wire.
- If you have a “B” wire in your system which is used as a common wire, connecting it to the “B” terminal on this thermostat may damage your system and/or the thermostat.


SYSTEM CONFIGURATION AND SETUP OPTIONS
On the circuit board, there are hardware settings called “jumpers”. These settings can be changed from their default values by removing its black cap and reinstalling the cap so that it is positioned on only one (1) of the metal pins, and not both. A CLOSED jumper means the black cap is on both of the metal pins, and an OPEN jumper means the cap is on only one (1) metal pin.

- HARDWARE RESET BUTTON: A change to ANY of the jumper settings will not be recognized by the thermostat until the white HARDWARE RESET button on the circuit board is pressed.
- JP1 (SYSTEM): [CLOSED = Furnace, default] This setting is used for the majority of all heating systems that are not heat pumps. Examples for this setting would be: natural gas furnace, hot water baseboard heat, and oil heat. [OPEN = Heat Pump] Use this setting if you have a heat pump unit (which looks just like an outside air conditioning unit, but is used for both cooing and heating).

- JP2 (DELAY): [CLOSED = 5 Minutes, default] This setting changes the length of time that the system must remain either on or off before it will switch to the alternate on or off state. The main purpose of this setting is to provide equipment protection by preventing brief or undesirable frequent on/off cycling. [OPEN = 2 Minutes] This can be used to decrease the minimum amount of time that occurs between cycles, and may be desired for hot water radiator systems to reduce overshoot.
- JP3 (SCALE): [CLOSED = Fahrenheit, default] All temperature values are displayed in F° degrees. [OPEN = Celsius] This setting displays all temperature values in C° degrees.
- JP4 (FAN): This option is located separately from the first three settings shown above.
[CLOSED = Gas, default] This setting lets the heating system itself control the blower fan automatically. Types of systems that would typically use the “Gas” fan setting would be: natural gas furnaces, propane furnaces, and oil furnace.
[OPEN = Elec] This setting runs the system’s blower fan when heat is called for, and is required for systems that do not control their own fan while in HEAT mode. Heat pump systems, and units with an electric heating element typically require this setting.
OPERATING INSTRUCTIONS
- HEAT / OFF / COOL, SYSTEM MODE SWITCH: Set this switch to HEAT to control your heating system, and COOL to control your cooling system. The OFF position will disable both the heating and cooling units.
- AUTO / ON, FAN SWITCH: When this switch is in AUTO, the blower fan (if present in your system) will automatically cycle on and off by itself when heating or cooling is running. When in the ON position, the blower fan will run constantly with or without a demand for heating or cooling, even in OFF mode.
- UP AND DOWN BUTTONS: While in HEAT or COOL mode, you can use the UP and DOWN buttons to raise or lower the set temperature. When the thermostat is powered up for the first time, it will use the default set temperatures of 68°F (20°C) for Heat mode and 72°F (22°C) for Cool mode. NOTE: when you adjust the temperature using UP and DOWN buttons, the change occurs immediately and you do not have to press the SAVE button to accept the changes.
- SAVE BUTTON: Reducing the amount of heating and cooling energy you use will directly save you money. The SAVE feature allows you to use just one button press to easily decrease the current set temperature by 5F (3°C) degrees while in Heat mode (or raise the set temperature by 5°F (3°C) degrees while in Cool mode). When you leave the house, simply press the SAVE button one time to put the thermostat into Save mode, and the word “SAVE” will be shown on the screen. When you return home, press the SAVE button again to cancel the Save mode and return back to the previous set temperature that you were using originally.
After Save mode has been started, you can adjust the energy-saving set temperature by using the UP and DOWN buttons in either direction. Just like above, one more press on the SAVE button will cancel the Save mode and return back to the original set temperature that was used prior to starting Save mode. - LCD DISPLAY BACKLIGHT: The display screen has a light that will assist viewing at nighttime, or in low lighting areas. When any front panel button is pressed, the screen will light up for approximately 10 seconds. Any button presses that occur while the backlight is on, will reset the 10 second timer, causing the screen to remain illuminated for an additional 10 seconds.
- STATIC NOTICE: This thermostat is protected against normal minor static electric discharges, however to minimize the risk of damaging the unit in extremely dry weather, please touch a grounded metal object before touching your thermostat.
ADVANCED FEATURES
- TEMPERATURE SWING: The amount of temperature variation between load-on and load-off is changed by adjusting the swing setting. The default value for this thermostat is #4, and the adjustment range is from #1 to #9. A smaller swing number makes the temperature control more precise and constant, and increases the number of cycles per hour. A larger swing number will produce a greater variation between load-on and load-off events, and decreases the number of cycles per hour.
- To adjust the Swing setting: Set the thermostat to OFF mode using the System Mode switch, and hold down the SAVE button for at least 5 seconds. When the screen changes to a single digit, this is the current Swing setting value and it can be adjusted using the UP or DOWN buttons. The thermostat will return back to the normal Run mode screen if no buttons are pressed for 4 seconds.
- TEMPERATURE CALIBRATION: This thermostat is accurately calibrated at the factory, and in most cases alteration to this setting should not be required. The Calibration feature allows you to manually offset the room temperature measurement by as much as plus or minus 5°F (3°C) degrees from its original value. 0°F (0°C) is the default setting.
- To adjust the Calibration setting: Set the thermostat to OFF mode using the System Mode switch, and press both the UP and DOWN together for at least 2 seconds. When the screen changes to a single digit, this is the current Calibration setting value and it can be adjusted using the UP or DOWN buttons. The thermostat will return back to the normal Run mode screen if no buttons are pressed for 4 seconds.
BATTERY REPLACEMENT
This thermostat is powered by two “AA” Alkaline batteries. The batteries should be replaced AT LEAST once per year (or sooner, if the “LOW BAT” battery symbol appears in the display screen). When the LO BAT symbol is shown, the temperature digits will also display the word “Lo”. The batteries are located on the back of the circuit board and can be accessed by pulling the front portion of the thermostat straight outwards and removing it from the wall. When installing new batteries, we recommend using only brand new Energizer® or DURACELL®, “AA” size alkaline batteries. Please observe the polarity markings shown in the battery compartment to ensure proper installation. When finished, line up the front of the thermostat to the base, and firmly press them together.
TECHNICAL SUPPORT
If you have any problems installing or using this thermostat, please carefully and thoroughly review the instruction manual. If you require assistance, please contact our Technical Assistance department at 856-234-8803 during regular business hours between 8:00 AM and 4:30 PM Eastern Standard Time, Monday through Friday. You can also receive technical assistance online anytime day or night at http://www.luxproducts.com. Our website offers you answers to the most common technical questions, and also permits you to email your questions to our technical support staff at your convenience.
LIMITED WARRANTY
If this unit fails because of defects in materials or workmanship within three years of the date of original purchase, LUX will, at its option, repair or replace it. This warranty does not cover damage by accident, misuse, or failure to follow installation instructions. Implied warranties are limited in duration to three years from the date of the original purchase.
Some states do not allow limitations on how long an implied warranty lasts, so the above limitation may not apply to you. Please return malfunctioning or defective units to the location from which the purchase was made, along with proof of purchase. Please refer to “TECHNICAL ASSISTANCE” before returning the thermostat. Purchaser assumes all risks and liability for incidental and consequential damage resulting from the installation and use of this unit. Some states do not allow the exclusion of incidental or consequential damages, so the above exclusion may not apply to you. This warranty gives you specific legal rights and you may also have other rights, which vary from state to state. Applicable in the U.S.A. and Canada only.
MERCURY WARNING AND RECYCLING NOTICE
Mercury is considered to be a hazardous material. If this product is replacing a thermostat that contains mercury in a sealed tube, contact your local waste management authority for instructions regarding recycling and proper disposal. It may be unlawful in your state to place it in the trash.
REFERENCE:
Download Manual:
Lux DMH110B Lighted Non-Programmable Thermostat Installation Instruction

Lux DMH110B Lighted Non-Programmable Thermostat Installation Instruction