
Roth Softline Room Thermostat

Installation
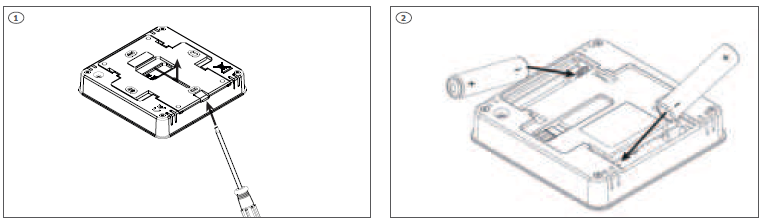
- Push lightly on the snap lock with a finger or screwdriver (if mounted on the wall) to slide the backplate of the thermostat.
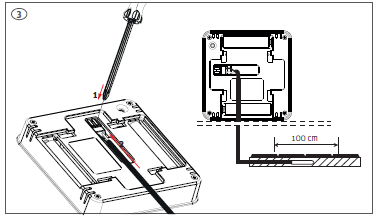
- Insert batteries (included), be aware of +/- polarity.
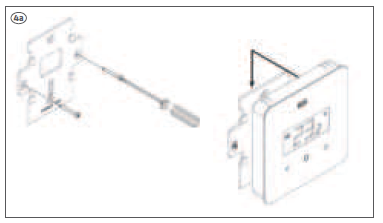
- It is possible to connect a floor sensor to the thermostat (floor sensor not incl.). Push gently on the terminals while you put the cable into the terminal. The sensor must be drawn in a tube and the tip placed directly beneath the top floor cover, in the middle between the floor heating pipes
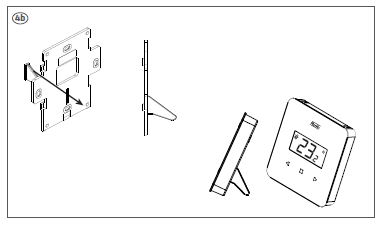
- Mount backplate on the wall (screws not incl.) thermostat slides onto the back plate
- If you want to use the thermostat as a free-standing, the supplied foot can be mounted in the back plate before it’s mounted again
- The thermostat can be connected to all Controllers in the Softline series. Pairing/registering is made the same way on all Controllers using the same buttons. On the pictures the panel of the Softline Controller, master is shown
Pairing/registering the thermostat to a zone (channel). All connections must be made to the Controller (pump, actuators and optionally potential free relay) before start-up. Please see controller manual for details. Attention! Do not press the buttons on the front of the thermostat whilst pushing the pairing button on the rear
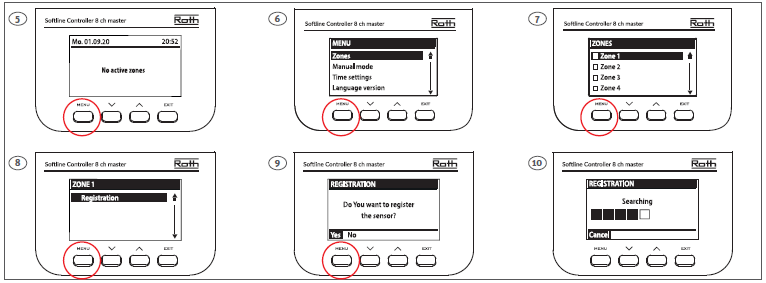
Once the thermostat is connected to the Zone/Channel, the overview shows: –
Temperatures on the thermostat (setpoint 22,0°C, actual 25,0°C) , battery (99%), signal strenght (100% – must be at least 10%) and mode of operation (CON = continously). For more info on the display, see the controller manual. Repeat registration for other thermostats, by choosing one of the other zones (2 to 8) until required number of thermostas are connected.
Attention! If a thermostat is paired to the wrong zone, do not delete the thermostat. Pair the thermostat to the correct/new zone and the old pairing will be deleted.
If the thermostat has a floor sensor connected, this must also be paired/registered as shown below (picture 21, must be two quick presses).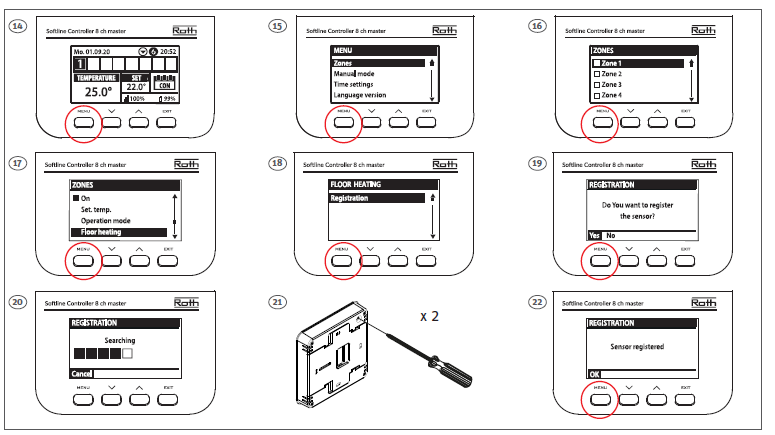
In the overview, you can see both the thermostat (setpoint 22,0°C, actual 25,0°C) and the actual floor temperature (21,0°C). Repeat this for all other zones/channels (2 to 8) with a floor sensor.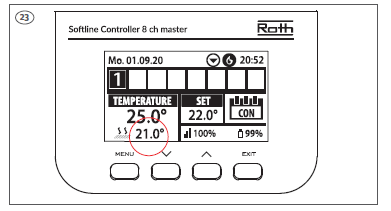
Operation
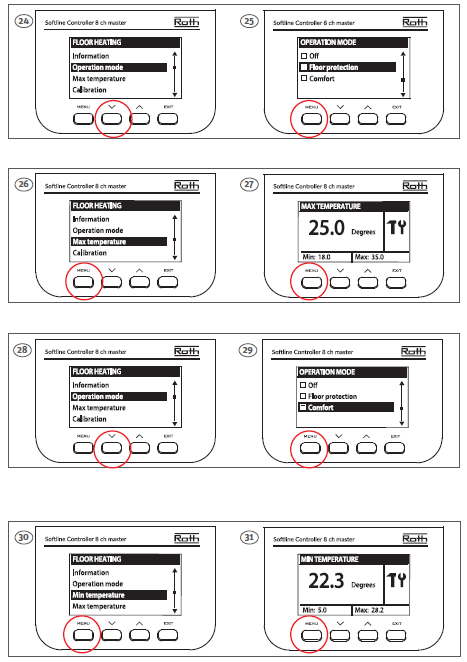
- Operation/setting of the floor sensor is carried out on the display of the Controller.
- Floor sensor operation can be set up as either ”Floor protection” (standard) or ”Comfort” (min. Floor temp.).
- Set sensor as ”Floor protection”. Choose operation mode and choose ”Floor protection”.
- Set max. floor temperature to protect your floor.
- Confim with ”Menu”.
- Set sensor as ”Comfort”.
- Choose operation mode and choose ”Comfort”.
- Set min. floor temperature for your comfort level.
- Confirm with ”Menu”. Min. temperature is set as described above.
Operation of thermostat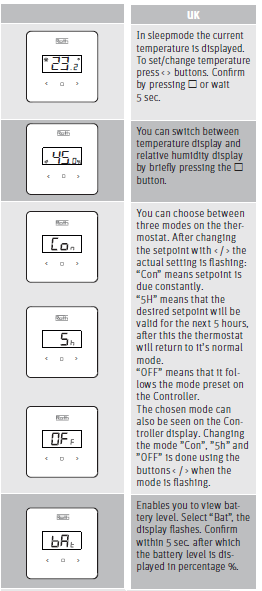

ROTH UK Ltd
- 1a Berkeley Business Park
- Wainwright Road
- Worcester WR4 9FA
- Phone +44 (0) 1905 453424
- E-Mail [email protected]
- [email protected]
- [email protected]
- [email protected]
REFERENCE:
DOWNLOAD MANUALS:
Roth Softline Room Thermostat Installation Manuals
![]()
Leave a Reply